I know it may seem like I’m a super woman who does everything herself (read: sarcastic) but I get busy and stressed out just like the rest. The other day I was SO tired in the morning that I couldn’t even bring myself to take the Veggie Pasta Bake out of the fridge and scoop some into a container to take for lunch.
Pretty pathetic, right? So I ended up buying a bagel and cream cheese for lunch and I paid an astounding $1.70 for it. That’s just too much for a little old bagel. Too much!
So, I came home and decided to do some therapeutic baking. I baked my own batch of bagels, 10 total, for less than a dollar. $0.09 per bagel is way more my speed.
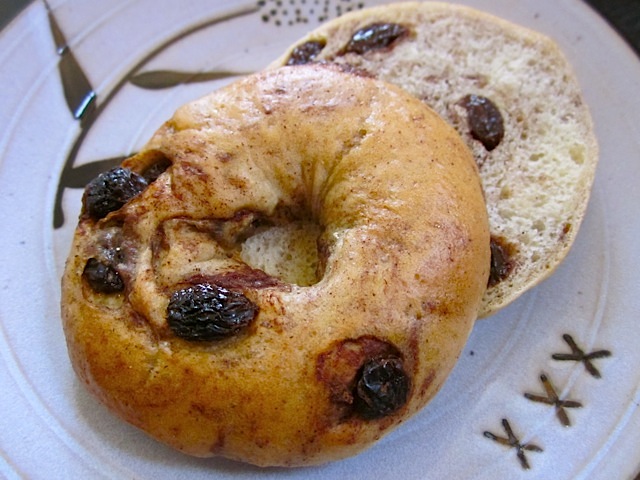
I split the recipe in half and made half cinnamon raisin and half sesame seed. The cinnamon raisin turned out so good that I decided to dedicate the whole post to them. If you want plain, sesame or any other topping bagel, just leave out the cinnamon and raisins then add your topping prior to the final bake. Further instructions will be in the step by step photos.
One more note: Most recipes just say to boil then bake the bagels but I remember having trouble with my bagels getting soggy and disintegrating in the water while boiling. So I started broiling my bagels briefly prior to boiling so that they wouldn’t turn into goo. Just broil the bagels for one minute on each side before boiling then they’ll still have that nice chewy skin AND hold their shape. It’s up to you whether or not you want to add the broil step; no one else across the world wide web seems to have had the dissolving problem.
Cinnamon Raisin Bagels
Cinnamon Raisin Bagels
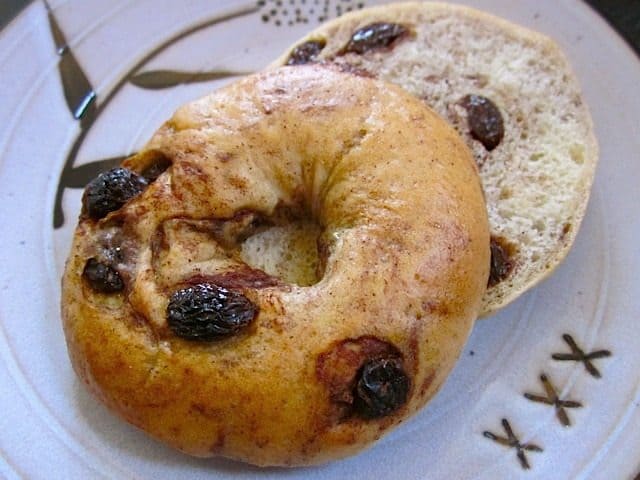
Ingredients
- 4 cups flour ($0.24)
- 1 1/2 tsp salt ($0.05)
- 1 Tbsp honey or sugar ($0.10)
- 1 1/2 tsp yeast ($0.14)
- 2 tsp cinnamon ($0.10)
- 1/2 cup raisins ($0.31)
Instructions
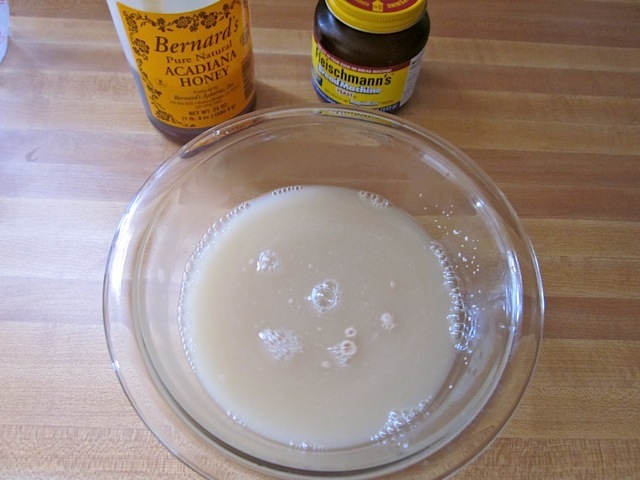
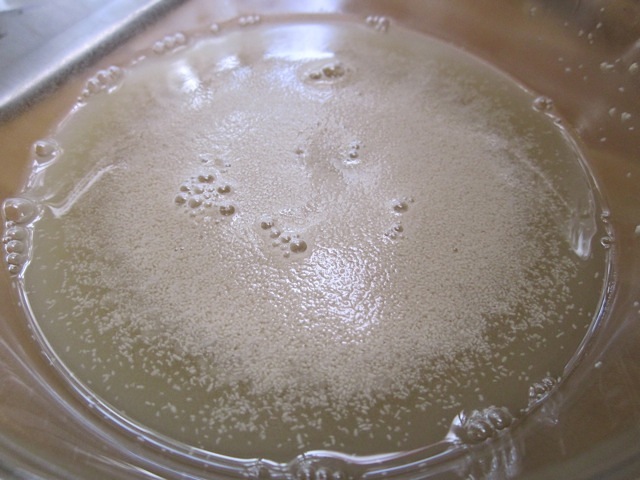
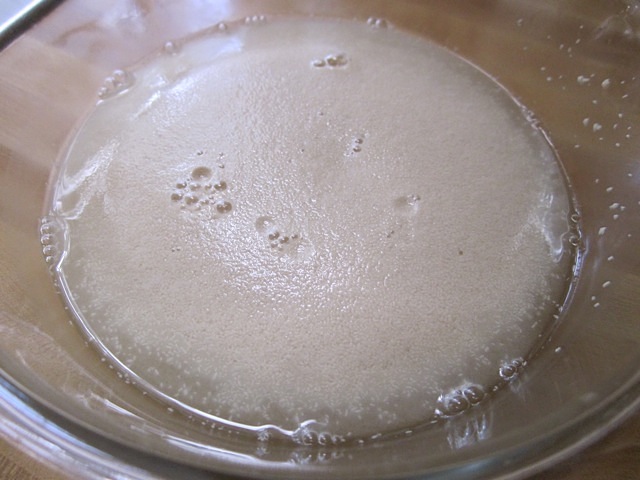
- In a small bowl combine the honey, yeast and 1.25 cups warm water. Stir to dissolve and let sit for five minutes or until the surface is covered with foam.
- In a large bowl combine 2 cups of the flour and the salt. Stir to combine. Add the frothy yeast water and stir well until everything is evenly mixed. Continue adding flour 1/2 cup at a time until it is too hard to stir by hand (about one cup later). Turn the dough out onto a well floured surface and continue adding flour a little bit at a time and knead in until you have reached 3.5 to 4 cups total (depending on the humidity). You can stop adding flour when it becomes fairly stiff but still pliable enough to knead. Knead the dough for 8 minutes total.
- After kneading, flatten the dough slightly and add the cinnamon and raisins down the center. Fold the dough over and knead a few more times until the raisins are even throughout the dough and the cinnamon has given the dough a swirly appearance. The raisins and cinnamon may “break out” of the dough while you knead it in but just keep going and let the dough pick it back up as you knead.
- Form the dough into a ball, loosely cover and let it rise until double (about 45 min.). Punch the down down, form it into a log and cut it into 10 pieces (for medium bagels). Form each piece into a ball by pulling the dough back and under itself. When you have a smooth ball, pinch it in the center to make the hole then carefully stretch the hole until it is a couple inches across. Make the hole about 3x larger than you think it should be because the dough will puff up quite a bit during cooking and close the hole off. Form the rest of the bagels in the same manner.
- Place the formed bagels on a baking sheet covered with parchment paper and cornmeal or non-stick spray. Let rise until double in size (about 45 minutes). Preheat your broiler near the end of the rise time.
- Put a large pot of water on to boil. While you wait for it to boil, place the tray of bagels under the broiler for one minute. Pull the bagels out, carefully turn them over then place them back in to broil on the second side. Every oven is different so watch the bagels closely. You do not want them to brown just turn slightly dull on the surface.
- Once the bagels have broiled on both sides, turn the oven to 375 to preheat. When the water has come to a full, rolling boil, drop the bagels in a few at a time. Boil the bagels for one minute, flip them over and boil for another minute on the opposite side. I found that a long chopstick works well for flipping them in the boiling water.
- As the bagels come out of the water, let them drain on a wire cooling rack so the bottoms don’t get soggy. After draining for about 5 minutes, place them on a baking sheet and bake for about 30 minutes or until the surface is golden brown.
See how we calculate recipe costs here.
Notes
Nutrition
Step By Step Photos
Combine the yeast and honey with 1.25 cups of warm water. Stir to dissolve.
Let the yeast water sit and it will begin to foam. When the surface is mostly covered in foam, it’s good to go.
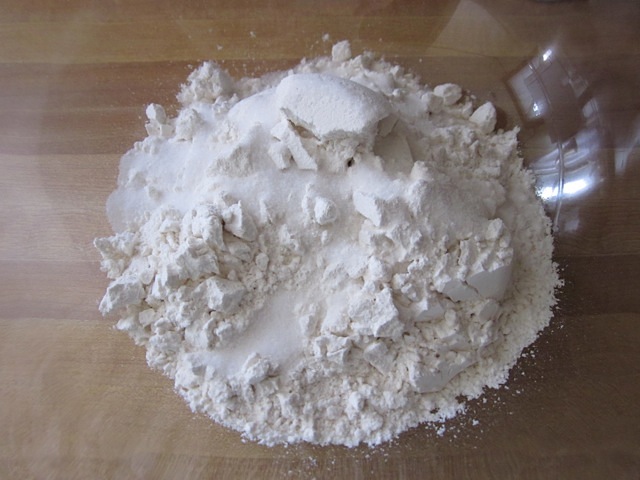
While you’re waiting for the yeast to do it’s thing, combine the salt and 2 cups of the flour in a large bowl. Stir until they’re all mixed together.
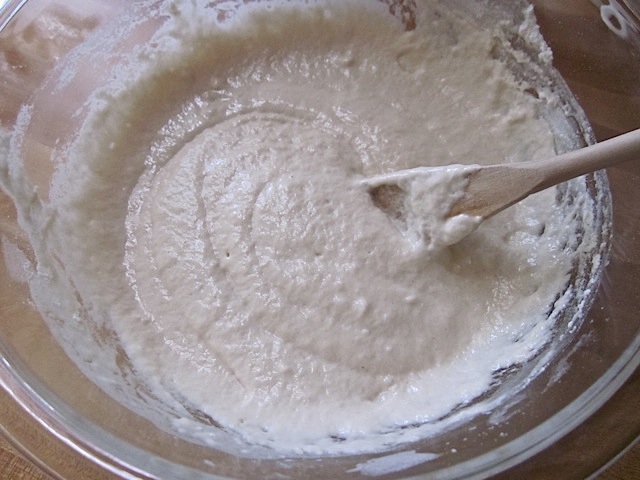
Add the foamy yeast water to the flour and salt then stir it up until everything is wet and mixed together (as pictured). Continue adding flour a half cup at a time until you can’t stir it by hand anymore (about one cup later).
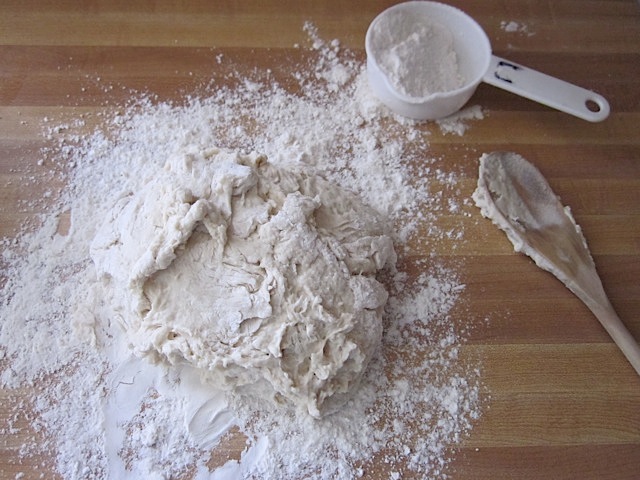
At that point, turn the ball of dough out onto a well floured surface and begin to knead. Continue adding flour a little at a time as you knead until it is a fairly stiff but still pliable dough (about 3.5 cups to 4 cups total flour… including the first two cups). Continue kneading until you’ve kneaded for about 8 minutes.
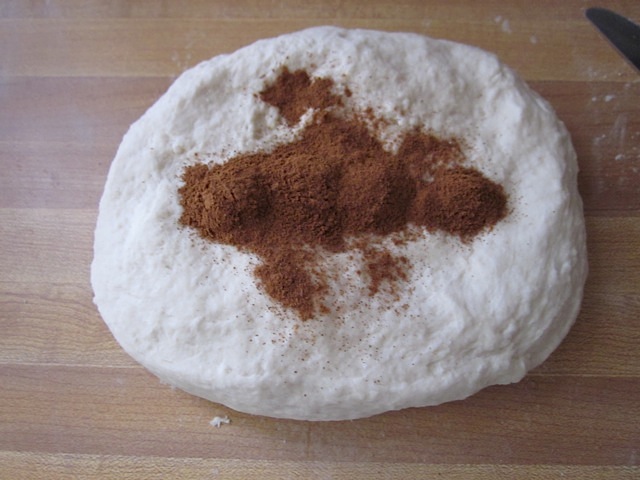
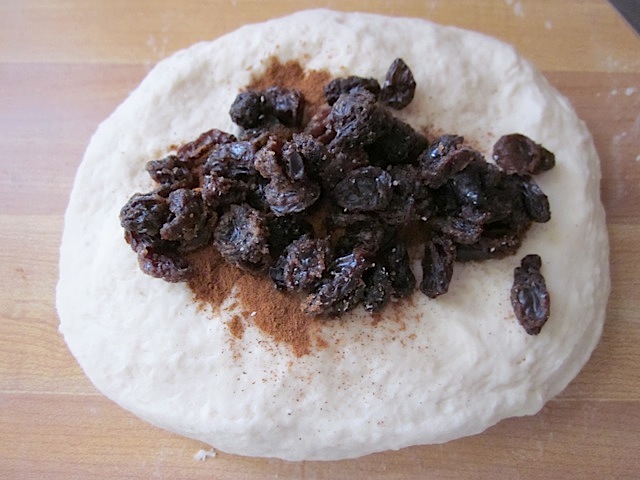
Flatten the dough out slightly and add the cinnamon and raisins down the center. Make sure to break the raisins up so there are no clumps.
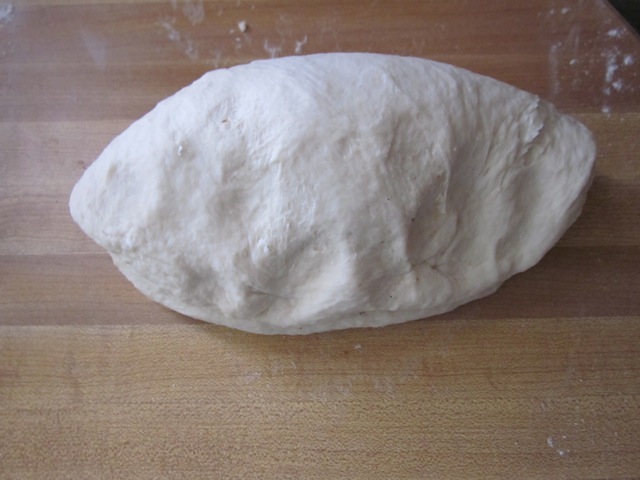
Fold the dough over (as pictured) then knead a few more times to incorporate the raisins and cinnamon.
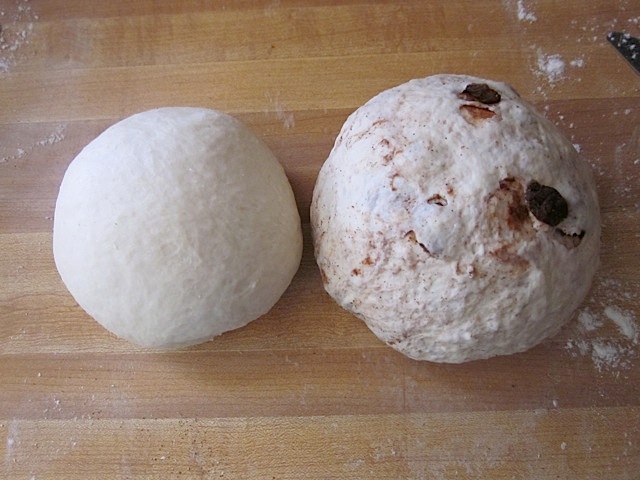
Form the dough into a ball, loosely cover and let rise until double (about 45 min). I split my batch in two and only made half cinnamon raisin (on the right).
After the dough has risen, punch it down and form it into a log. Cut the dough into pieces about the size of a small lime. My cinnamon raisin ball was larger than the plain so I made four plain and 6 cinnamon raisin. Dough scrapers make dividing dough very easy… I keep meaning to buy one.
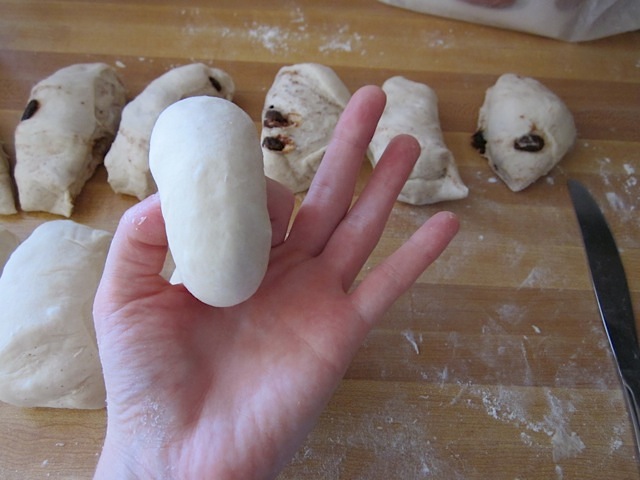
Form each piece of dough into a small, smooth ball. The more perfect, smooth and even these balls are the more perfect looking your bagels will be. I wasn’t too concerned with perfection.
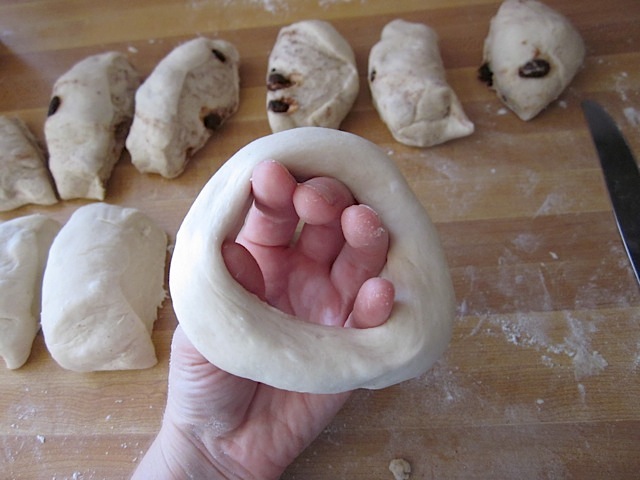
Pinch the ball in the center to make the hole.
Carefully and evenly stretch the hole to about 3x the size that you think it should be (it will shrink as the dough gets bigger).
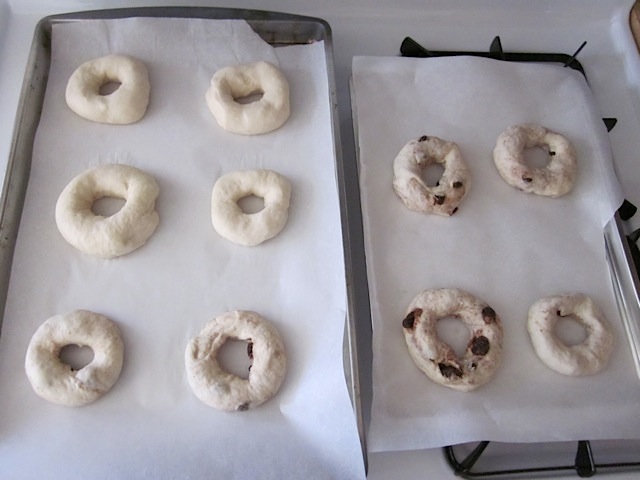
Place the shaped bagels on a baking sheet with parchment paper. I learned the hard way that you will want some corn meal or non-stick spray on the parchment paper so that you can easily lift the fluffy unbaked bagels off without them sticking. If they stick to the parchment they will deflate as you pull them off (very very bad).
Once they have risen to twice the size, you can broil them quickly (1 minute) on each side. This picture is after they have been broiled. They will poof up and get kinda dull looking on the surface when you broil them.
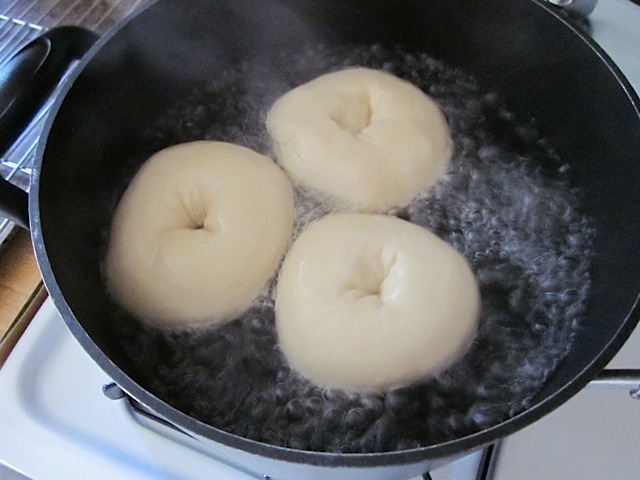
Next is the boiling step that gives bagels their characteristic chewy skin. Make sure the water is a full boil before dropping them in. Boil for one minute on each side then let drain on a wire cooling rack so that excess water can drain away.
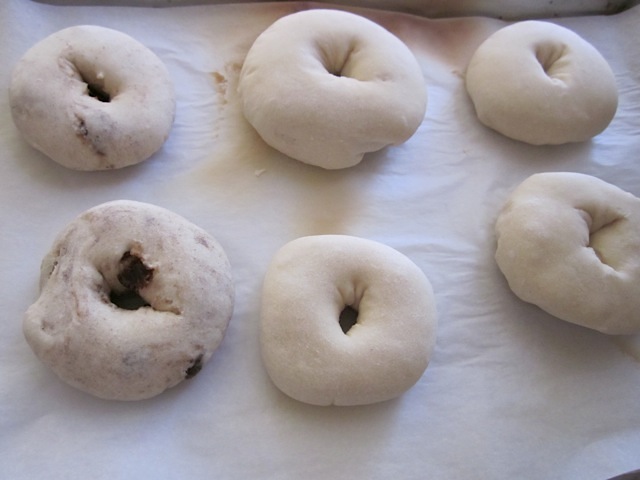
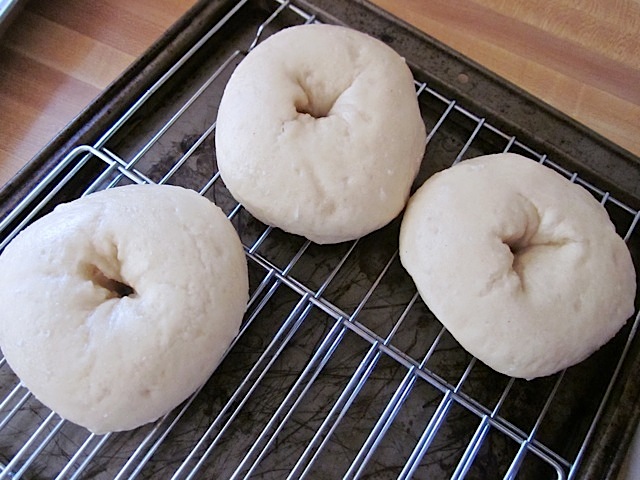
Here are the bagels draining off… they get even BIGGER as they boil. Now you can see why they need to be so small to begin with. Also notice how small the holes are now compared to when they were first formed. I should have stretched them more.
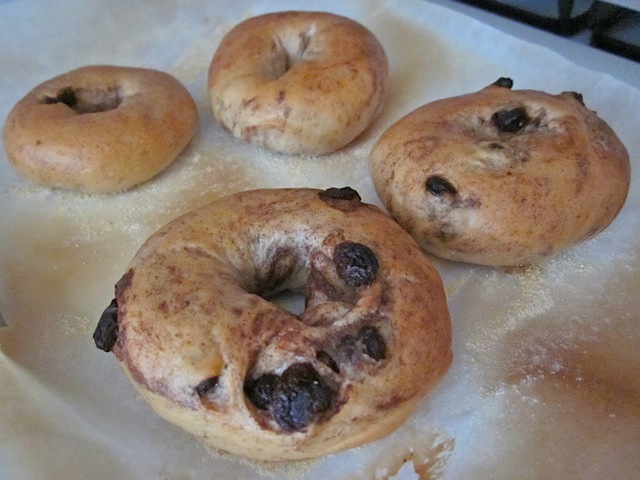
Bake the bagels for about 30 minutes at 375 degrees or until they are golden brown on top. You can use the same parchment lined sheets as before.
If you want to add toppings, do so before baking them. I thought the surface of the bagel was sticky enough from baking to hold the seeds but you really will need to brush them with a beaten egg to make them stick. Mine fell off as soon as I touched them.
I know that it seemed like a lot of steps and it may have taken a long time to read through but these were really easy to make… and strangely fun. I was able to do a lot of other work while they were rising and baking so it’s not like making a batch of bagels will steal three hours of your life away!
If you like a sweeter bagel, you can increase the honey or sugar in the dough. I basically took a plain bagel recipe and just added cinnamon and raisins. I don’t like super sweet stuff so I relied on the raisins for sweetness. I know some store bought cinn. raisin bagels are rather sweet so you might consider it if that’s how you like ’em!
Just Broil, Boil then Bake!
This post may contain affiliate links which won’t change your price but will share some commission.






Try adding 2-4 tablespoons. I haven’t actually experimented with it to see how much is needed, but that is where I’d start. Try adding it to the flour and salt when you initially stir those two together. I would not use honey because too much honey can inhibit the yeast growth. Good luck!
I like a sweet bagel and was wondering how much more sugar I should add and if I would still add it in the beginning?
I am literally overwhelmed with emotion seeing that I can make bagels tonight without paying a single cent, since I already have the materials on hand. I live outside of NYC where bagels are soooooooooooo expensive, but I just can’t bring myself to kick my bagel habit. I cannot wait to try this out tonight. Thank you thank you thank you!!!
Anon – I would suggest kneading them a little less (this can help keep them soft) and let them rise longer so that more gas bubbles form and create a flufflier texture. I hope that works for you!
Hi I made the bagels yesterday and the flavor was great but they turned out a little hard did I over baked them? Please help. I would love to perfect these cuties since we are bagel lovers.
I am eating one of these right now, and I have to say, they are not half bad. They may not taste like Panera, but they are ten times better than the stuff you can buy in the grocery store. Also, I use an old putty knife instead of a dough scraper. It works great in my opinion.
I made these tonight. They are great!
These turned out beautifully!! And, I really did have fun making them. Thank you so very much for this recipe and step-by-step tutorial! I followed your instructions exactly, but mine ended up making 8 large bagels–which was certainly fine–and I didn’t use all four cups of flour (more like 3.25-3.5). I followed one commenter’s advice about setting the oven to the lowest temp (mine went to 170), letting it rise to temp, then turning it off as you put the bagels in during rising times. That really worked to have the extra warmth to help them rise. I made half plain and half cinnamon raisin. Husband likes the plain, but seriously those cinnamon raisin ones were AWESOME! THanks again!
Finally got around to making these today! Other than me making them a bit too small, and using wax paper instead of parchment (big mistake), they’re wonderful!
I made the initial dough in my bread machine, and let them rise the second time in a warm oven (preheated to the lowest setting, then turned off) with a pan of steaming water in the bottom. It’s the only way I can get breads to rise in this weather, and they still didn’t get quite as big as I would have liked (though neither did my loaf of bread last night, so I’m still blaming the weather.) Your process is perfect, and I can’t wait for us to finish this batch so I can try again!
Also, money saving tip: I bought spices to make “everything” bagel seasoning from the bulk section, but they were out of garlic and onion flakes. Rather than spend $4-6 on a bottle of stuff I’d never use for anything else, I sliced up some garlic and onion I had at home and dehydrated them in my oven (along with two huge pans of spent grains I use for bread) and gave them a quick whirl in my food processor. Since I only paid about 10 cents each for the tablespoon of sesame seeds and poppy seeds I bought and had caraway seeds on hand, I have a nice little bottle of new specialty seasoning for a whopping $.20.
Did your yeast and water mixture froth up before you added it to the flour? Depending on the type of yeast you used, you need to make sure it starts foaming before you add it to the recipe. Instant or bread machine yeasts don’t need to be “activated” this way, but most other yeasts do. It’s like waking the yeast up for action :) Also, you want to make sure the water isn’t scalding hot or else it can kill the yeast, but it should be very warm. Bread making can be tricky at first but once you get the hang of it, it’s a breeze!
You can use either a light, slightly damp cloth (if the cloth is thick or heavy, it can weigh down the bread) or some plastic wrap. If you use plastic wrap, you’ll want to lightly dust the top of the bagels with some non-stick spray or else the plastic can stick and pull when you try to remove it, causing the bagels to deflate.
Good luck and don’t give up if it doesn’t work the first time!
my bagels are baking in the oven as we speak.. they didn’t rise much at all during hte rise process so i’m a bit nervous about how they will turn out… i just bought the yeast today so i know it’s not htat.. maybe i didn’t kneed them enough?? i dont know.
one question what do you cover you dough with when it rises.. i’ve seen some recipes that say plastic wrap some say a damp cloth?? what do you use???
I’m a beginning baker, so for me these were fun, but challenging. I used brand new yeast that I bought today, but they didn’t rise as well as I would’ve liked. They poofed up around circumference-wise, but stayed pretty flat so they look more like the top halves only. But they taste great! I will definitely keep trying till I get it right.
Samantha – What a bummer! I’m sorry they didn’t turn out :( Here is how you can solve the dryness issue: never add exactly the amount of flour called for in a recipe. Flour can tend to absorb moisture so it’s hard to give an exact amount to use. Some people will need more, some people will need less. So, start with just a little (I usually start with a cup) and stir that into the wet mixture and then add a half cup at a time until the dough is at a good elastic consistency. After about two cups of flour you’ll probably have to knead the flour in so it may go slowly but you’re much less likely to go too far with the flour. It’s really hard to add water after the fact. Just use the volume listed in the recipe as a rough guide.
Do you keep your yeast in the refrigerator? That usually helps. Keep trying the bagels, you’ll work out the kinks quickly and then you’ll be a bagel pro and never have to pay the $4 again :D
I had a little difficulty making these. First of all, I think my measuring cups may be way off – because every time I try to make a bread item, it becomes way too dry. I should have added a bit of water, but I’m not smart like that. Second, I think (even though it doesn’t expire until the year 2012), my dry yeast has gone bad. It just never wants to let anything rise. I remember making cinnamon rolls which were bigger than my face… and that’s the last time I was able to get anything really rise.
So those were probably the culprits to my difficult attempt at making homemade bagels. Because of the dryness, it was extremely difficult kneading in the raisins + cinnamon and because of it not rising, there wasn’t a lot of chewy bagel on the inside, just a really good crust. I think I need to work a little on my bread making skills.
On a side note, the flavor is absolutely delicious and I hope I’m able to make these properly. Normally I spend close to $4.00 on a bag of bagels, which lasts my husband the week. I had all of the ingredients (and normally do) for these, so it was basically free!
Really great blog you have! I noticed you don’t have any oil in your dough recipe, do you leave it out on purpose? Also you are missing one step in possibly not having your dough dissolve in the water – 1tsp sugar and 2tsps salt in the water is what I usually do when making bagels. I’m going to try your recipe but with 1tbsp of oil in the dough and the water the way I usually do bagels and I’ll let you know the results if you’re interested.