I’m an English Muffin fanatic. They’re complete breakfast heaven to me, especially when turned into a breakfast egg sandwich. I vaguely remember baking my first batch eight or nine years ago and as far as I remember, they turned out pretty good. So, now that I have time and space to do some baking again, Homemade English Muffins were on the top of my list.
This post contains some affiliate links, which means that we make a small commission off items you purchase at no additional cost to you.
Recipe Inspiration and Adjustments
After looking at a good 20+ recipes, I decided to work off of this one on allrecipes.com. After reading a bunch of reviews, I made a few changes.
It seems that there are two keys to getting an English Muffin with the classic “nooks and crannies” they are famous for. First, make sure the dough stays soft and loose. This means not adding too much flour during the kneading process and kneading for a shorter length of time (about 5 minutes). Second, letting the dough rise only once (as opposed to the usual two for most breads) allows giant gas bubbles, rather than small uniform bubbles, to form. The muffins turned out nice and light with a decent amount of nooks and crannies. There weren’t enormous pockets like the store bought muffins but I’m willing to trade some of that for a muffin that only costs seven cents (and is pretty fun to make).
Serving Suggestions
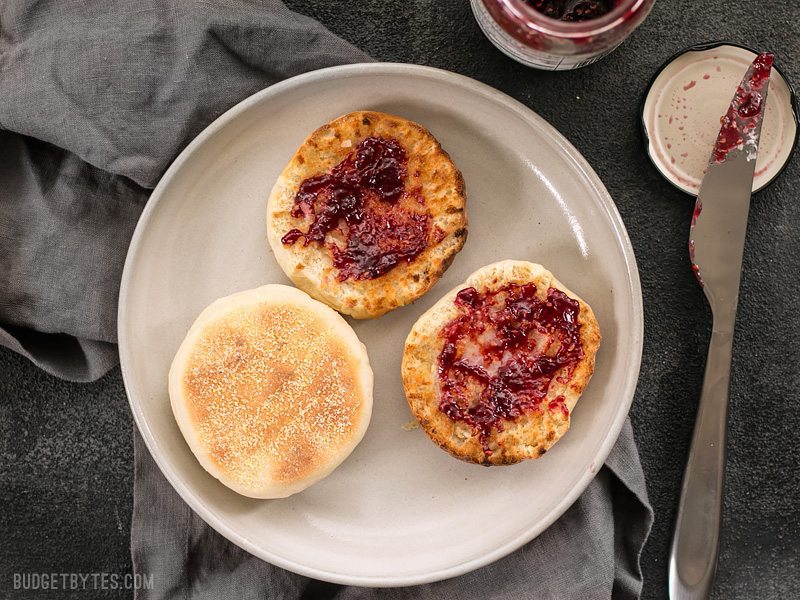
English muffins are great for more than just eating toasted with butter and jam…although they would taste amazing with homemade Pumpkin Butter! I also love to make mini-pizzas with them, or my make-ahead breakfast sandwiches. I also love to smear them with a little hummus and add a fried egg for a different sort of savory breakfast sandwich.
How to Store English Muffins
After baking your English Muffins, make sure to let them cool completely. Once they are cooled, you can either freeze or refrigerate them. When refrigerated they’ll keep for about a week. If frozen, they’ll keep for months. When freezing, make sure to use a heavy duty freezer bag to keep air out and prevent the muffins from drying out. They should thaw quickly at room temperature, or if pre-sliced, can go straight from the freezer to the toaster.

Love making homemade bread? Check out our Bread Recipes category!
Homemade English Muffins Recipe
Ingredients
- 1 tsp active dry yeast ($0.10)
- 1 Tbsp sugar, divided ($0.05)
- 1/2 cup warm water ($0.00)
- 1/2 cup milk ($0.15)
- 2 Tbsp butter ($0.27)
- 3 cups all-purpose flour, divided ($0.36)
- 3/4 tsp salt ($0.05)
- 1/4 cup cornmeal ($0.06)
Instructions
- Dissolve the yeast and half of the sugar into 1/2 cup warm water in a large bowl, and let it sit for about 5 minutes, or until it has developed a thick foam on top.
- While waiting for the yeast, combine the milk, butter, and the rest of the sugar in a measuring cup or microwave safe bowl. Microwave on high for 30 seconds, then stir until the butter is dissolved. Add an additional 10 seconds if needed. You want the milk warm enough to melt the butter, but not scalding.
- Once the yeast is foamy, pour the milk and butter mixture into the bowl, along with 1 cup of the flour, and the salt. Stir until the mixture is mostly smooth. Add the second cup of flour, about 1/3 cup at a time, stirring to combine each time. Finally, begin to add the third cup of flour, 1/3 cup at a time, until you can no longer stir it with a spoon. At that point, turn the dough out onto a lightly floured surface and knead for about 5 minutes, dusting with small amounts of flour as you go. Once finished kneading, you should have used 2.5-3 cups flour total.
- Let the dough rest for 15 minutes, then roll it out to about 1/2-inch thickness. Use a cookie cutter or sharp edged drinking glass to cut several discs out of the rolled dough. Cut them as close to each other as possible to leave few scraps. When you can cut no more circles, ball the scrap dough up, flatten it once again, and cut a few more. Place the cut muffins on a baking sheet coated with a liberal layer of cornmeal.
- Let the muffins rise in a warm moist area for about 1.5 hours, or until they are slightly more than double the size. (I placed a casserole dish full of steaming water on the bottom rack of my oven and placed the baking sheet on the top rack to keep the muffins moist as they rose.)
- When the muffins are large and fluffy, it’s time to cook them in a skillet. Heat a cast-iron or non-stick skillet over medium low heat. Once the skillet is preheated, carefully use a spatula to lift 3-4 muffins from the baking sheet and slide them into the skillet, along with some cornmeal. Let the muffins cook 3-4 minutes, or until lightly golden brown on the bottom. Carefully flip the muffins and cook for 3-4 minutes on the second side. The muffins will puff further as they cook in the skillet. Once the muffins are golden on both sides and sound hollow when tapped, transfer them to a wire rack to cool.
- Once completely cool, split the muffins with a fork and toast in a toaster or the oven. Or, transfer the cooled muffins to an air-tight container and keep in the refrigerator for up to one week, or the freezer for up to three months.
See how we calculate recipe costs here.
Equipment
- Cast Iron Skillet
- Wire Cooling Racks
- Mixing Bowls
Nutrition
Scroll down for the step by step photos!
How to Make Homemade English Muffins – Step By Step Photos
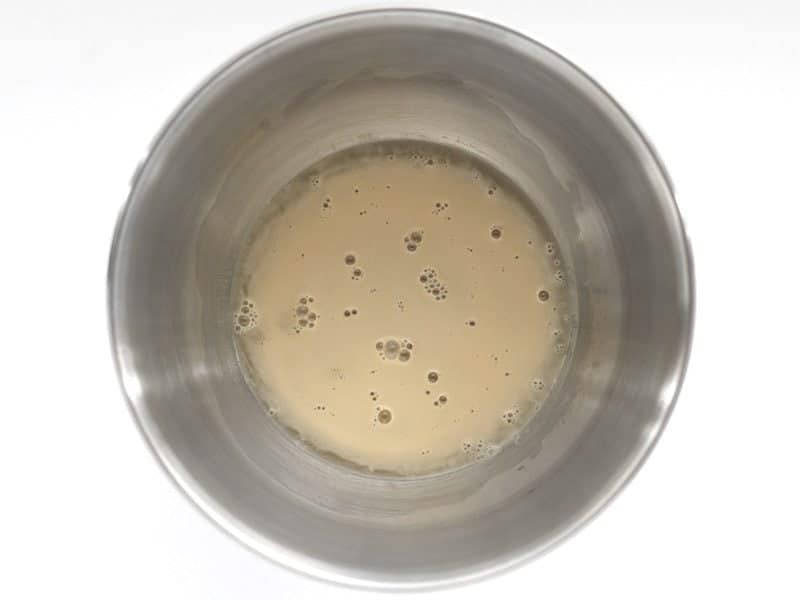
Begin by combining 1/2 cup warm water with 1 tsp yeast and 1/2 Tbsp sugar. Stir to dissolve, then let them sit until a thick layer of foam develops on top.

While waiting for the yeast to foam, combine 1/2 cup milk, 2 Tbsp butter, and the second 1/2 Tbsp sugar in a measuring cup or microwave safe bowl. Microwave for 30 seconds, then stir until the butter melts. You can do an additional 10 seconds in the microwave, if needed, but try to get the milk just warm enough to melt the butter, not scalding.
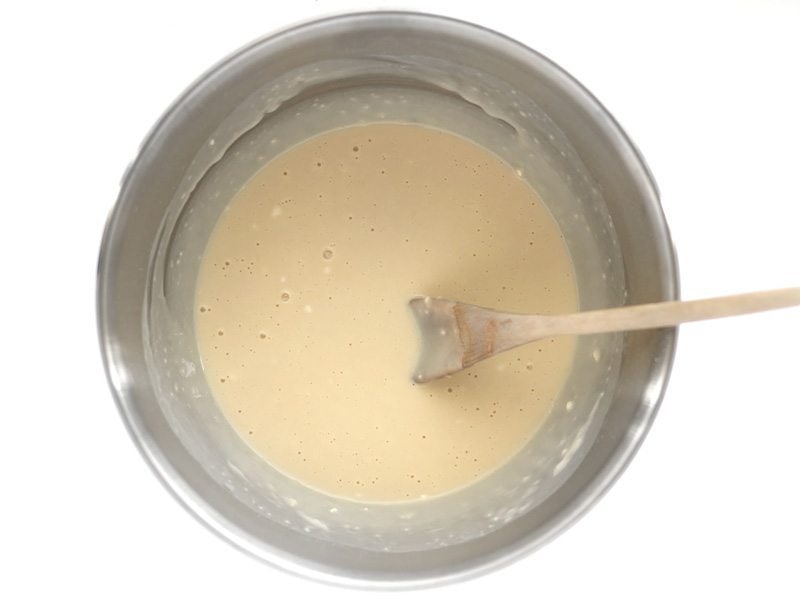
Once the yeast is foamy, pour in the milk mixture, 1 cup flour, and 3/4 tsp salt. Stir until the mixture is mostly smooth.
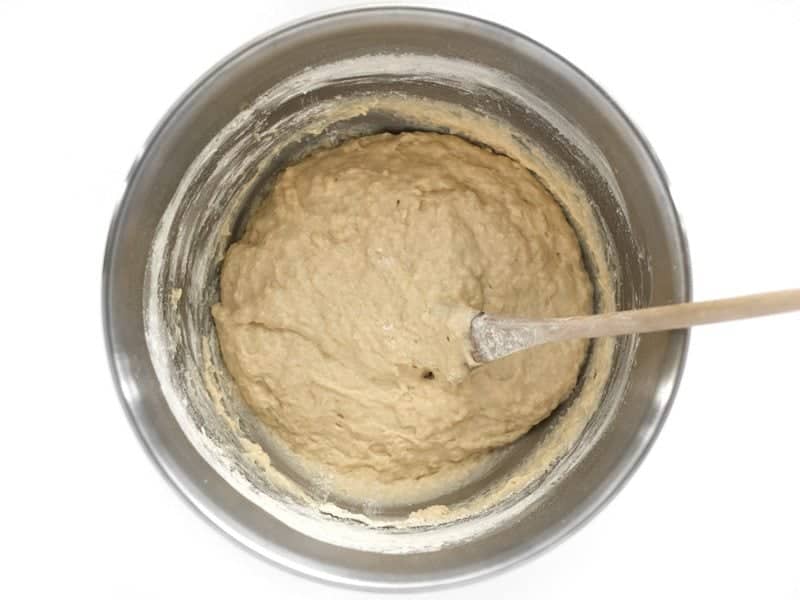
Stir in a second cup of flour, about 1/3 cup at a time, stirring until incorporated before adding more.
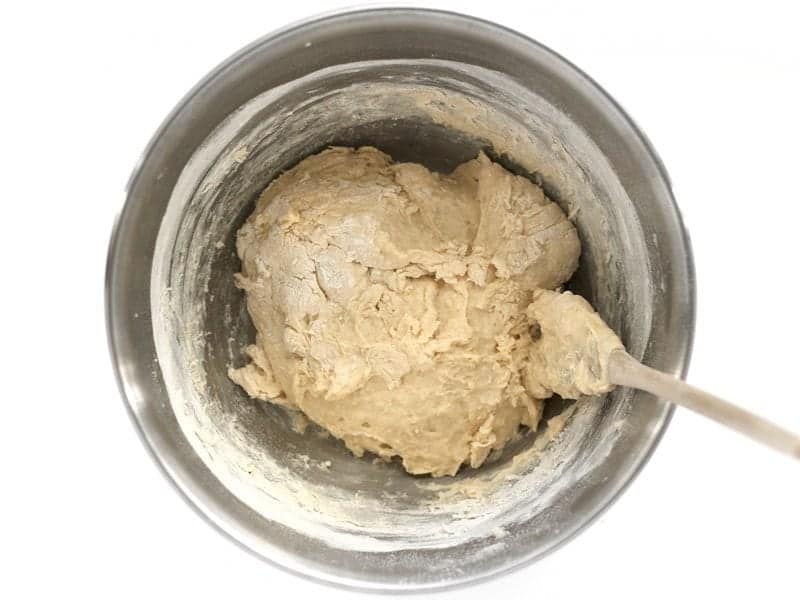
Finally, begin to add a third cup of flour, again a small amount at a time, until you can no longer stir it with a spoon. At that point, turn the dough out onto a floured surface and knead for about 5 minutes, adding small amounts of flour as you go. Only add enough flour to keep the dough from sticking, as adding too much can cause the dough to get stiff.
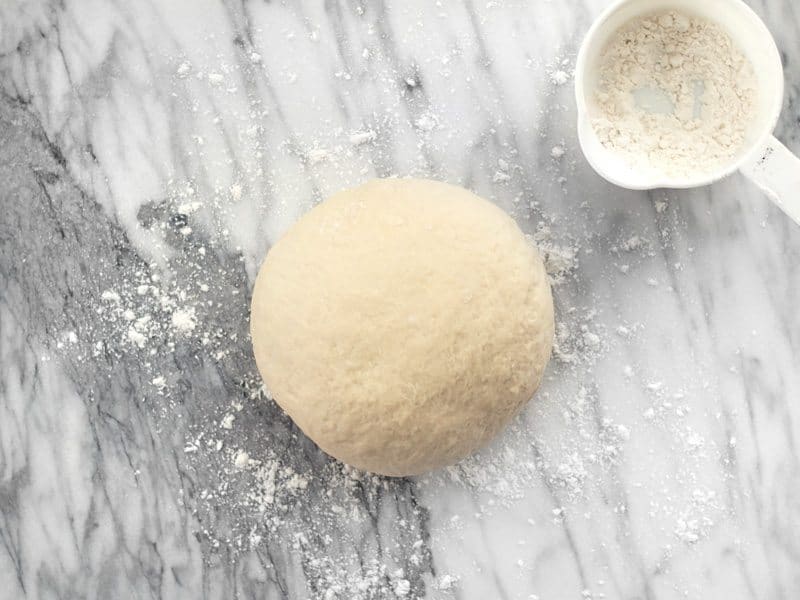
After kneading, you should have used somewhere between 2.5 to 3 cups flour. Let the dough rest for 15 minutes.
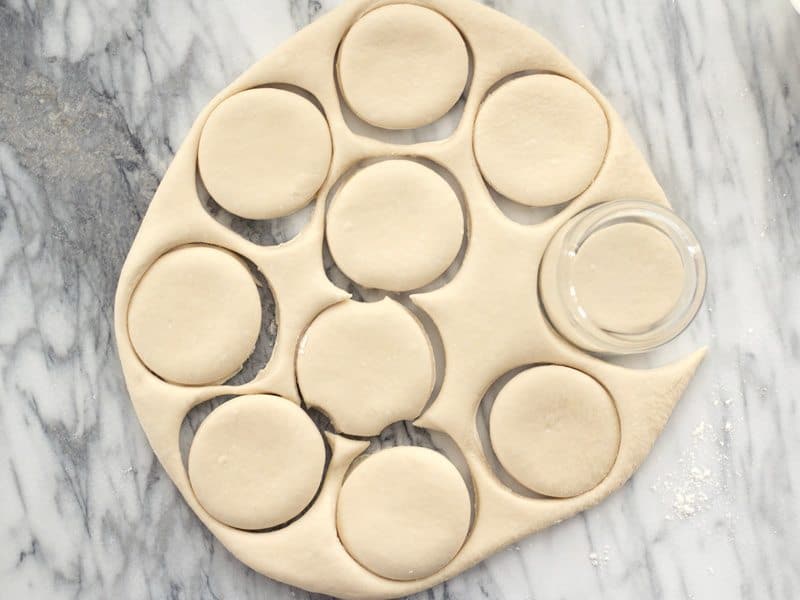
Roll the dough out to about 1/2-inch thickness, then use a cookie cutter or sharp-edged glass to cut as many circles into the dough as possible. Cut the circles close to each other to leave as little scrap dough as possible. Gather up the scraps, form them into a ball, press the dough out once more, then cut a few more circles.
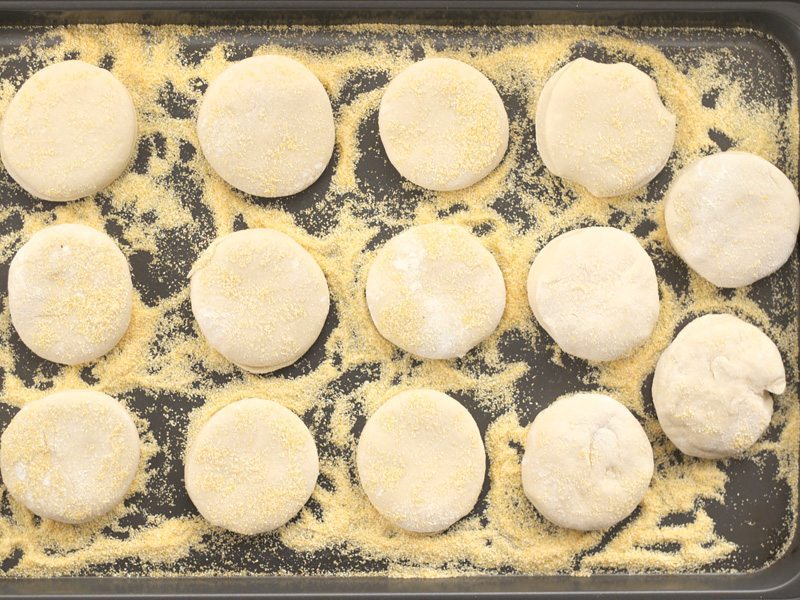
Cover a baking sheet liberally with cornmeal (this is 1/4 cup of cornmeal spread out on a large baking sheet). Arrange the muffins on the cornmeal, pressing one side into the corn meal, then flipping them over and pressing again, making sure there is plenty of cornmeal under each one to prevent it from sticking as they rise.
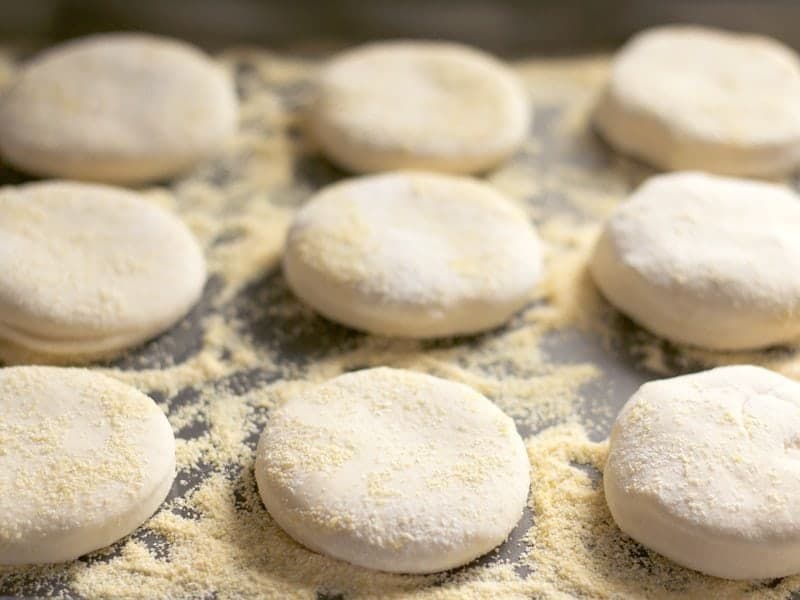
For reference, here is a side view so you can see how thin they are. Let the muffins rise in a warm, moist area for about 1.5 hours or until they’re slightly larger than double their size. I put a casserole dish with steaming water on the bottom shelf of my oven and placed the baking sheet with the muffins on the top rack (oven turned off) to create a nice warm environment for them to rise.
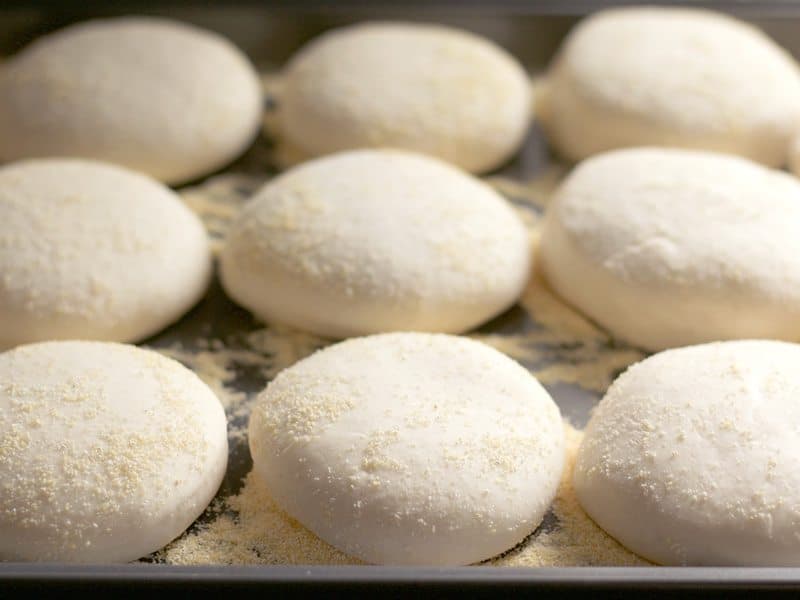
The Muffins should be very large, fluffy, and delicate after rising. Make sure they’re not touching each other because pulling them apart could cause them to deflate.
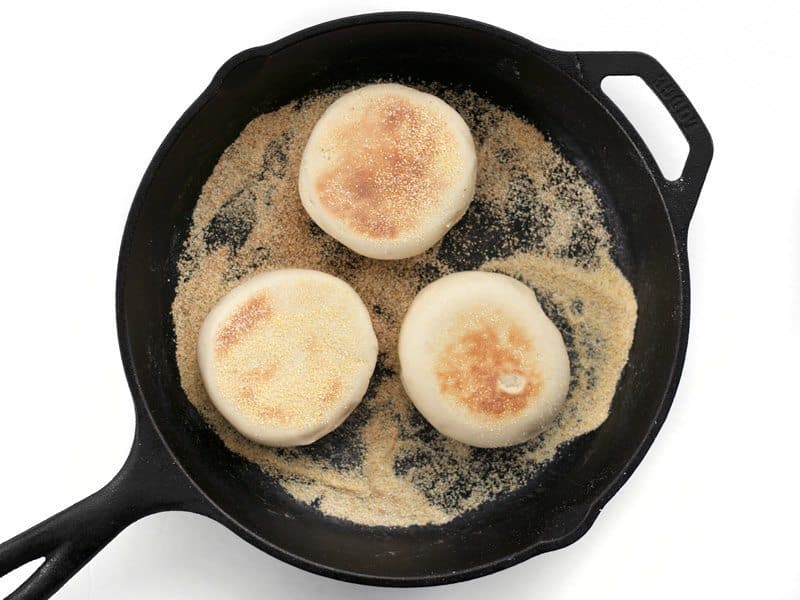
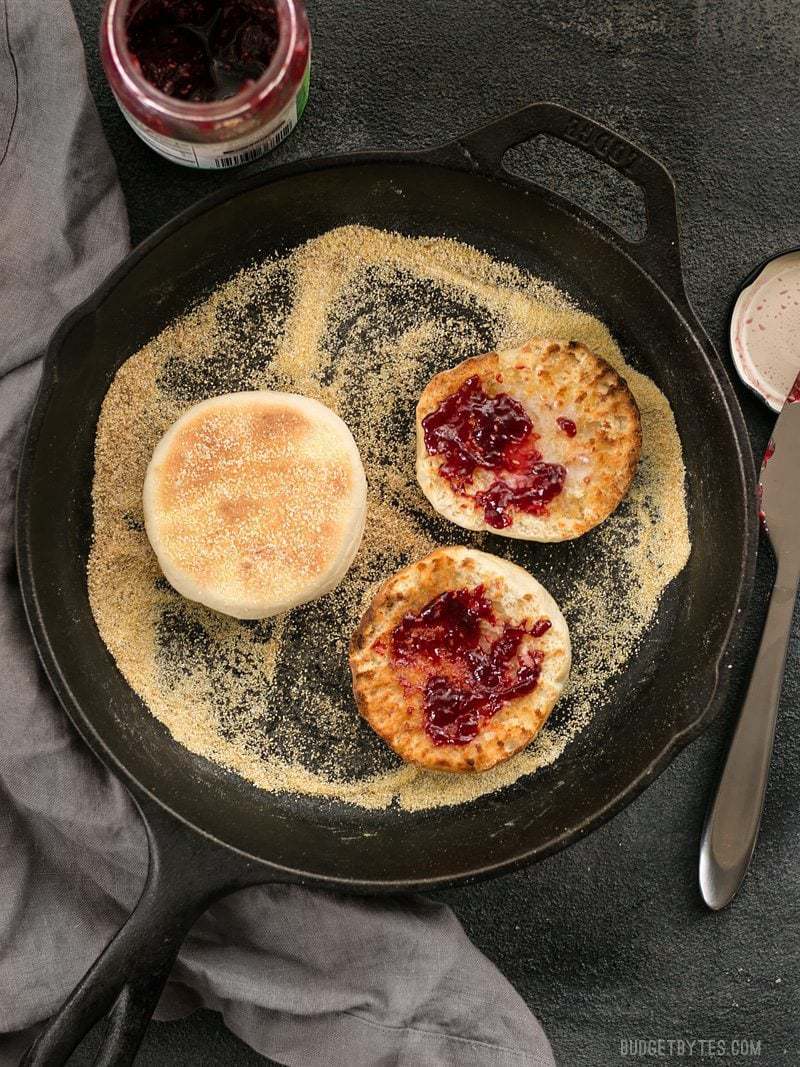
Once risen, it’s time to cook them in a skillet. Heat a cast iron or non-stick skillet over medium-low. Once preheated, use a spatula to carefully lift a few of the muffins off the baking sheet and onto the skillet, along with some of the cornmeal. Cook on each side until golden brown (3-4 minutes per side). The cornmeal will keep the muffins from sticking (the cornmeal in the skillet in the photo above is after 3-4 batches, each batch adding more to the skillet). The muffins will puff even further in the hot skillet.
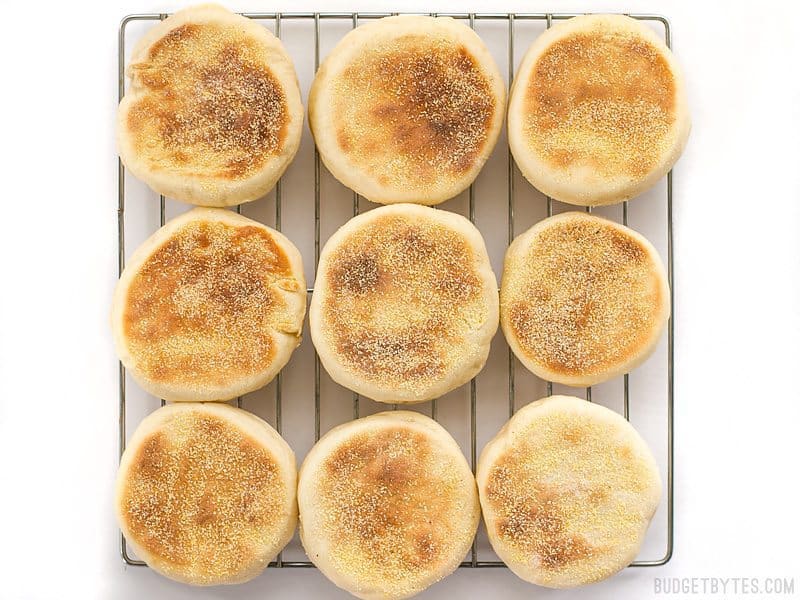
Transfer the cooked English Muffins to a wire rack to cool.
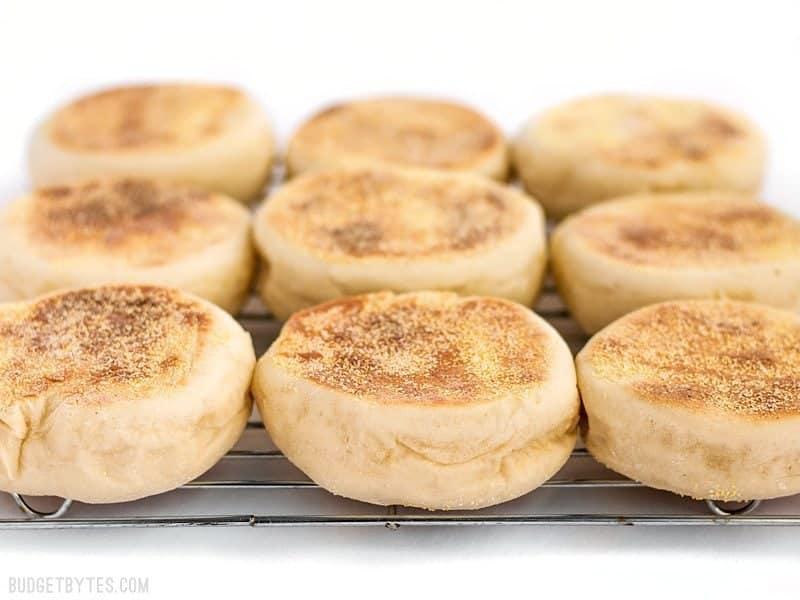
Once cool, either split with a fork and toast, or transfer to an air-tight container (like a gallon-sized freezer bag) to store in the refrigerator or freezer.
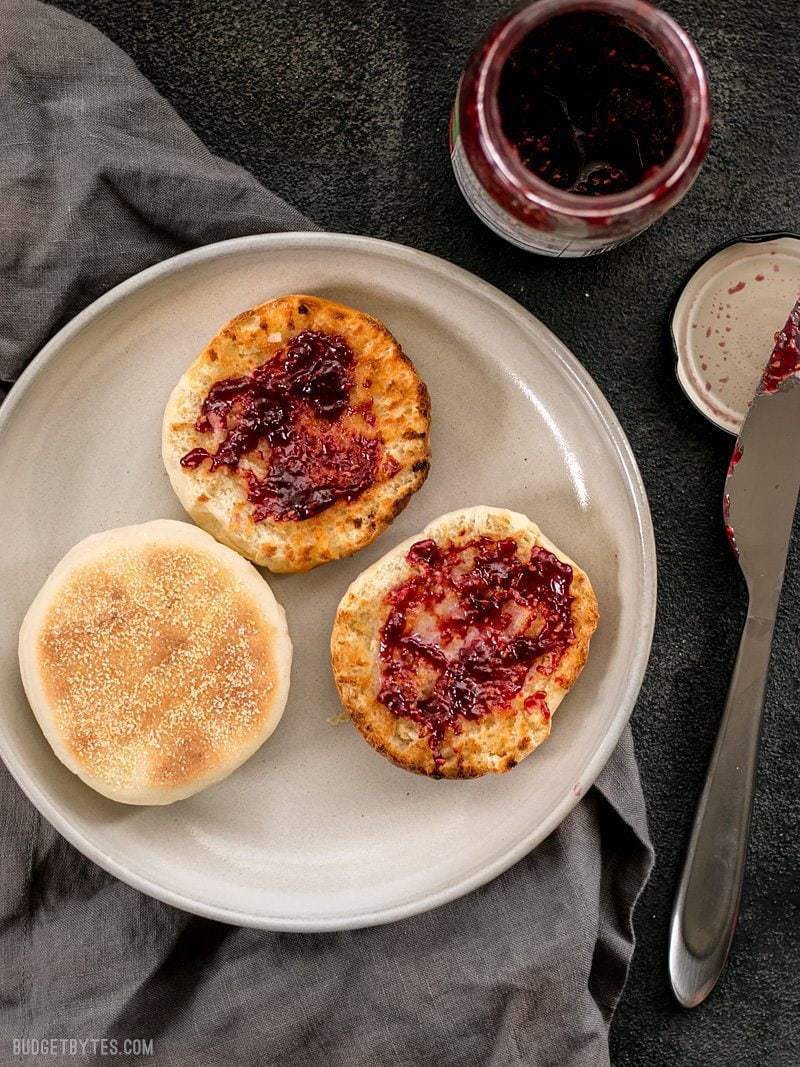
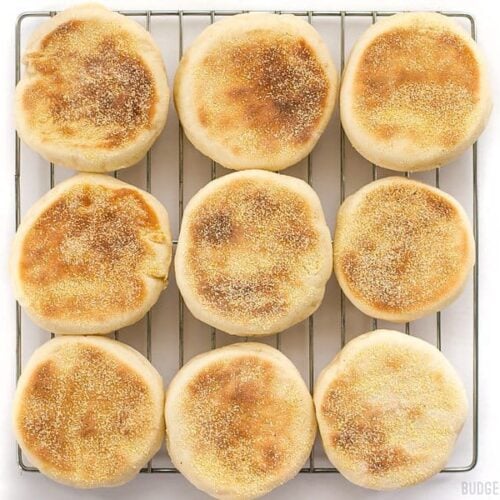
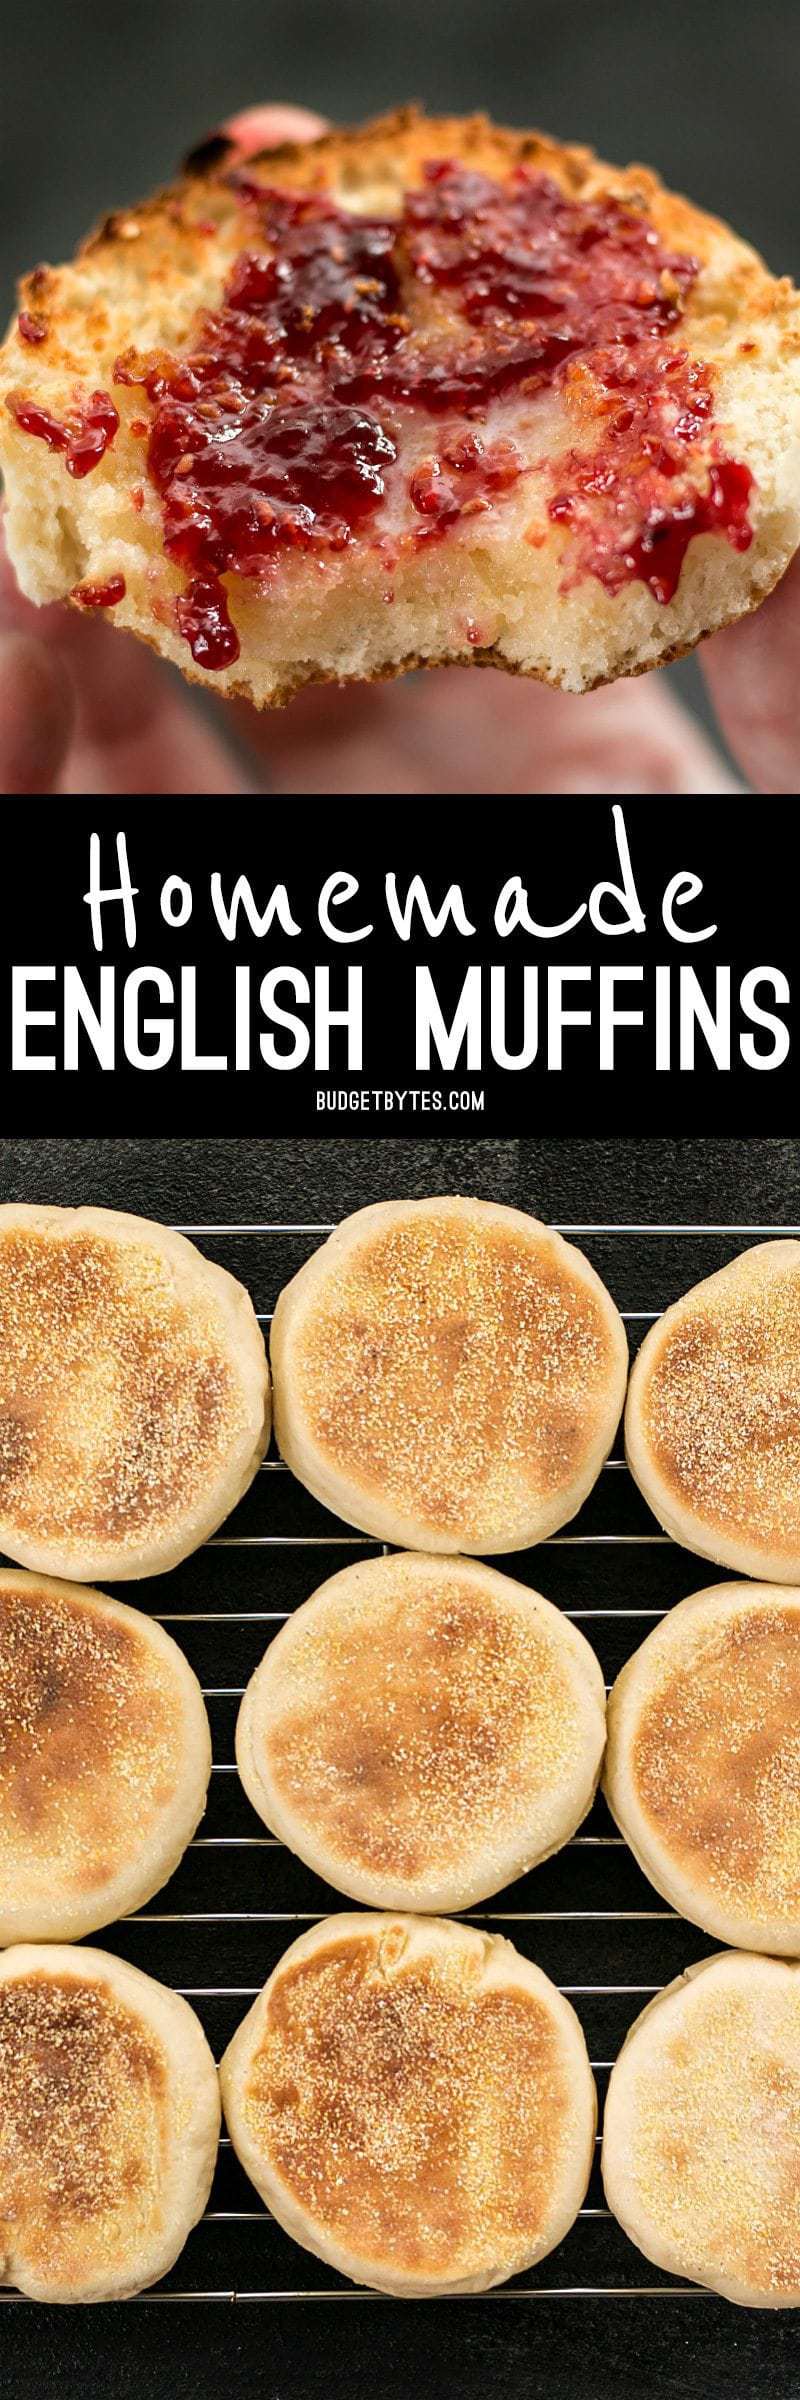
These Homemade English muffins are absolutely to-die-for with butter and jam! Light and fluffy, with very crispy edges and crunchy cornmeal bottoms!


Super yummy! Made a double batch today with no issues. A family favorite!
My daughter hooked me up with this recipe..so easy and delicious
Would be nice to know the size of cookie cutter
6cm
This was great, tasty and well written. Thank you !
Absolutely love this recipe! Any tips on how to have an even size on both sides? Mine get very dome shaped when they rise so one side tends to have a smaller area that touches the pan.
Try placing them on the skillet top side down first (the side that is slightly domed when it’s rising). Maybe the weight of the muffin will help flatten that side out before it stiffens enough from being cooked in the pan.
Love the recipe but mine turned out more like a tea biscuit consistency. I suppose I over kneaded/worked the dough?
I haven’t had a tea biscuit, so I can’t say for sure what the issue might have been without a texture reference. But if it was dense and tough there’s a good chance it was either too much kneading, too much flour, or both.
Would a regular skillet work? I don’t have a cast iron one.
Yes, a regular skillet will also work just fine! ~ Marion :)
I would like to add fresh cranberries to the recipe. How much should I add and do I need to change anything else if I do this? Thank you.
Since we haven’t tested this recipe to add any fresh ingredients, I’m hesitant to give you any specific suggestions because I can’t promise that the result would be equally successful. Typically cranberry English muffins are made with rehydrated dried cranberries because, as they cook, fresh cranberries will release a significant amount of moisture (although it’s a lot less than other types of berries) which may throw off the balance of wet/dry ingredients. I would suggest only adding 1/4 cup of berries (coating them with flour) and seeing how it goes — potentially adding more the next time. Good luck! ~ Marion :)
how would I go about freezing these?
Hi, there! Beth answers your question in the blog post under the header called “HOW TO STORE ENGLISH MUFFINS.” If you have any follow-up questions, feel free to reach out! ~ Marion :)
To make things go a little faster, could I use my electric griddle instead of cast iron pan and be able to take care of that step all at once?
Hi Sarah, We have not tested the muffins on an electric griddle and cannot say what the results will be. If you want to use an electric griddle, make sure it heats evenly and retains that heat (like cast iron does). Also, remember that it has no sides and will not trap steam. So your results might be different than those pictured. But I would def try it! XOXO -Monti
So much easier and faster to make than other recipes I’ve been seeing. They turn out so well I was accused of buying them and saying I made them.
I assume this is unsalted butter?
I use salted butter for all my recipes. :)
Will this work if I substitute 1 C whole wheat flour for the white flour?
Yes, that should work alright. Usually you can substitute up to 50% of AP flour with WW without too much of a texture difference.
I’ve made these several times, and they’re so easy and a favourite in our house. The hardest part is the ‘down time’ while they rise. Making a batch today and plan to gift to a special birthday fella!
🤠🇨🇦ON
Thank you I live these muffins.
Would it be okay to use fresh yeast here? And if so, how would I substitute it?
Thanks!
Unfortunately, I’m not experienced with using fresh yeast so I can’t advise.
I’ve made two batches of these already and they taste great! My only concern is I’m not getting those nooks and crannies in these. The bubbles are still pretty small. Any reason why this could be?
I’ve made these a couple times. They are great. I was wondering if you’ve ever tried to make cinnamon raisin english muffins and get ideas on how much of each to use.
I haven’t tried that, unfortunately!
Question! I really like this recipe, but the last couple of times I’ve made it, the muffins don’t bake all the way through and stay doughy. I’m leaving them on the skillet till they’re nice and golden, and I don’t open them too early, but they’re just super sticky inside. Any ideas on baking them all the way through?
Hmm, it’s hard to say without being there to watch your process, but my guess would be that maybe the heat in your skillet is just a bit too high so the outside is finished cooking before the inside has a chance to cook through?
When cooking in the cast iron pan, do you heat it with oil or just dry heat the pan?
Dry heat. :) The cornmeal will help keep them from sticking.
When cooking muffins cover them with a lid,hope that helps!
So good! Super easy! They were simple to put together and tasty!!! I’ve always been intimidated to make English muffins but these were simple. Will make again for sure!!
In your ingredient list, you call for 3 cups of flour. In Instructions, item #3 it references all 3 cups of flour to be added in intervals. Further down in item # 3 during the kneading instructions, it states: After kneading, you should have used somewhere between 2.5 to 3 cups flour. That is a little confusing. Is that in addition to the the before mentioned 3 cups?
Hi Robin. That is total. She’s stating start with one cup of flour. Then add 1/3 cup at a time until you can no longer stir it. Hope that helps?
Hi! I want to make the english muffins but I don’t have cornmeal or semolina for dusting. What can I use instead?
You could use rice or all purpose flour if that’s what you have on hand. But it may not get that signature crunch!
i have never made English muffins before. how do i divide 1 tablespoon of sugar?
i really did not want this to be too complicated. please let me know how many prep bowls of sugar do i need
to put however little amounts of sugar i need for this English muffin recipe .
please e-mail me to let me know at [email protected]
There are 3 teaspoons in a Tablespoon. So 1.5 teaspoons with the yeast in the first step then 1.5 next.
Is there any kind of substitute I could use for the cornmeal? I want to make these but my fiance is allergic to corn. Thanks!
Semolina would be a great swap.
I jist tried them oh yum. It was easier then i thought. Some were bigger then others but thats ok. I loved putting them in oven with steaming water. Thanks well worth it
Still in the process of cooking these as I type away but these are great! I just ate one with some jam and it was nice and fluffy and was quite moist. I originally screwed up and rolled my dough too thin and didn’t catch it until after I cut out a bunch of circles but with that mistake came a reward. I just lightly smushed two cut outs together and let them rise that way and cooked them up and they are super easy to pull apart!! They also have that characteristic ridge in the center that the store bought ones look to have. Excited to try these tomorrow as eggs Benedict
Do you think these could be made substituting buttermilk for the milk?
It’s tough to say without testing that one, since buttermilk is a lot more acidic than regular milk and that might throw off the chemistry of the dough.
My first time making English muffins and they turned out really good. I knocked off a star because I think the recipe should emphasize two things. One, using the appropriate sized cutter (biscuit or otherwise). I used what I thought was a pretty big jar and they turned out a little small. I like the commenter’s idea to use an old tuna can. Second, the name of the game with this recipe is not deflating these guys. They need plenty of space to rise and abundant cornmeal to avoid sticking. If you have to peel them off the tray or each other they will deflate. I also found that sliding them into the pan same-side-up as the rise made them stay puffier than flipping. Make sure the pan is truly hot -takes a while – for optimal fluffiness. Anyway, with these notes, this was a super fun project and I enjoyed the novelty of cooking bread on the stove. They’re way more moist than store-bought English muffins and much more worthy of toast or a sandwich. Yum!
Very good recipe! I was impatient with the initial sponge and ended up without the characteristic holes. A biscuit cutter (2 3/4” diameter) produces smaller than normal muffins with a yield of 14. In the future, I’d be more patient and use an old tuna can to cut larger rounds.
What do you mean you were impatient? I didn’t have very many holes either so trying to figure out what I did wrong.
I can’t wait to try this! Has anyone tried this with vegan butter and milk?
This was my first time making english muffins, and they turned out great! I made mine with Earth Balance butter and Earth’s Own Barista Oat Milk and it worked out :)
I used olive oil and plain water and they turned out amazing!
I love you guys.
Thank you so much!
I’m at a high altitude and followed your recipe as close as possible. They turned out wonderful! Thank you so much.
I found this recipe as I couldn’t find soy free ones at the store and my son is allergic. My son loves these! Thanks!
Do you think altitude could cause them not to rise so much?
Unfortunately I’m not experienced with high altitude baking, so I’m not sure what affect that might have on the muffins.
@Natalie, make sure your water temperature is correct (between 110 and 115) so the yeast blooms. A cheap thermometer on Am….n would be less than $10 and is well worth it. If you still have issues with dough proofing, run your dishwasher to get it steamy, turn it off, and put the covered dough in there to rise. I do this and my dough always rises perfectly. Dough never rises right if I don’t do this because of our near constant air conditioning.
This is by far the best English muffin recipe out there. I have tried numerous and this is the closest to to what I was looking for. I made 12 and they came out almost perfect. Next time I will make them thicker and add 1 tsp of baking soda in an attempt to get more air holes.
Hi, was wondering if you did try with the baking soda? Did it do the trick?
Thanks!
Is the 1/2 inch thickness from an exact measurement? I measured the dough out that thick with a ruler and used a 3 inch diameter cutter but only got 8 muffins
No, it’s an estimation.
How big of a cup do you have? Mine came out like muffins but they’re awful small!
Maybe 2.5-3″ in diameter? I just chose a cup that was close in size to English Muffins. :)
is there any recipe for an english muffin that you can bake in the oven?
I don’t have one, unfortunately, but you could always try Googling “english muffin oven” to see what comes up. :)
I love English Muffins and am trying to master this recipe. I am new to breads and yeast. Mine did not rise anywhere near enough. Any ideas? When you say “after kneading you should have 2 1/2-3 cups”. That is just the original amount, not additional that is added while kneading, correct?
Thank you!
After kneading you should have added 2.5-3 cups total of flour, from start to finish. :) There are so many factors that affect rising that it’s really difficult to say without being there to watch your process, but two common things are room temperature (if the room is a little chilly it can take a lot longer to rise), and did your yeast water get frothy and foamy on top? If not, the yeast wasn’t activated.
Easy to make recipe and enjoyed by all! My batch usually makes about 14 english muffins
I made these today. Used half whole wheat flour, half bread flour. Delicious! I will never buy store made English muffins again! Thank you!
Excellent recipe! I was very successful with it . Can I double the recipe?
Valérie
You can, but at a point dough can be difficult to knead if it’s too big. :)
I love this recipe! I’ve been making them for quite a few times, getting better and better at kneading and my spouse is devouring them! (He normally doesn’t care for English muffins!)
However, when I make them, they never quite get a nice amount of holes inside and are more bread-like. Do you think it has something to do with me using instant yeast instead of active yeast? Or perhaps I am not proofing the yeast for long enough?
I would try proofing longer to create larger gas bubbles. But just remember, they do get more delicate the longer they rise.
Excellent recipe! I have made several from the internet but by far is the best.
I’ve tried to make this recipe twice now – the first time they stuck to each other but obviously deflated. The second time I was super careful to not let them touch but they still deflated in the pan! Any idea what could be causing them to end up flat and sad instead of beautiful and fluffy like yours?
Hmmm, my guess is that the gluten wasn’t strong enough to help them hold their shape. Try kneading for two minutes longer to see if that helps. :)
Or you let them rise too long. Hope you figure it out.
Hello and thank you for your recipe. I am trying to make sure a cup in US is 150g of flour and 1/2 cup of water 120ml. Could you please confirm as I have different weights on different websites ? Thank you so much, Lola
Unfortunately I don’t know what the exact conversions are. I’d just have to ask ask google and rely on that.
Hi! I just thought of another question. If you use instant yeast, would you change the rise time?
It shouldn’t change the rise time. :)
Can you use English muffin rings for these?
You could use the rings to cut the dough, but since this is more like a bread dough than a batter, you won’t need the ring to pour the batter into in the skillet and hold the shape.
Hi Beth: we live in Ecuador and my daughter has been craving english muffins, but they are even more expensive here than in the states, so i decided to try my hand at making them myself. Your site proved to be very helpful and im excited to say it was a success. Being from another country with all the ingredients being slightly different, one never knows. One day i may write about it on my blog 4000miles.com thank you.
Hi there! Do you think I could sub spelt flour instead of all purpose? I love spelt English muffins but they are hard to find and not to mention expensive! If so, would I still use the same amount as the recipe?
Do you think these would turn out if I did a vegan butter and unsweetened original almond milk?
I think those substitutes would change the flavor and texture quite a bit because their composition (fat/protien/water) is quite different.
I use almond milk with mine and they turn out perfect. I have never used vegan butter though.
I say, try it anyways. Worse case scenario, you wont like it and you will never do it again. Living out of the states i try alot of recipes that i have to make major alterations to make them work with the ingredients here. Sometimes it is amazing and my new favorites and sometimes, i throw out the recipe. But if you dont try it you will never know. I write about some of our experiences of try new things at 4000miles.com
Do you have a cinnamon raisin recipe?
FYI for you calorie counters! Only 142 calories each! (I used Noom to calculate)
can I make these and have them rise in the refrigerator overnight, cook them in the morning?
thanks!
Hmm, I’ve never tried that method with this recipe before. That nice long fermentation should give them large air pockets, which will be good, but they will likely be very delicate so just be careful when transferring them to the skillet. :)
Have you ever substituted whole wheat flour when making?
I haven’t. Generally you can substitute up to about half of white flour for whole wheat before you start to see major texture changes, so I would suggest only substituting that much. Otherwise it can get very heavy and dense.
Thank you for this wonderful recipe!
I made these before leaving for a NYE party. Half of them were gone before we left for the party and the other half didn’t see a lot of the new year. I was mildly disappointed my muffin seemed more dense that store bought English muffins since there were no large nooks and crannies. That is until I took a bite. I see no reason to go to the store for these anymore.
They taste great, are light and easy to make.
I will be making these again today because the craving for one will not go away.
Thank you again :)
Well I do adore w/some avocado and eggs like a lil sandwich plus some bacon too, so delicious breakfast
I’ll try to make them like you shown us in this blog, thanks so much
Sincerely
I have been pondering about making English muffins for ages. Literally lie one year or so. Today I took the plunge and did everything right. While doing so I realize before I never had the patient to proof my yeast for other times as it became foamy lie I never seen before! They come out very nice. I got 16 muffins which will be two day’s worth of breakfast for us. The only thing I’d change next time would be to roll it a litre bit thicker than I did. they are not as thick as ey should be. Thank you for your recipe!
Just wondering how many English muffins this recipe makes. Thanks!
It can depend a little on how well you roll and cut the muffins from the dough, but you should get between 9 and 12 muffins.
Hi,
I would love to try your recipe but am allergic to corn meal. Is there a substitute for that or can the muffins be baked without it?
Thanks :)
You can bake them without it. :)
Saw another recipe that called for polenta indtead of cornmeal.
Also semolina (pasta flour).
I made these today and they turned out super delicious thank you so much for sharing the recipe.
Toasted with butter and peanut butter and a touch of kosher / sea salt….. & strong black cooffee of course.
Hi! I love your blog and none of your recipes have failed me yet. I do have a question though on this one. I used whole wheat flour and don’t feel like they got very fluffy. Have you tried whole wheat flour and did you need to do anything different to get the same result?
Anytime you substitute whole wheat flour for white flour, you’ll get a more dense product. The bran gets in the way of gluten formation, so it doesn’t rise quite as nicely (it also absorbs more moisture, making it heavier). For best results, I usually suggest only substituting up to 50% of the white flour for wheat.
OMG BETH!! I MADE BREAD!!!!!!
Ok – So, I have NEVER made anything bread-like in my life. But I have been a longtime follower of your blog (and I just got your book), and I started to convince myself that these things were easy and that I could totally do it. AND I DID! My first effort yielded only one burned muffin, which I’m calling a win. They didn’t rise as much as I wanted, but I am chalking that up to beginner’s folly. So, thank you for an easy recipe! It makes me want to keep trying different breads to make myself!
Awesome!!! Congratulations! :D I’m so glad you finally took the leap and tried it. Failures are a part of learning, so it’s important to not be afraid. :) Keep up the great work!
Hi Beth,
Thank you for the step by step making of English muffin. Just one question. After the muffins have risen, could we leave them that way for the next 4-5 hrs before we cook/bake them?
I haven’t tried that so I can’t say for sure, but the only risk you run is that if the yeast ferments *too* much, they can collapse. I’m not sure how long is too long, though.
I did this recipe and the taste is fantastic. The only problem I had is no airpockets in my muffins… Not sure what I am doing wrong, but if you have a minute to answer with an idea what should I do different, it will be HIGHLY appreciated.
Thank you!!! Keep baking! ♥
Hmm, try letting them rise a little longer on the second rise. Hopefully that will help. :)
Tastes incredible!!!! Best thing i have cooked in ages. the only thing was how long it took to make, it was all worth it though.
Could I use the dough feature on my bread machine? It has two rises then do the third out of the machine?
Honestly, I’m not sure. I’ve never used a bread machine before. :(
So here’s my update I used my cuisinart bread machine and it came out great!! I did the third rise in my microwave after making it in to a proof box. Then I used my griddle to “bake” the muffins. My husband absolutely loved these!!! Looks like I’ll be making theses on a weekly basis!! Thanks for the recipe!!!
Awesome!! Thanks for sharing the results :D
I just made these last night for the first time. They rose as they should and were big and fluffy when I cooked them. They taste great. The only problem is that they don’t have the nooks and crannies of an English muffin. When I flipped then, they did poof down a little. Did that have anything to do with it? Can you give me some advise for next time?
Hmm, maybe try kneading just a little bit longer. That will develop the gluten a little more, which will make them a little stronger and hopefully they’ll hold up to the turning in the skillet better.
Is there a way to make these ahead? It would be okay with me if it was frozen dough to cook when ready or cooked just trying to get breakfast going quicker.
Bread freezes really well after baking, so that’s what I would suggest. Make the whole batch on one day and after they’re completely cool, wrap in plastic and pop them in a freezer bag.
I’ve made these tons of times and then froze them – both plain and as breakfast sandwiches – and they hold up great.
love your recipes! I tried this one today. Overall I’m satisfied but my original ball of dough wasn’t nearly as smooth as yours and was very sticky. I used a mixer. Should I have kneaded it by hand and added small amounts of flower until it didn’t stick to me? I did this after the first rise and I don’t have the air bubbles we know and love. Thanks!
Yes, I like hand kneading the best because you have more control over the texture and can know when to stop adding flour. The amount of flour needed will change slightly almost every time you make bread because differing amounts of moisture in the air and flour, so you kind of have to play it by ear. :)
Can I use instant yeast?
Yes, instant yeast should work fine for this.
Can you freeze these after cooking ?
Yes, you definitely can. English muffins (and most bread products) freeze wonderfully. :)
Hi Beth,
I was wondering what I can substitute for the cornmeal. I don’t have any on hand. Thanks in advance!
You could actually just make them without. There isn’t really anything comparable, unfortunately. Maybe sprinkle with a little extra flour to help keep them from sticking. The cornmeal is a nice finishing touch and gives it that classic English muffin feel, but isn’t exactly crucial.
you can substitute it with Semolina , which is common to use on breads it gives it a golden crunch on breads
Have you tried storing these in the freezer or mass baking a whole bunch to keep around?
I haven’t, but in general bread products freeze very well. :)
I am trying this recipe for the first time right now! Based on previous comments they seem like they will be great and for many English muffins my husband and son eat I needed to find a more inexpensive way to make then. This will save me loads of money! Seriously!
Hi, I think your blog might be having internet browser
compatibility issues. Whenever I look at your site in Safari, it looks fine however when opening in I.E., it’s got some overlapping issues.
I simply wanted to provide you with a quick heads up!
Besides that, great website!
How much flour should I use? I don’t understand because the ingredients list says to 3 cups, yet when following the recipe, I only used 2 1/4 cups (1.5 cups for initial mixture + 3/4 cups mixed in). Where does the other 3/4 cup go?
Step four, just after you mix in that 3/4 flour, you’ll knead the dough for about five minutes. As you knead the dough, you’ll need to continually add a little flour at a time. Even though you sprinkle very little, it adds up over the course of 5 minutes. Plus, you’ll need a little later to dust the countertop when rolling and cutting the dough. The total amount will vary, but it will be around 3/4 cup. Sorry for the confusion!
Instructions arent clear, how much milk am i suppose to use for the butter mixer. wasted butter, milk and flour. terrible
Did you even read the recipe??? All the ingredients are clearly listed.
Beth, wanted to say I found your website via Pinterest, and I’m making these muffins for the second time. They’re absolutely divine, no more store bought english muffins for me :)
I’m making these right now, I’m not sure what I may have done wrong, my first rise hasn’t risen. I’ve never baked before like this, Do I need to keep the dough warm or should it be cold?
It should be warmish, probably above 70 degrees or so.
Can I substitute some or all of the flour in this recipe for wheat flour?
I wouldn’t substitute more than half for whole wheat. Any more than that and it tends to have quite noticeable effects on the texture.
I almost forgot how great this recipe was! My Plan to Eat recipe box just looks like your blog! <3
If you don't already use Plan to Eat….try it! I fell in love immediately. And add me as a friend! Sbrennnan or click my website to get it free for 30 days!! Making these soon!
My plantoeat acct looks just like this blog too! hah.
Can I make a couple batches of these muffins and freeze them? Would I freeze them before or after baking?
Bread products generally freeze very well. I would definitely freeze after baking.
I made these today and after a setback they did come out great. I did not add enough flour to the dough before the first rise. And after the end of the second rise it was too sticky. I rolled it out on my board and added a little bit more flour to it before I cut the muffins. I wasn’t going to let all of that effort and product go to waste so I’m glad that it did work out. They are just now cooling and I will split them pretty soon and see how they turned out.
I have never tried anything like this at all and usually have horrible luck with yeast dough. This seems to have worked like a charm. Without realizing it, I made 15 instead of 9, but they are currently cooking and I cannot wait to try them!
Thanks
If I double the recipe, do I automatically double the yeast?
Correct. You would want to double all of the ingredients.
Great, thanks!
Just wanted to be sure – I’ve read recipes that don’t, and guidelines that say that 1 tablespoon will leaven 3 to 6 cups of flour so I wasn’t sure what to do!
Sure, no problem! The amount of yeast used actually depends on a couple of factors, especially the rise time. For instance, I have a no-knead recipe that only uses 1/4 tsp of yeast, but it’s left to rise for 12+ hours so the yeast has plenty of time to grow and multiply. :)
I figured it might have something to do with that and with how fluffy these need to be, but I’m only starting out with yeast, at least in the kitchen – I’ve worked with yeast in research labs but somehow baking with it seems much more intimidating!
I have these on their final rise right now. I doubled the recipe and subbed whole wheat flour for half of the total flour. So far, so good!
Does anyone know approximately how many muffins this makes? Feeding a few people and not sure if to double the recipe.
I made them today and they came out perfect! Can’t wait to taste them. Thanks for the recipe.
First time was pretty much a fail although I ate them anyway. Second time better rising but cannot get them done in the middle. Will hope the 3rd time they will be “charming”. :-)
Hi, I’m from the UK and was wondering what kind of flour you used? Would it be bread flour, plain flour or self-raising? Is this the same kind of flour you used for the no-knead cinnamon rolls?
Thanks!
Just regular all-purpose flour, although bread flour would work as well. Just don’t use self rising flour. :)
Hey Beth!
I found your site a few weeks ago and I love it!
Do you know if a product like saf-instant yeast would work as well as active dry yeast? I have a pound of the blue label variety in my house and I want to try to use most of it before it goes bad. A pound is a lot of yeast…
It sounds like it is an “instant” yeast variety, which you can use in place of active dry in any recipe. Keep the yeast in an air-tight container in the refrigerator and it should stay viable for at least a year! I’ve had a pound of yeast before, too ;)
I’ve never tried making anything like this before and right now they are ‘baking’ in my skillet! They look fantastic and I can’t wait to break them open! Thank you for your website Beth!
Hi Beth, it’s lovely to read your recipes! I don’t know if this tip will be of any use to you but it has always worked for me. Paul Hollywood (I don’t know if you have heard of him, try his crumpet recipe!) he suggests using olive oil instead of flour when kneading your dough. It keeps the dough really light. I’m going to try it using your recipe but it’s a great little tip if you’re worried about using too much flour as you stated at the beginning. I’ll let you know if it works! Happy baking!
Interesting! I’ll have to give that a shot, thanks! :D
Thanks for posting this recipe! I love Thomas whole wheat English muffins with an egg and cheese, but I am 76 miles from the nearest town that carries them. I made these today and followed your instructions exactly. I did use a 50-50 mix of whole wheat and AP flour, which resulted in my not adding all of the remaining flour the recipe called for, only about 1/4 cup + 2 T. I think it’s because the wheat flour is heavier. Therefore I only got 7 muffins total, but they look fantastic, just like the real deal and I can’t wait to try them.
The first time I made these I think my oven was too warm for the final proofing, but they made delicious chibatta-style rolls then, haha! I made these a second time and was more careful with the third proofing and they came out perfect! These will be a staple in my house now :)
The butter in the the dough WILL affect the rise. I have a roll recipe I make often, and when I had to stash it in the garage (I live in WI) overnight before Christmas eve, those stinkin’ rolls took EXTRA long.
A few suggestions to those of you in cold climates (and can’t bear to turn the thermostat past 68!)
Set a pan of hot (nearly boiling) water in your oven. Turn your oven on just for a bit – just until it gets to 100. Turn it off IMMEDIATELY.
Turn the oven light on. Cover all of your dough rises with a damp rag or flour sack towel that has been soaked and wrung out with hot water (the dough will not only pull any needed water from the towel, but the heat will help as well).
Stash in oven. Duct tape shut if you’re like me and have two curious little preschoolers who are enamored with yeast activity. Repeat each rise. :)
Hmm, I wonder if being in the fridge dried the dough out… all of that cold circulating air may have done a number on them, especially since they’ve already had quite a bit of rise time. That’s the only thing I can think of :( Now that I’m an older and wiser baker than when I wrote this post, I wonder if one rise before cutting would be enough. I’ll have to try it again!
Help, My english muffins did not rise. My yeast and milk did froth like in the picture. My first rise took 1 1/2 hours. I did it in a warn oven, my house is not very warm. Took it out and they looked just like your picture. My second rise took also the same amount of time, but it never doubled in size. Maybe 2/3 the size. Also in the oven. At that time i rooled them out and cut them so the could rise over night in the fridge. In the morning the looked the same as the night before. I put them back in a warm oven to see if i can get them to rise a bit more. I am just waiting….
Yummy! Just made with soy milk. Forgot to cover during the 3rd rise and they still turned out great! Thanks for sharing. My husband will be excited to have the English muffins for breakfast sandwiches this week!
Made these last night for the family. Substituted dairy milk with rice milk and butter for began butter and they came out perfect. Thanks for the recipe!
I cut parchment paper into squares, dusted them with cornmeal and let each muffin rise on its own square. Its easier to get under it and turn it into the pan that way. I’m saving the squares to use a few more times.
I have made these before in a skillet and they are really quit tasty. Especially spread with home made Strawberry Rhubarb Preserves!!!!! :)
Just finished making these. I did have a little trouble getting them onto the skillet without them deflating. They turned out delicious. Reminds me of the Thomas’ biscuits that I fell in love with and can no longer find. Thanks for the recipe!
A tip I might offer for helping dough rise: I boil water on my stovetop while I’m mixing the dough. If you live in a dry climate or if it’s winter time and low humidity, it helps the yeast grow and it warms up the kitchen. I start the humidity before I try to get them to rise as a time saver. Usually this takes half the time to get your double-size dough. Thank you so much for sharing this recipe, I’m making them for the first time now!
Thank you!!! The temp in the house is about 68…not sure if that is cool or not! haha! I think I messed up by not letting my yeast sit long enough in the beginning! But, regardless they turned out good. I am doing another batch today, hoping that they have a few more nooks and crannies(;
Faith – WOW, yeah, that’s a super long time. Did your yeast mixture get nice and frothy in the beginning? I’m wondering if the yeast had time to really wake up and get going. Also, what is the temperature like in your house? If it’s fairly cool it will take much longer. Placing them in your oven (with it turned off) along with a dish full of hot water. The water should warm the air in the oven and it will stay nice and warm because it’s insulated.
Mine took forever to rise, just curious to why that would be? I started them around noon, and just putting them in the skillet now at 6:30.
one side strawberry jam, the other side cream cheese :D. I love your blog! Hopefully I can try this recipe soon
just made these and they’re delicious.
Note: I’m not good at things like biscuits and such and I was worried because these didn’t seem to be rising as much as they do in the pictures but I still got perfect english muffins.
Anonymous – Cutting them into square is an EXCELLENT idea! I’ve never left mine to rise over night in the fridge, but my hunch says it will work (I’ve done it with pizza dough hundreds of times). If you try it out, please let us know how it works out!
Hope this doesn’t post twice:
can you set them in the fridge overnight for the last rise?
also, what about rolling them out into a square, then cutting square muffins? no waste, no worrying about toughening the dough….
Found this via pinterest. Thank you for sharing it!
I arrived here via Pinterest and I cant wait to try this recipe! Thanks for sharing!
Anon – The printer friendly button is a third party program and it’s the best I can do within the Blogger system. If you want only text and only part of the page the easiest thing to do would be to highlight the text that you want, copy it, paste it into a word program, and then print. It’s pretty quick and easy and then you’ll get exactly what you want. :)
It would be nice if your “printer-friendly” option was actually printer friendly – having my printer spit out 13 pages of people repeating the same questions (because its so hard to make bread) as well as every single tiny thumbnail in your crowded layout is really not awesome. Printer-friendly should be text only, instructions only – not 12 pages of housewives trying to figure out how yeast works.
Alyssa – you might try letting them rise longer so that larger bubbles have time to form. Either way, there won’t be nearly as many nooks and crannies as store bought. I think for that you have to use a more liquidy batter (I saw Alton Brown do it once), but that requires a mold, which I don’t have! :)
Just made these these and although they were FANTASTIC, there were no nooks or pockets in them once i cut them! Where did i go wrong?!
they turned out great! at first i didn’t think they were as good as Thomas’ English Muffins, but then I took another bite and they were so fluffy and so perfect! Loved them! Just don’t over toast them in the toaster or else they turn out wayyy too crispy. Excellent recipe! made with TLC :)
Delcie – Make sure they’ve completely cooled and then you can either refrigerate or freeze them. They’ll stay good for about a week in the refrigerator and a few months in the freezer! I use large, gallon sized zip top bags for storage. If you slice the muffins in half before freezing, they can go straight from the freezer to the toaster.
First time with the recipe and they are great! Only thing I’m upset about is not doubling the recipe!!! These will be gone asap! What’s the best way to store them if they do last through the day? Thanks for the killer recipe!
I love EM! My favorite way to eat them is toasted and then slathered with peanut butter and honey! Yum!
Hi! I think these muffins look fabulous! Am going to try it out soon! Thanks for the recipe:D
I made mini versions of these the other day and it was wonderful! Thank you so much!
Thank you! Thank you for this site! I’ve tried several recipes and LOVE them. Eng Muffins are rising as I type. Thank you! (hope you are feeling sufficiently appreciated! :) )
Just made these, except used whole wheat flour (it was all I had on hand) — they are amazing!! I know this will be a staple in my home!
Yep, it should still rise three times with rapid rise yeast :)
What if you use rapid rise yeast? Can you still let it rise 3 times?
Zachy – probably not because the sugar is needed for the yeast to feed on and create the leavening action.
Can these be made with Splenda or a sugar substitute?
These look delicious! I can’t wait to try to make them :)
Make your own English muffins and they your can add egg, jam or whatever you like.
Can’t wait to try this. Looks so good. I love English Muffin bread. I make it all the time. Give two out of four of them away to friends and those in need each time I make it. Makes great toast!
Just found this homemade English muffins recipe on Pinterest. Love how inexpensive this recipe is — it’s definitely going into my to-bake file!
I found this recipe on pinterest which then had me searching through your whole blog and I just want to tell you that I love EVERYTHING about your blog! I love how you give the recipe and then show everything after that in pictures. I also LOVE how you list the price for each recipe and the ingredients. You make cooking look so affordable and fun, which it is! I am going to try these English muffins tomorrow, as well as your red beans and rice recipe, but I couldn’t wait until tomorrow to tell you thank you for doing this blog! I will now be a constant reader of it! Thank you, thank you, thank you!!!
For those having rising problems, I’ve read somewhere to turn your oven on low and put the bowl of dough on the stove. The heat from the oven helps it rise.
Well, these english muffins don’t get bubbles nearly as big as store bought muffins, so keep that in mind. You might try letting them rise longer so the gas pockets have time to get bigger. A hotter skillet will actually work better than a cooler one, so that shouldn’t be the problem. When the skillet is nice and hot it forces the air to expand rapidly which should help bubble formation (like in my recipe for naan). I’m glad you enjoyed them anyway! Hopefully you get some better bubbles next time :) Oh, and I believe Alton Brown has an english muffin recipe that uses a batter instead of a dough and that supposedly produces very large bubbles. So, you can give that a try too!
Beautiful recipe! I made them yesterday and they taste great! I didn’t get big bubbles inside… The yeast frothed, the rises went well. After I cut them, they seemed to double in 45 min. Very carefully lifted them to my pan. I used a cast iron skillet pan that I use to make tortillas. Do you think I didn’t let them rise enough? Or the pan too hot? I will definitely be making them again with some adjustments to see if I can get more bubbles? Thanks, Kim
Anon- hmm, its hard to say where the problem might be without watching the process but here is the answer to the flour question: first you add 1.5 cups all at once and stir it in. Then you add more, .25 cups at a time until it forms a ball and you can no longer stir with a spoon. Then you continue to knead in even more, until you’ve totalled about 3 cups from start to finish. Depending on the amount of moisture in your flour, you may need slightly more or less than 3 cups. I hope that helps! :)
I made your recipe twice and for some reason my dough will not rise. My yeast got bubbles and frothed up in the water. I also noticed that you say to have 1 1/2 cups flour but your recipe calls for 3 cups. My dough was incredibly sticky the first time and I felt like I was adding flour forever to get it to ball up nicely. Not sure what is wrong but I am anxious to get it to work…
Thanks so much for this!!! We loved them! Though I agree with Beth M., lift carefully…a couple of mine “fell” a bit. Will definitely makes these again and double the batch!
Never mind to that comment, I think it was in the pizza dough where I was not sure!
Do you use active yeast?
You just lift them carefully :) They might fall just slightly, but those big bubbles will still be in there. To be fair, this is one of the more complicated recipes on the site! :P
I don’t know why, but my brain is having a hard time wrapping around the concept of letting them rise and becoming very delicate and then placing them on a skillet. Won’t they fall? I mean, when you pick them up, won’t you basically be bursting them? I’m worried to try and then they fall and are all dense! I’m probably just totally lame and I know it’s something simple!
I am so excited to have this recipe — found this link on Pinterest! I love love love whole wheat EM and have often considered making them myself. Thanks for doing all my research for me ;) I like them toasted well with my homemade chicken sausage patty tucked inside, or loaded with butter and apricot jam. Mmmm!
The yeast mixture didn’t get as frothy as I had expected. This is the first time I have ever made a bread type food so I am not too discouraged. Your recipe looks so yummy I will have to keep trying. Thanks for the quick response. Definitely not going to give up!
Anon – it’s hard to say without having watched you make them… did your yeast get frothy after you dissolved it into the water with the sugar? This lets you know if the yeast is active. Also, sometimes you just need to let it rise longer. Room temperature and other factors can greatly affect the rising. It’s always hot and humid here so my bread always rises easily. Lastly, don’t dismay! This is probably the most complicated bread recipe I’ve made and it takes a bit of effort to get it right! Keep trying!
My first attempt making these and it looks like an epic failure. The dough did not rise to double in size. Where did I go wrong?
I’m in New Orleans, Louisiana. I just happened to be online so I saw the comment notifications right away :) Glad I could help and I hope they turn out well for you!
Ok, it wasn’t too sticky and was soft and pliable so I think it will work out well. Thanks for the quick response! Where are you located? I’m in Vancouver BC!
No, you won’t need to add it after it rises. The amount of flour needed for bread recipes will vary from person to person and each time you make bread because of the amount of moisture in the flour and air. So, you kind of have to just get a feel for when you’ve added enough flour. For this recipe, you want the dough to be very soft and pliable which means you don’t want to add very much flour at all. Just enough to keep it from sticking to the counter top. Bread can be tricky but you get the hang of it eventually :)
Ok thanks, I have about 1/2 of a 1/4 cup leftover (because I wasn’t sure if I was supposed to add it in), do you think I should leave it out or knead it in after the first rise is finished? It’s rising now…
Oops, looks like I made a calculation error! Follow the written directions :)
This looks good! Your recipe calls for 3 cups of flour but your directions only mention 1 1/2 cups and then adding 3/4 more. That equals 2 1/4 cups, so when do you add the other 3/4 cups of flour? Before kneading for 5 min?
I made them… amazing. I used half whole wheat flour, and the turned out perfectly. I love English Muffins!
I’m defnitely trying this one this weekend, for my mom’s birthday brunch, with eggs benedict <3
Laura – I’m not too familiar with using mixers to knead dough but I think it would be fine with this. This isn’t a dough that you have to worry *too* much about over kneading… not like a biscuit dough or pie crust dough.
I’m so excited to try these, my DH loves english muffins but they’re so expensive at he store (as most already noted)! Would it be okay to use a Kitchen Aid mixer for the dough or do you think that will overwork them?
This comment has been removed by the author.
Heidi – I would definitely freeze them after cooking (and cooling). Baked bread freezes really well. And if you slice them first, you can pop them straight into the toaster from the freezer like a toaster waffle!
I just made these for the first time & they are a big hit, I’d love to be able to double or triple the recipe & freeze some, do you know if they freeze well & what the best way to do it is, before the stovetop, after cooling, not at all?
Mary – go ahead and try turning the heat up a little bit. Every stove is different so your medium might be equal to my low :) Experiment until you get the inside cooked and the outside golden brown.
I absolutely LOVE these muffins-they are tender, flavorful, and SO much better than the store bought! I discovered your blog a few days ago, and I’ve made this recipe twice already, and I’m planning on making more of your dishes!
The only problem is that on low on my stovetop, these are taking about 15-20 minutes per side. I am still getting 8-9 per recipe, so I know I’ve rolled the dough out to the correct thickness. Any ideas?
Christine – if you cook them in the oven they’ll kind of puff up like a dinner roll instead of being an English muffin shape. Unfortunately, I think you *have* to make them on the stove :P
Any suggestion how to cook those in the oven?
I made them with 100% whole wheat flour. I grind my own flour and I didn’t use 1/2 white or anything. These were great!!! All though next time I’m going to add a little more salt because they were a bit bitter, I think due to the wheat. I so love this site and all the recipes. Thank you so much for all your work on this site. I’ve told so many people about you!!
I am definitely making these for my DH. He is nuts for EMs. I’m going to use gluten free flour, and see if he notices. ;D
I made this one over the weekend and I have to say I was scared getting started. Seemed way out of my league, but they came out great and I got rave reviews from my husband who is incredibly picky. I ended up getting 7 muffins out of the recipe. Oddly, I think my husband liked the muffins that came out of the “reused” dough better than he liked the ones from the initial cut. Not sure what to do with that info, but I will definitely take a closer look at which are which next time. I’m very excited about being able to make these so easily from scratch.
Beautiful English muffins! I love the pictures of the dough rising – they are fraught with anticipation. I have a non-stick griddle that I use to make English muffins and I’ve stopped using cornmeal on mine because it scratches up the griddle. Just a dusting of flour works well if you’re using non-stick.
I am an English muffins fanatic, too and your receipe looks great, thank you for sharing!
I made these this evening and holy gosh on a cracker…fantastic!! So easy, and they came out absolutely beautifully. I will NEVER go back to the (more expensive) hockey pucks they sell at the grocery store.
Anon – You should be able to do it without non-stick spray because the cornmeal should keep it from sticking but using non-stick spray won’t hurt if you’re nervous!
I just made these, and they are TERRIFIC! I am going to try them next with the last rise in the fridge overnight, so we can have fresh ones in the morning ;) I just love your blog!
They are rising now, do I spray the skillet with non stick spray or just throw them in?
these were delicious. i think i made them too big because i only got 7 out of the recipe. next time i would definitely double it to make more. my only problem was that my dough was way too sticky after adding the amount of flour you did, and i was trying to knead it anyways. now i know better for next time. thanks!!
I can’t be the only one who wants a recipe for the fig spread! If not that, then any other fruit spread would suffice :)
Anon – I’m not sure about using soy milk because I’ve never tried it but I’m going to guess that it would work. The milk doesn’t play a huge chemical role in the recipe and since soy milk has a little bit of fat and a little bit of sweetness just like dairy milk, it should be okay.
Can you use soy milk instead of dairy milk?
Great recipe! I used half white flour and half whole-wheat pastry flour, and they came out very well. I should have let them rise longer (and in a warmer place) for the third rise (after cutting into circles), so the nooks and crannies were not quite as pronounced as yours, but they are quite delicious and were relatively easy to make. I made a double batch, and will definitely make these again.
These look soooo good and so easy! I’m gonna try them this weekend; I’m in such a cook-all-kinds-of-bread mood, so this is perfect. Then I’m going to try your naan recipe, then the ciabatta…
just found your site, love it! I’m attempting to make these today!
Well, these are now a staple where I work!
I made a test batch there, about 2 weeks ago since the oven is amazing compared to mine and after the owner tasted them, they got swapped out for the bagels we normally used! The cost savings was just insane, but I did promise to try to make your bagel recipe for any of the diehards that want them lol.
I also made a gluten free version with a special flour blend. They are still so so so much better than anything I could find in the gluten free section of the grocery store. With the added side benefit of not costing me about 1$ per muffin. Yeah, being different is costly to say the least. All whining aside though, the recipe still worked with that change which to me shows how good it is. Gluten free version came in at 2.53$ simply because of the cost of the flour blend. Still a whopping savings of 3.47$ per 6.
I made them really big, did I mention that lol (at least the ones for me at home)
Thanks again Beth.
I didn’t have any corn meal and was a little worried that it would make a difference. They turned out awesome only thing I would do different next time is to get a bigger cutter than a highball glass.
I had bought some bread flour when I tried to make ciabatta (which didn’t work :P) but I usually just use all-purpose flour. I get pretty good results with it and can’t really tell the difference… but that’s probably because I’m not a master bread maker! ha! I probably will post a basic sandwich bread recipe at some point because I’ve gotten so many inquiries about it. Right now I’m waiting for my broken wrist to heal so just hang in there :)
Hey Beth these were great. My wife eats EM almost every day and she always buys them on sale. Now we can save even more by making them from scratch! I think I may try 50/50 whole wheat next time. Can I ask – did you use bread flour for these? Do you for all your breads? I’m off to try your bagels next….
–Dave A
Your amazing Beth! I made two batches and found that they keep well on the counter in some Tupperware. I love to toast mine and make a sandwich of butter and chicken nuggets, and dip in ketchup :D Sounds weird but soooo goood.
These look great. I got some of your biscuits in the oven now, and I am going to make some corn bread next, and then these. I can’t wait.
I absolutely *hate* making bread but this I am going to have to try. I love to make egg sandwiches and will when I make these.
They look delicious! I love EM but have never made them but will have to try it now! I’m new here and really like your blog. Way to go!
ericat18- I’ve never made these with WW flour but I have found that most breads work well with a 50/50 mix. Using more than 50% WW flour usually tends to make bread heavier and more dense… but it might be worth a try!
Leslie – I’m storing mine in the fridge. You can freeze whatever you think you won’t eat within a week :) Making a double batch and freezing them is a really really good idea considering the time needed to make them.
How do you store these wehn you are finished?
This is amazing! I have all the stuff in my cupboard right now to make these! I may make these this weekend
I am super excited to try these. We like english muffins but I am too cheap to buy them. Thanks so much for posting this recipe.
I’ve made English muffins before but I only let them rise twice and they baked in the oven. The skillet sounds interesting! I’ll have to try your method.
My favorite way to eat English muffins is with a smear of homemade pizza sauce and slice of cheese toasted in a toaster oven. This was my breakfast of choice throughout most of high school. :)
Those look fantastic and are perfect timing for my, “oh no english muffins are not on sale and I’ve run out from the freezer,” panic of yesterday. YAY
These sound great. We have given up English Muffins since I started making all my own breads. Have you tried using whole wheat flour or would that not turn out? What about half and half? Can’t wait to play around with making these. Thanks!