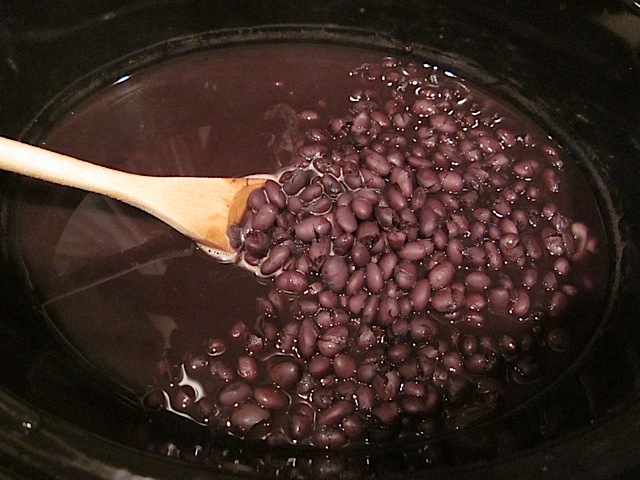
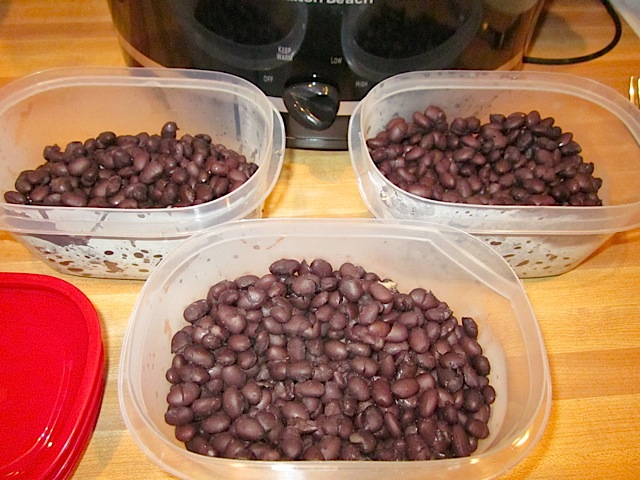
I know many of you Budget Byters already cook your own beans but I wanted to make this post for all of the newbies out there. Beans are one of the most economical and nutritious foods available so I try to use them in recipes as often as possible. Canned beans are quick and convenient but with a little planning ahead, dry beans can be just as easy and HALF the cost of canned.
Many people (including myself) shy away from cooking dry beans because it seems like such a daunting chore with the overnight soaking and hours of cooking. What I’ve discovered is that cooking beans can be as easy as “setting it and forgetting it” and, thanks to Kalyn’s recent post, I now know that presoaking is not even necessary! If you cook a large batch, the beans can be divided up into two cup containers, frozen and then pulled out of the freezer as needed. Taking frozen beans out of the freezer is just as convenient as opening up a can!
Last night, I cooked up a batch of black beans for today’s soup. The final cost for one can equivalent of dry beans was $0.40 cents. Compare that to a store bought can which usually runs me about $0.79 and I’ve cut the cost in half. Plus, I’ve eliminated salt, preservatives and a lot of wasted packaging. Have I convinced you yet?
*NOTE* This method is not advised for kidney beans or beans in the kidney bean family (like white kidney beans or cannellini) because they contain a naturally occurring substance called Phytohaemagglutnin, which can be toxic to humans and cause severe GI distress. The beans must be cooked in a full boil for at least ten minutes to break down this substance, and most slow cookers do not achieve this level of heat.
How to Kick the Can (of beans)

This post contains some affiliate links, which means that we make a small commission off items you purchase at no additional cost to you.
Here is how it’s done:
STEP 1: Pour one pound (or two for an extra large batch) of beans out onto a baking sheet and sort through to remove any stones or debris. Transfer the beans to a colander to rinse off any dust.
STEP 2: Place the cleaned and sorted beans in a slow cooker and add 6 cups of water for every pound of beans. Put the lid on, set the cooker to HIGH and let her go. Beans that have not been presoaked will take 4-6 hours to cook on HIGH.
STEP 3: Once the beans are tender, pour them into a colander and give them a quick rinse. Divide the beans into containers (re-sealable or zip top freezer bags), label, date and freeze until ready to use! Easy as that.
One pound of dry beans will yield about 6 cups of cooked beans, equal to about 3 cans.

The hands-on time to make these beans was only about 15 minutes. Once they were cleaned and sorted, they go straight into the pot and then I didn’t have to do ANYTHING until I checked them four hours later. Then it’s just a quick drain, rinse and pack into containers.
You can cook beans on the stove top if you don’t have a slow cooker although it takes more attention and care. Just place them in a large pot with a lid (same water/bean ratio), bring it up to a boil then reduce the heat to low and let it simmer until tender. Do not let the beans boil heavily or else the delicate skins will disintegrate and you’ll be left with nothing but bean fragments.
If you have any tips, tricks or notable experiences cooking dry beans, share them in the comments section below!
…the black bean soup recipe should be posted later tonight ;)


cpamomma – I think you need to get fresh water to get rid of the gas stuff… but in all of my years of bean making and doing the soak then add fresh water method, it has *never* lessened the gas for me :P
Curious about Anonomous’s comment about setting a timer to start the cooker after they’ve soaked during the night. Interesting…so, you don’t have to discard the water they soaked in and add fresh before cooking them? I always thought you did. Can you soak them, then cook them in the same water, and still get rid of the gas causing stuff?
I’m going to second the pressure cooker method; it’s awesome! Not only does it cook the beans up in a fraction of the time, but you’ll infuse them with WAY more flavor.
Thanks for your prompt help, Beth! I’ve got one crock pot of black beans going, and one crock pot of kidney beans going :)
Veronica – I would say about 4-6 months. You just have to make sure to keep some of the liquid in there so they don’t dry out. Even air-tight containers let a little evaporation happen. :)
Oh okay :) How long do they last in the freezer?
Veronica – I’m really not sure! I’m not experienced with canning at all, which is why I go the lazy route and just freeze them :P
Is it possible to can beans? I’ve never done canning before, but was wondering if it’s an option with beans :)
I know this is old….It is possible to can beans. I did a big batch of beans for refried beans. The only thing is that they are not mashed up, because with the density all the air might not be gotten out, and then bacteria can grow. When I wanted to use them, I just opened up a jar, mashed them with a potato masher, or threw them in the food processor, warmed them up and I had refried beans! Here is the link I used: http://thebeginningfarmerswife.blogspot.com/2008/06/canning-refriedburrito-beans.html
If you want to cook the beans a little faster try the pressure cooker! I did 4 pounds tonight of a mixture of red, pink and black beans. They were done in about 40 minutes.
Gawbyn, I just froze them in the containers that are pictured above. I found that it works best if you include some of the liquid in the container and then just drain it off after thawing. I try to use the frozen beans within 3-4 months. Give it a try, it’s easy! :D
Maybe I missed it, but how would I go about storing and freezing for future use? Do I have to use them in a certain amount of time?
Hooray! I’ve been meaning to do this, and now I’m completely inspired!
Thank you so much for posting this! I had wanted to kick the can for awhile but this finally inspired me to do it. Now I will never go back! :)
Soaking the beans is better for your digestion b/c it will neutralize the anti-nutrients in it. Even though it takes longer, it’s better for your health. If u have a timer on the slow cooker, u can set it start in the morning after it’s soaked.
If you’re soaking beans to improve their digestibility (soaked beans tend to be easier on the system and reduce–though not eliminate–gas issues), you don’t want to go that route, though. You want to drain off the soaking water and put fresh water in.
Still, if you’re going to slow-cook your beans, you can soak them in your cooker’s crock, drain them, add fresh water, and start them. I never actually found soaking them to be much of a chore. I just set my beans to soak in the evening while I’m washing my dinner dishes, and then drain them and put them in the slow cooker the next morning.
Two of the best kitchen investments I’ve ever made are as follows: a small upright chest freezer and a 3-in-1 pressure/rice/slow cooker. These two purchases have more than paid for themselves. Not only can you save money by cooking and freezing your own beans, you can same time with a pressure cooker. I used to be terrified of using the stove-top pressure cooker, but Fagor makes and excellent electric pressure cooker that also can be used to make perfect rice, risotto (in six minutes), yogurt, and anything else that requires a slow cooker. We use this device almost every night! The freezer has also been fantastic. No more cramming everything into the refrigerator’s freezer. Can double and triple recipes and freeze for quick meals on busy nights. Yes, kick the can!