I’m pretty much a pizza addict. I want it all the time. Thin pizza, thick pizza, frozen pizza, artisan pizza, I want it all. I love exploring the pizza frontier, which is why I decided to test out this No Knead Pan Pizza technique. I’ve seen the technique quite a few places around the web, but this post from Serious Eats has a really excellent tutorial with photos.
The idea is simple. Make a basic batch of no knead bread dough (I used my awesome Focaccia Roll dough), plop it into a well oiled cast iron skillet, top it with your favorite goodies, then bake at a really high heat. The outer crust gets nice and crispy from all the oil, the inside dough is thick and bubbly, and the whole thing is just divine. Plus, as always, it’s super cheap! Hooray pizza night!

As mentioned before, I used the Focaccia Roll dough for my no knead pan pizza (halved to fit my skillet, plus added a little olive oil), I had some left over sauce and cheese in my fridge, and I stopped by the salad bar at the grocery store to get a handful of vegetables for toppings (my salad bar pizza method). This no knead pan pizza is great for using up leftovers, so keep this trick tucked up your sleeve. You can use leftover BBQ sauce as a base instead of red sauce, use up extra beans, cheese, veggies, or meat, whatever you have on hand. Just keep in mind that the dough needs at least 12 hours to do it’s thing, so you have to plan it out at least one day ahead.
No Knead Pan Pizza

Ingredients
DOUGH
- 2 cups all-purpose flour ($0.30)
- 1/8 tsp instant or bread machine yeast ($0.02)
- 1 tsp salt ($0.05)
- 1 Tbsp olive oil ($0.16)
- 3/4 to 1 cup water ($0.00)
PIZZA
- 1 Tbsp olive oil ($0.16)
- 1/2 cup sauce ($0.40)
- 1 cup shredded mozzarella ($0.99)
- Toppings of your choice ($0.84)
Instructions
- The day before, combine the flour, salt, and yeast in a bowl. Stir until they’re very well combined. Add 1 Tbsp of olive oil and 3/4 cups water. Stir until the dough forms a ball. If there is still dry flour on the bottom of the bowl or the dough doesn’t form a single, cohesive ball of dough, add more water, 1 Tbsp at a time until the dough comes together. The dough should be slightly sticky and shaggy in appearance.
- Loosely cover the dough in the bowl and allow it to ferment for 12-16 hours at room temperature. This develops the gluten, making kneading unnecessary.
- When it’s time to make the pizza, begin preheating the oven to 450 degrees. Oil a cast iron skillet with another tablespoon of olive oil. Use the excess oil from the skillet (there will be a lot) to oil your hands and the dough in the bowl. Pull the dough out of the bowl and place it in the oiled skillet. Press it down into the skillet until it covers the entire bottom of the skillet (it will be very loose and soft).
- Top the pizza with sauce, cheese, and your desired toppings. Cover the pizza edge to edge with the sauce, cheese, and toppings. The dough will be very thick, so there is no need for a dry edge or crust around the outside.
- Bake the pizza in the fully preheated oven for 18-22 minutes, or until the top is golden brown and the cheese is bubbly.
See how we calculate recipe costs here.
Equipment
- Cast Iron Skillet
- Mixing Bowls
Notes
Nutrition
Scroll down for the step by step photos!

This post contains some affiliate links, which means that we make a small commission off items you purchase at no additional cost to you.
How to Make Pan Pizza – Step by Step Photos
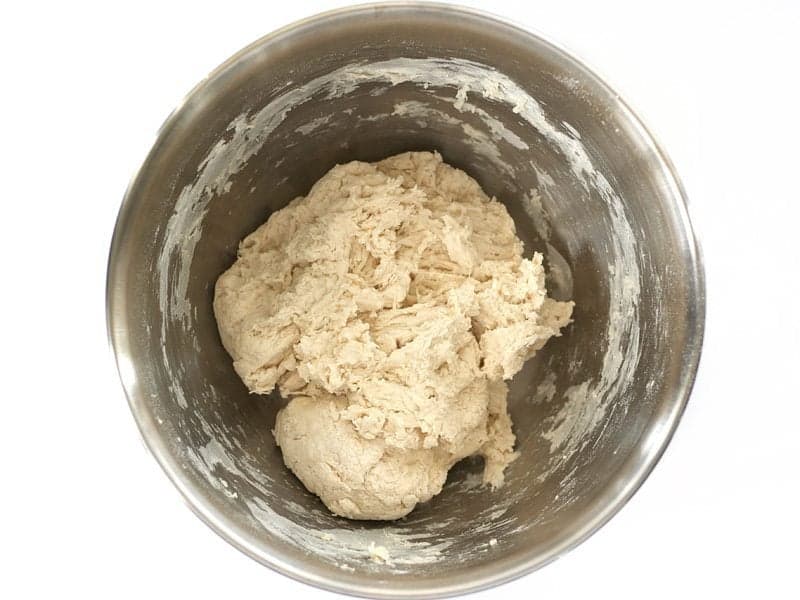
Begin the dough the day before so that it has time to “ferment” for at least 12 hours. In a bowl, stir together 2 cups all purpose flour, 1/8 tsp instant or bread machine yeast, and 1 tsp salt. Once those are well combined, add 1 Tbsp olive oil and 3/4 cups water. Stir until the dough forms one cohesive ball. See how there is no dry flour left in the bowl and the dough is all in one piece? If needed, add more water 1Tbsp at a time until it forms this sticky ball of dough.
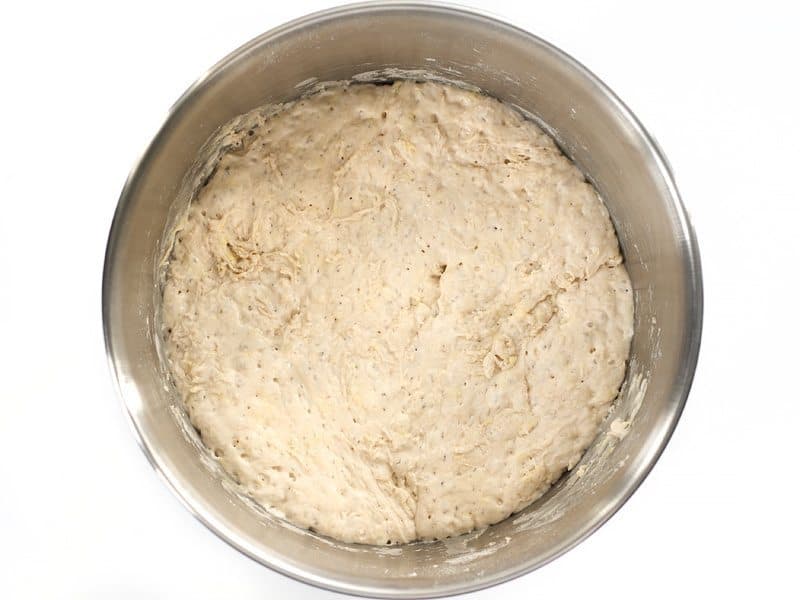
Loosely cover the dough and let it ferment at room temperature for at least 12 hours. During that time, it puffs up and becomes light and airy. It’s still very sticky, though…
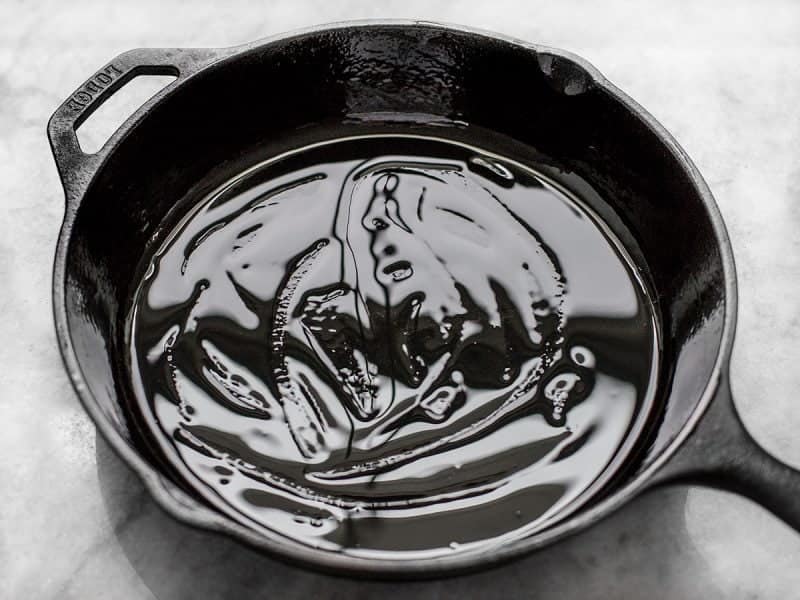
Begin to preheat your oven to 450 degrees. It needs to be FULLY heated before you put the pizza in there. Add 1 Tbsp olive oil to a 10 or 12 inch cast iron skillet and spread it around. There will be a LOT of oil, but that’s what gives pan pizza that awesome crispy crust.
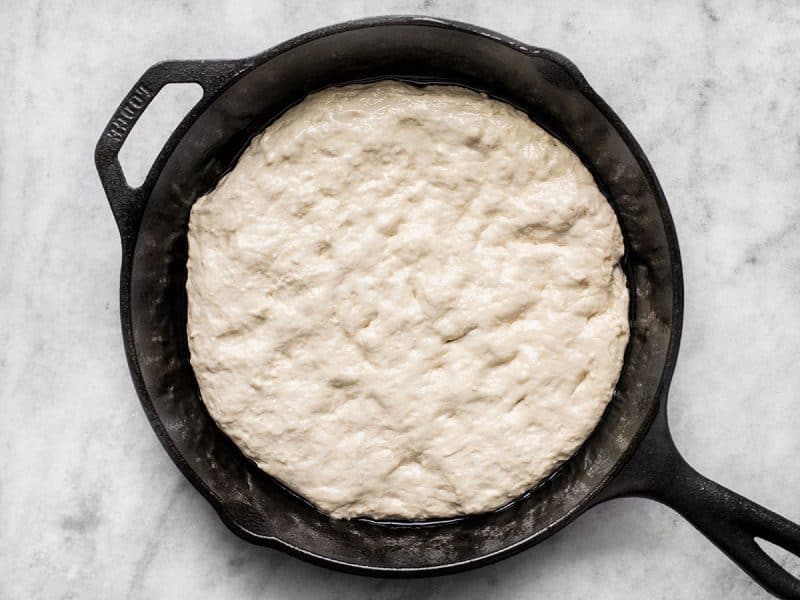
Use some of that excess oil to coat your hands and that sticky ball of dough, then transfer it from the bowl to the skillet. Press it out until it covers the bottom of the pan. The dough will be VERY loose and should be easily manipulated.
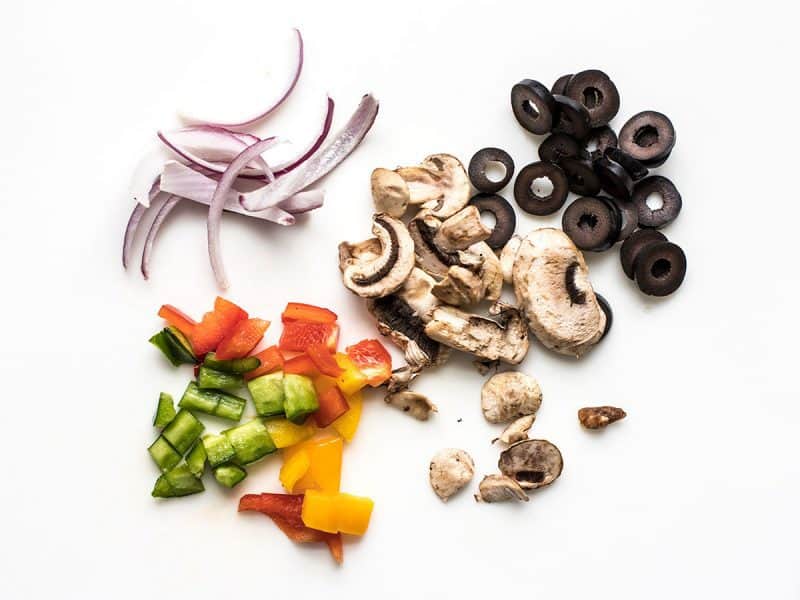
Instead of buying a bunch of things to add to the top of this pizza, I stopped by the salad bar and got a small scoop of black olives, bell peppers, mushrooms, and red onion. The small handful of toppings was only 84 cents! Much better than buying a whole package or item of each then trying to figure out how to use up the leftovers.
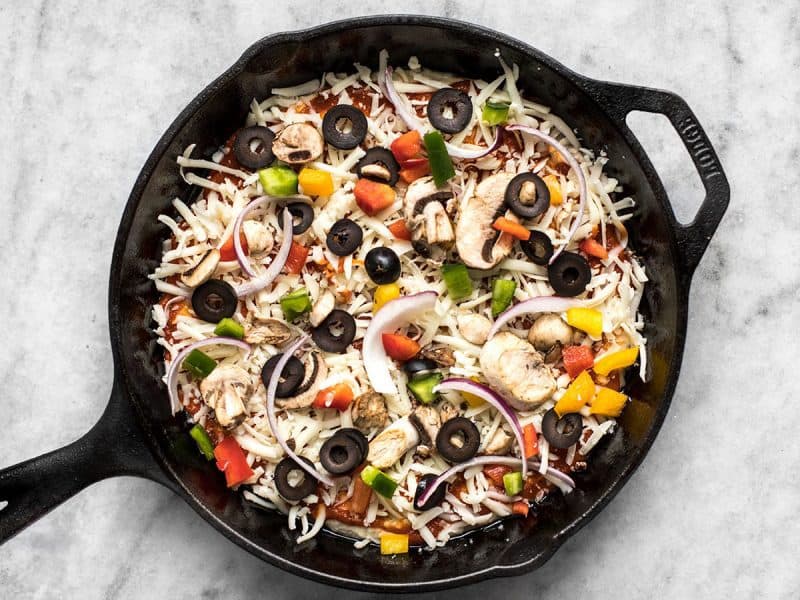
Top the pizza with sauce, cheese, and your veggies (I used leftover sauce and cheese from my fridge). Go ahead and spread the sauce, cheese, and toppings ALL the way out to the edge. The dough will be thick once baked, so you need all those toppings to go to the edge to balance all the bread and keep things moist. By this time the oven should have finished preheating, so go ahead and pop the pizza in the oven. Bake it for about 18-22 minutes (depends on your pizza, toppings, skillet, and oven), or until the edges are browned and the cheese is bubbly all over.
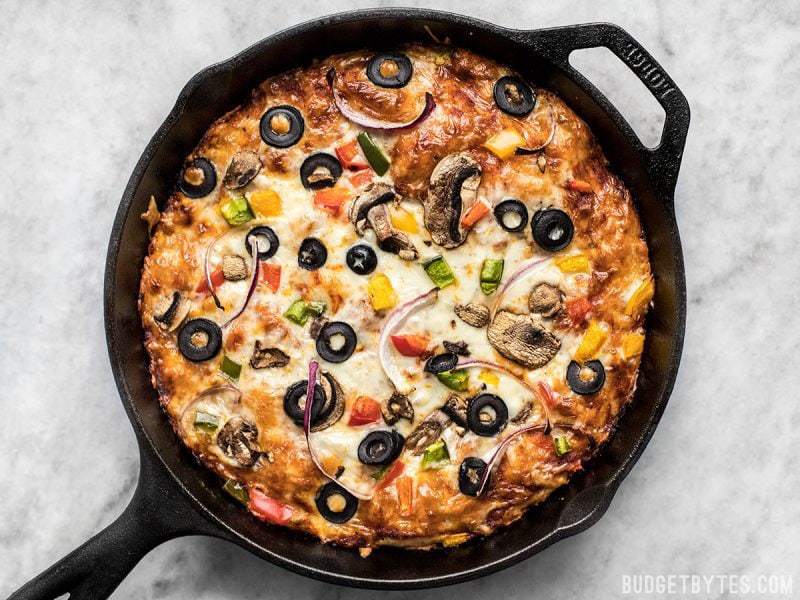
Like this! Yummm… smells like a real pizzeria in here. (take my word for it)
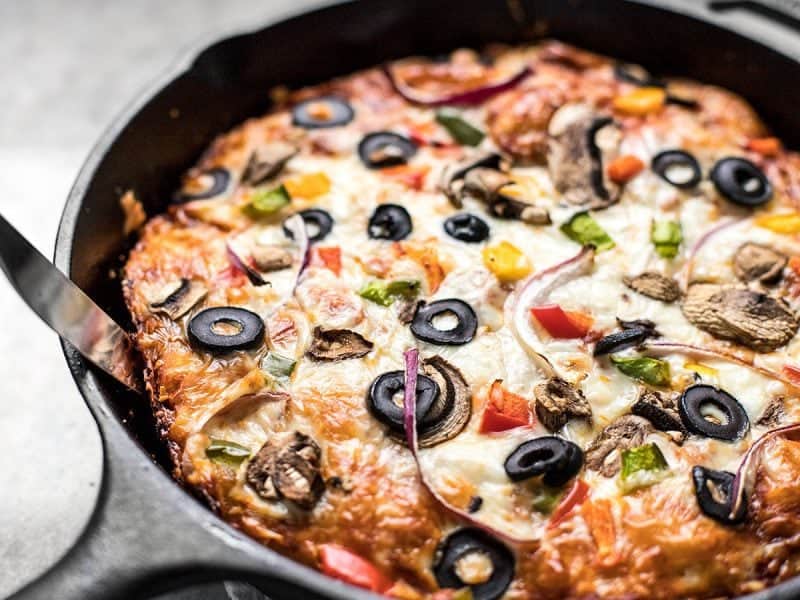
You’ll want to run a knife around the edges to loosen any cheese that has stuck to the side. Because we used so much oil in the pan, nothing should really be too difficult to loosen. Once loose, I suggest sliding the pizza out onto a cutting board to slice, rather than leaving it in the pan like I did for the photos. It’s rather hard to cut while in the pan and you may damage the finish on your cast iron!

Crispy on the outside, soft and fluffy inside, all around moist and delicious.





So good! I used a 12 inch skillet and that worked well. It’s 80 degrees in my apartment in phoenix and 10 hours was plenty of time for it to rise haha. Thanks for the recipe!
So good! So simple! We have two 5.5” cast iron pans, so we opted to make personal pan pizzas instead and it worked great! Dough fit fine split between the two, and I just used a 1/2 tbsp of oil in each pan. Still took 20 minutes to cook, no reduction there. Topped mine with sliced Kalamata olives and baby spinach I sautéed in olive oil and garlic beforehand. Such a hit, can’t wait to make it again!
Can I let the dough sit for 24 hours instead of 12-16 hours if I want to make it for dinner the next night? Or does it have to be 12-16 hours?
You should be able to make that work, but 24 hours is the absolute max.
Great idea for a change from store bought pizza! I’m wondering though, the recipe calls for 1/8 teaspoon of instant yeast; do you take that out of a yeast packet, what would you do with the remaining yeast in the packet? To clarify, I’m talking about those “strip of three” yeast packets that are sold on store shelves, but when I get them home, I put it in the butter shelf of my fridge (I live in a small trailer, and it would get lost in my tiny little pantry if I put it in there!). So what I’m asking is, can you put the unused portion of the packet of yeast in a Ziploc baggie, or do you pitch it, or use it by…? Hopefully I’ve explained myself clearly, I’ve got chemo-brain, and I have issues with making myself understood sometimes.
You have totally explained yourself well, and this is a great question — so no worries! We use a jar of instant yeast rather than the packets. Yeast keeps a long time in the fridge and the jar is less messy and much more budget-friendly than the packets (though more expensive, you get a whole lot of yeast more for the money). However, if you only bake bread occasionally, the packets are perfect! Definitely keep it and use the rest later. And yes, you can just keep the open packet in a baggy tucked somewhere safe in the fridge. It will keep until the use-by date, and potentially up to a year. ~ Marion :)
I have self-rising flour. Can I use that? Do I also need yeast? It’s King Arthur brand, pretty fresh.
Hi Jenny! Great question. Short answer: you can try it, but it won’t have the chewiness of pizza dough, and it will have a different texture for sure, as well as a possible aftertaste. If you do it, omit the yeast. Long answer: All-purpose flour and self-rising flour are different beasts. AP has about 10 percent protein, and when you work it into a dough it creates a wonderful amount of gluten which gives you a product that has a chewy mouth feel. The gluten strands act like rubber bands that help the dough stretch and prevent breaking. It also doesn’t let the pizza dough rise too high. Self-rising flour is a mix of all-purpose flour, baking powder, and salt. It has a lower protein content of about 8.5 percent. It will give you more of a cakey dough without elasticity. XOXO -Monti
I have to come back and leave another review. I’ve been making this once a week for my family for about a month and a half. It’s so delicious and easy. I actually switched to using all whole wheat flour and my family prefers the flavor and I had seasoning to the dough. It’s so easy and delicious. I love budget bytes so much. The recipes encourage me to try new things and also take ownership of the recipes to make them perfect for my family!
Okay I seriously love this! I wanted to swap out our Thursday frozen pizza nights for an easy homemade pizza and this was perfect! So easy for my 3 year old to help me prep the dough and she can even help with the toppings. I’m so excited to make this again and again!
Wondering if anyone has tried putting this in the refrigerator for a really slow fermentation? Like making the dough one night, and baking it 24 hours later? I’m guessing it should work, but I always love hearing of others experiences.
I’ve made this dough several times now. So easy and results in a great crust. I use a 12” pan and it’s pretty thick. I think it would be too thick in a 10” pan.
I’ve made the dough in this recipe several times. I haven’t had any issues preparing the dough the night before and baking it anywhere from 2-7pm. I’ve also forgotten the oil in the dough a few times and it turns out okay, not as crispy maybe.
I have a 12″ cast iron pan. I bake the dough for 10-15 minutes by itself then add the toppings and bake until done.
I also suspect the recipe would work just as well with active dry yeast if that’s what you have. I haven’t tried it for this recipe specifically but I make my no knead bread with active dry and it’s almost the same.
Fantastic recipe! Just made it for the second time. It’s a hit with my family. Definitely more like delivery than my usual pizza recipe.
I wanted to try out my new cast iron skillet so made this pizza last night and it was really great however the whole pizza bubbled up in the middle while it was cooking. I’m not sure what I did wrong, any suggestions?
Hmm, I haven’t had that issue, so I’m not sure how to prevent that. Maybe poking a fork in the center of the raw dough a few times once it’s in the pan to prevent large bubbles from forming?
Love this recipe! I’ve made it several times now and it’s always turned out perfect! Crispy edges, soft thick crust, extra cheese and toppings. Can’t ask for an easier homemade pizza dough recipe.
I made this for our lunch today and it was delicious! Yesterday for the dough I used 1 1/2 cups all purpose and a 1/2 cup semolina. I put my 12” cast iron skillet in the oven as it preheated and let it heat an additional 10 min. When I took it out of the oven I added a roasted garlic olive oil to the pan and then dropped in the crust I had rolled out and all the toppings. The crust immediately sizzled and started cooking in the hot pan so when it had finished baking it was baked all the way through and wonderfully crispy on the bottom. Thanks for the recipe!
Does the cast iron pan need to pre heated before placing the dough on it ?
Nope no need to preheat
I preheated mine because we like a really crispy crust but I’ve done it without preheating too
Delicious!! Super easy, my family is begging for this recipe to be made weekly.
Any way to manage this with whole wheat flour – even if only partially? All purpose flour is hard to find right now.
It sure is hard to find! Up to 50% whole wheat usually works pretty good with this dough, although I notice it does take on a strange grey-ish color. So, as long as that doesn’t bother you. :)
I tried this with 1/2 whole wheat bc we were out and now I find I prefer it that way!
Has anyone tried this with gluten free ( measure for measure) flour?
We just loved this. It was super easy and delicious. We didn’t have any issues with the crust not fully cooking in a 10” cast iron pan.
Thank you Jonie!
I made this and I found that the dough didn’t really bake all the way through, I’m wondering if I used too many toppings?? I also found that the one side of the dough got a sort of crust on it after sitting after 15hrs and it didn’t really go away after baked? Any tips??
Adding a lot of sauce or too many wet toppings can prevent the center from cooking all the way through, so that might be the issue there. As far as the crust while to dough fermented, did you have the bowl loosely covered? I find plastic wrap works well because it helps hold in the moisture. Sometimes I even have condensation on the plastic in the morning.
The family LOVES this!! I need to make 2 pizzas but only have one cast iron pan – could I use a pie pan?? Or do you have another recommendation??
Yes you definitely could use a pie pan or a 9×13 dish.
Going to try this soon. However, this isn’t Chicago style! It’s just a pan pizza. Google Gino’s East Pizza for a real Chicago deep dish.
I bought a 14″ cast iron pizza pan. Would this recipe work as a thin crust? We spend way too much money on ordering pizza so time to make my own!
The no-knead dough is really loose, so it may be hard to work with if stretched really thin, but you can certainly give it a try! :)
Thank you again for this great recipe!! I made it in a 12 inch pizza pan and it turned out perfect. A definite keeper😋
This was tasty, but it was a little doughy in the middle even though I cooked it five minutes longer (in a 12″ skillet). I’m not sure what went wrong.
My family ended up loving it even though a little doughy. I could only have one bite since I’m doing low carb. They want me to make two next time ( using my 10″ skillet too). Thanks Beth for these great recipes! My family loves you. LOL
Awww, thank you! :)
Recipe worked great and was the first time I had ever made pizza dough from scratch. Only alteration I made was heating the cast iron on medium-low heat before adding the dough to it. I believe this made for a crispier crust.
Judging by what I’ve read re: this and other pizza recipes, I can’t wait to make this and your others. You have a really nice blog and your recipes look great and are well thought out. I, too, am a pizza fanatic, and this is a really good collection of mouth-watering offerings. Keep up the good work, Beth!! I’ve just signed up for your email alerts.
The salad bar idea for toppings is brilliant! Thanks for another great recipe!
Great recipe! My oven quit on me halfway through and I had to finish it on the bbq. It was a resounding success! I will do it on the bbq again when we want pizza in the summer but I don’t want to crank up the oven. Thanks for another great recipe.
I live in NJ, so we have REALLY awesome pizzeria pizza, hard to beat. However, I do occasionally make-my-own using a Boboli crust. at about $2.75 per crust (household size requires 2 made at a time), it’s a less expensive alternative to ordering pizza and tastes pretty good. I would say this recipe is on par with a Boboli. I did purchase pepperoni to put on one pie and I used fresh mozzarella to really give it a great taste but there was something different I couldn’t quite put my finger on. I’m not a great cook so I couldn’t quite figure it out, my best guess was that perhaps I needed to add a little more salt to the dough mix. Would definitely make this again.
Can I use active dry yeast for this recipe?
No, unfortunately you really need instant yeast for this since the yeast is added in dry and not proofed in water first.
If i don’t currently have a cast iron skillet is there an easy substitute?
You can use a different type of baking dish, but the way the heat transfers through different materials like ceramic or glass can change the way the crust turns out or the cooking time. You may just want to keep an eye on it to get the correct cooking time.
I have made this many many times for my family. Everyone absolutely LOVES it. Thank you for delicious affordable recipes.
Awesome! I use a bigger skillet and adjust the heat down a bit plus bake a few minutes longer. We have this pizza often!
I wonder if this dough is freezable–has anyone tried? It’s so, so good.
I think no-knead dough is the only type that I haven’t tried to freeze. Now I’m curious.
It worked perfectly. This is a delicious recipe. Thanks Beth, everything on this site is fantastic.
This is so good! Made it for lunch today and my family devoured it! Has to start a second crust for tomorrow. Thanks for the great and easy recipe!
I wanted to add to my original review: I have made this pizza three times in four days! It is THAT good. The third time I used white whole wheat flour since I ran out of regular all-purpose. Turned out great!
Is it much of a big deal if I have put the whole packet of yeast? !? I went to measure it and the whole thing fell in the bowl with flour and stuff??
It might over ferment if left for 12 hours with that much yeast, but I haven’t tested that theory. I hope it worked out okay for you!!
Wonderful recipe, thank you!
I didn’t have any sauce but I’m not a big fan of pizza sauce anyway, but I did have fresh garden tomatoes. Recently, my store had a buy 1 get 2 free special on high quality balls of mozzarella so I scooped ’em up.After spreading the fermented dough on a pizza stone, I drizzled the dough with a little olive oil and sprinkled some Italian seasoning over it. I seeded and chopped the tomatoes, tore the mozzarella into pieces with my hands…and oh my word, the finished product was delicious! It was much better than delivery which usually packs a $20 punch I can rarely afford. YUM YUM YUM…make this recipe!
I got a great tip on cast iron once. I was told you can pick up old rusted looking ones at thrift shops & yard sales and them recondition them pretty easily. The Lodge website tells you how or maybe even a “how to” video.
STRONGLY agree with this comment! I collected cast iron pieces for a while and found some WONDERFUL antique stuff for pretty cheap and much better than Lodge. Look for Wagner or Griswold pieces if you can, they are thinner than Lodge and that is not a bad thing. They are usually much smoother on the cooking surface, I have reconditioned some that have a near-glass finish and they are SUPERB.
This was wonderful and easy!! And my college kid loved it. I made the dough the night before and let it sit out for 12 hours. It was still early so I put it in the frig until about 2 hours prior to preparing. Turned out perfect, I might have to go buy a second skillet though.
Hi Beth! I love this recipe. Can the dough sit for longer than 12 hours? Like 24 hours? Thank you! I love your site!
Yes, you can let it sit out for a couple of hours to get the yeast started, then keep it in the fridge for the remaining 24 hours. It will continue to ferment, just at a slower pace. :)
Hi Beth! I love this recipe and really want to make it. Is it possible to have the dough sit for longer than 12 hours? Even possibly 24 hours? I’m thinking I could make the dough the night before instead of in the morning before work.
Thanks for all you do! I love your site.
Yep, if you need to leave it for more than 12 hours, you can just pop it in the fridge after the first few hours. This slows down the fermentation process. It can actually sit in the fridge for a week or so.
This recipe is excellent! I’ve used your traditional dough recipe successfully for a while now but this one is so much easier. I love that I no longer have to knead or proof the yeast. This crust comes out soft in the middle and crisp on the outside. It also makes the perfect amount to cover my pizza stone.
I’ve found that the dough doesn’t dry out if I put a wet cheese cloth covering the bowl and then plastic wrap over that.
Thanks for the fantastic recipes!
Could you use an enameled cast iron skillet to do this? I have a dutch oven type cast iron pot that is enameled.
Yes, that would probably work just as well.
This recipe is DANGEROUS! So simple, so delicious! Beth, you are the best!
I’m not sure what “loosely cover” should mean – I covered the dough with a kitchen towel, and after 8 hours a very hard outer shell has formed. It doesn’t look promising. I live in a very dry climate.
For other bread recipes I’ve rubbed dough with olive oil before leaving it to sit for a long time, and/or used a damp towel. Or maybe I just didn’t use enough water with the dough?
Ah, the dry climate probably made the biggest difference. A damp towel probably would work well. I just covered the bowl with plastic, but left it loose so that some air could flow in and out.
This is exactly what happened to me and I also used a towel on top. Next time I will use cling wrap or a wet towel. It didn’t rise at all and is dry and sad. I don’t live in a dry climate (Portland, OR!).
This looks good! I want to try it, but I don’t have a cast iron skillet. The only two kinds I’ve got are non stick and stainless steel… Now that I think about it, I do have a griling cast iron, but I’m not sure this would work or if I would like to have a wavy pizza! Do you think it would work in the stainless steal pan? Or even in the grilling cast iron?
You could definitely do it on the grilling cast iron if you don’t mind the wavy bottom. :) The issue you run into with stainless steel is that it’s just not as thick or heavy as the cast iron, so the heat won’t be quite as even. You run the risk of the outer edge browning/burning too fast. BUT, I haven’t tried it and it probably depends on the particular pan in question (and make sure it doesn’t have a plastic handle!).
I was wondering if I could make the dough ahead of time, storing it in the fridge… then bring it out the night before to rise/ferment? For that matter, could I freeze the dough, then thaw it and do the same thing?
Yep, you can actually leave it in the fridge to ferment for a couple of days, too. It will continue to ferment in the fridge, just at a slower pace.
I was wondering what temperature “room temperature” is for you. My house is pretty chilly in the winter with the thermostat set at 62. If this dough can be refrigerated, then it sounds like I could make this, but I might need to allow it to rise a bit longer. How can you tell it is ready to be used?
Yep, you can definitely do it in the refrigerator, as well, but it will take about twice as long. Room temp around here is somewhere between 70-75, depending on the season. You’ll know it’s ready to use when it’s big and bubbly, like in the second picture of the step by step photos.
hi! Would this work in another dish than cast iron? Thanks!
It might work okay in a heavy ceramic dish. The special thing about cast iron is how it conducts the heat. Ceramic does a pretty good job, too, but not quite as well as cast iron.
You can also use a round cake pan!
Thank you so much for this recipe and your wonderful website! This one turned out perfectly and was a huge hit with the family. We have recently enjoyed your sesame chicken and yakisoba, and your swamp stew is a staple at our house! I love that I can cook such yummy food, even when money is tight. Thanks again for all you do!
I want to make this but I keep having trouble with the dough! It keeps making stiffer bits on top within 3-4 hours of being left on the counter. I’ve made the original focaccia recipe and that worked fine, but the three times I’ve tried this (with the oil in the mix) it gets stiff floury bits on the top like a shield. Is that from not enough water? Too much water? I can’t figure out how to fix it!
Hmmm, I’ve never had that happen. Have you tried covering it loosely with plastic? That should help hold in the moisture and keep the skin from forming on top. Not enough water may be an issue, too, but it’s hard to say without seeing what’s actually going on.
I’ll give that a shot. I’m thinking it has to do with living in a hot place with less moisture in the air (ie, AZ). I think it’s basically the dough drying out on top. I’ve hit closer to 1+c of water to get it to form into a sticky ball. Ahh, the fun of cooking in a stupidly hot place.
That worked!! Thank you so much! Made the pizza last night and it was delicious. :)
I would like to try this but I don’t have a cast iron skillet. You think this would work on a dutch oven??
I think it would work in any really thick, heavy cooking vessel, but cast iron is definitely the best. :)
I’ve made this recipe five times so far and each time it turned out great. The first time I was worried because I don’t have a cast iron skillet. I used my 12″ calphalon everyday pan. This one is a keeper. Thanks so much!
Is “active dry” or “quick rising” yeast the same thing?
Hmm, I haven’t heard of quick rising, but you will definitely need “instant” or “bread machine” yeast for this recipe. Active dry yeast requires proofing in warm water before it is added to a recipe, whereas instant or bread machine yeast does not.
I can’t find this anywhere and I’ve checked Giant Eagle, ALDI, and another store. :( I also found “RapidRise” yeast.
You can buy it on amazon. They have several brands.
You are a genius.
I may have missed this mentioned somewhere, but how long would be too long to let the dough rest?
I think the yeast starts to die off after 18 hours or so. BUT, if you need to let it go longer, it can be refrigerated and kept for days without baking.
This was tasty but the crust never crisped up on the bottom. I cooked it in a 12″ cast iron skillet and extended the cooking time to 25 minutes because it didn’t seem quite finished after 22 min. While the dough was cooked through, the bottom wasn’t brown or crispy at all. Any ideas? My dough was quite loose (but not super sticky) when I put it in the pan – perhaps it was too wet and I need to add more flour next time?
Hmmm. That might work, or I wonder if raising the oven temp a bit would also help.
I’ve had good luck with putting the pan on the stove over high heat for a couple minutes after removing it from the oven, when this happens.
I haven’t tried this, but my mom used to pour cornbread into a blazing hot cast iron skillet before putting it into the oven. Made the cornbread nice and crispy on the bottom, so maybe it would work for the pizza crust as well.
This was such a great meal idea! I changed it up to use the ground beef we had on hand to make it a taco style pizza. Utilizing pantry and fridge finds I replaced the sauce with salsa, added taco seasoned beef and topped with a healthy dose of shredded cheddar and jalapeño. When it came out of the oven added chopped lettuce, tomatoes, and sour cream. Seriously no more need to order pizza! Can’t wait to play around more with variations!
Another new favorite! I like to make pizza, but don’t very often, because the dough is usually a pain to work with. But this is SUPER easy and fast, as long as I remember to mix up the dough in the morning before work!
Can I cook the pizza in a springform pan vs. a cast iron skillet? I’ve seen recipes for pizza in a springform pan, so just curious if that would work here, too. Thanks! Love your recipes!
Interesting, I’m not sure how that would compare. The cast iron is a really good heat conductor, so it might affect the texture of the dough differently than a thin spring form pan.
This method has become my go to b/c it is so unfussy. I love that I don’t have to knead the dough and deal with rolling it out, transferring it to a baking sheet or pizza stone. Plus, it doesn’t even stick to the skillet so I barely have to wash dishes when I’m done. Plus it is incredibly tasty! I’ve had good luck using the lazy pizza dough recipe from smittenkitchen (with a dab of olive oil for flavor), but your method is the best for pan pizza. Thank you for the fabulous recipe :)
I’m getting ready to make this tomorrow! Loved the article from Serious Eats. Curious: why didn’t you bake this at 550 like SE suggested?
My oven doesn’t get much hotter than 500 (it’s a very bare bones model) and it’s about 95 degrees outside, so I was content with 450 :)
Have you ever made this with whole wheat flour or gluten free all-purpose flour?! Looks amazing!
I haven’t tried that yet, no. If you do, let us know how it turns out. :)
Any thoughts on whether this would work with gluten free all purpose flour, such as Bob’s Red Mill? I adore pizza, but wheat is evil to me.
Hmm, hopefully another reader can give some advice on this one. I’ve never cooked with gluten free flour.
I made it with Betty Crocker gluten free pizza dough mix, and it was great! (I accidentally topped it before baking, but it turned out.) I’m sure if you followed the Bob Red Mill’s pizza dough mix recipe, it would work too.
this was a great recipe! we love it! the crust perfectly cooked!
Thanks for another fantastic recipe!
I am also a pizza aficianado. all types. all styles. many toppings. am planning to cook this up tomorrow and Im stoked!
I made this last night and the family loved it. I have two cast iron skillets so I had a cheese and pepperoni one for the kids and veggie for the adults. I added oregano and basil to the flour before stirring in the water and that was a nice touch. I used the convection setting since there were two in the oven, and while the outside was really crispy the inside was still a little doughy, so I think next time I’ll go down by 25 degrees and add a couple minutes. I did notice that the leftovers for lunch today tasted a little more sourdoughy than last night so maybe the goal is to not have leftovers? Not such a bad problem to deal with, really. In any case, my kids loved placing the toppings and cheese so this is going into my regular rotation.
Could I use something other than a cast iron skillet to cook the pizza in?
You could use a deep glass or ceramic pie dish.
I tried posting this once before but it didn’t work.
Is this dough freezable? You said you only used half to make this pizza so I was wondering if freezing would work for the other half to use later.
I used half of the ingredients for the original focaccia dough recipe, but used all of the dough that I actually made. The ingredients listed below were what I used to make one pizza :) I hope that makes sense! This type of dough is a little bit more delicate than regular bread or pizza dough, so I’m not sure how it would hold up to freezing.
Is there an alternative to the no-knead dough? Would a typical pizza dough recipe work?
I think it would technically work, but regular dough tends to be more dense than this fluffy no knead dough, so it will have a different end result.
I have never figured out how to do the ’12 hour’ timing. I would have to start the dough at 6 am to be able to eat at 7 pm right because of the time to make and cook? Maybe on the weekend I can start it before bed on Friday to have for lunch?????
It’s actually quite flexible, so it doesn’t have to be exactly 12 hours. :) It can be anywhere from about 10-20 hrs. I usually mix it up the night before around 9pm, and then make it for either lunch or dinner. And, if you by chance need to leave it longer, you can pop it in the fridge to slow down the fermentation.
This recipe is so perfect. We’ve made it twice since you first posted it! I actually let one batch of dough sit for 20 hours, and it was great.
I have a Lodge 10″ griddle that I use almost exclusively for pizza. I have yet to try any of the no knead breads, but I think the pizza will be the first thing I try.
The best homemade pizza! My husband took a bite and asked, “Are you sure you didn’t order this?” Thanks for posting this great method!
This looks delicious and I love the salad bar idea!
You said in the post that you only used half of the dough for this pizza. Would the other half freeze well?
I actually just mixed up half of the ingredients that were called for in the original recipe (plus some olive oil). The amounts listed below are what I used for one pizza. :)
omigosh, I just figured out my mistake..,.do I ever feel stupid! I used all the dough, missed the part where you divided it in half. Well, live and learn. At least I wasn’t feeding it to company, hee hee!
Our family can’t thank you enough for helping us keep our stomachs full, despite our skinny wallet! :-)
What would your thoughts be on this:
I bought some trader joe pizza dough which is in the freezer now & wondered if it would work similarly like the no knead version in this recipe?
It might be slightly more dense, but in general, it would work. This particular dough is very light and fluffy in comparison to regular pizza dough.
Boy, I agree with Deb…GET a Lodge Cast iron skillet…and get a Lodge Dutch Oven while you are at it :)!
Anyway, I’ve made no knead pizza for almost 4 years and I make it similarly in either cast iron or sometimes on a cookie sheet (gasp!!). I spread a bit of olive oil on the cookie sheet, spread the sticky dough with my fingers, top and bake at 425 for 8-12 minutes…depends on how large and how thick I spread the dough.
You do want the oven HOT – I preheat mine for 25 plus minutes.
Oh…forgot… I do the Artisan Bread in 5 minutes a day so mix the dough, let it be out for at least 4 hours, refrigerate and then grab a hunk for pizza, a boule, a baguette, etc.
I don’t have the cast iron pan so I imagine a pizza stone will work.
Ok, people. I’ve heard enough! What kind of cooks are you that you haven’t talked someone into getting you a cast iron skillet for Christmas! :) Everybody needs at least one – they last until the end of time. I have two from my great-(yes, great)grandma and use them all the time. Totally worth the nominal cost of a good “Lodge” brand skillet. Like all great loves, you will not regret it!
This looks like something I’d love to make for my family, but the 12-16 hours of letting the dough ferment? If I want dinner at 6pm, I have to make the dough between 1:30-5:30am? I have to be misunderstanding some part of this.
Well, that’s really just a general time estimate. I usually stir the dough together around 9pm just before I turn in for the evening and then I can make the pizza either for lunch or dinner and it’s fine. You want it to go for 12 hours minimum, though.
Beth, if you don’t have a cast iron skillet can you use a regular nonstick skillet?? I hope so! Thanks!
No, you really don’t want to use a non-stick skillet for this because it has to cook at a very high heat and you need something very thick and heavy. Ceramic or glass would be better than a non-stick skillet.
What about a square cast iron pan that has those grooved griddle lines? I know it’ll make a goofy shaped pizza but think it’ll cook the same? I realized I do have one of those and it’s deep enough for the crust.
I think it will still work the same, plus some goofy ridges. :)
BETH THE PIZZA WAS AMAZING!!! Cooked up just perfectly in the square skillet, fifty times better than a restaurant. The crust is unbelievably perfectly crispy but fluffy inside. You’ve changed my life. SO GOOD OH MY GOD!!!!
;D
Could the dough sit for closer to 24 hours? Or would suggest making the dough before work the morning of the day you’re planning to make the pizza?
It needs a minimum of 12 hours, but if it sits out at room temperature more than 18, I’d suggest putting it in the fridge for the last few just to slow it down some. I usually start the dough the night before (around 9pm) and then use it for either lunch or dinner and it’s good. :)
How do you think this would work with subbing half of the flour for whole wheat?
Up to 50% whole wheat usually works pretty good with this dough, although I notice it does take on a strange grey-ish color. So, as long as that doesn’t bother you. :)
Its been running 100 degrees outside and 85 inside here( no AC) will that be to warm for the dough to set out for 12 + hours?
Yes, you can also transfer it to the refrigerator for half of the time. That will slow it down and prevent it from over proofing.
I knead this in my life.
Hahha love it. :)
Before I got my cast iron skillet, I made pizzas very successfully on an unglazed tile, you know, like you find at the big home improvement stores. Have you ever tried this with bread flour? If so, what is the difference in the crust? I was just wondering why the recipe calls for plain flour.
Bread flour actually works better. :) I just usually don’t write that into the recipes because so many people ask if they can use all purpose instead. ha. :)
You can get a 12″ cast iron skillet at Walmart for $20 or a model with a silicon handle from Amazon for $24. They last FOREVER and are totally worth the investment. Just be sure you find directions about how to properly season the pan first – or spend more for one that’s pre-seasoned.
My adoration for pizza holds no bounds as well :) So much so that I mandate a “pizza night” (usually Fridays) every week with my bf. As if it even needs to be mandated ;) Will try this recipe out soon!
add my vote to all the above comments about how amazing this looks! i don’t have a cast iron pan either but have been intending to buy a ceramic pie plate. now i have the perfect excuse — i HAVE to buy one (any particular pie dish you’d recommend?).
also, I use this recipe for pizza crust http://allrecipes.com/recipe/quick-and-easy-pizza-crust/ it’s great for rolling out and adding toppings. do you think it would work for this recipe, too?
thanks!
mb
I don’t have a particular pie plate recommendation, unfortunately. I have a glass one myself (Pyrex, I think?).
Regular pizza dough (like the one from allrecipes) will turn out a bit differently with this recipe. The over night fermented dough has a LOT of air bubbles, which makes it very light and fluffy. Regular pizza dough tends to be a little more dense and has smaller bubbles or cells. So, it will definitely have a different texture, whether or not it’s enjoyable might be up to personal preference. ;D
I have glass pie plates, too, however, I think standard pyrex pie dishes would be too small for this recipe?
Will have to give your focaccia dough a try– thanks!
mb
That’s true, a standard pie plate is 9″ and my skillet is 10″. Seems like a small difference in print, but it may seem big in pizza reality. :)
This looks great! I don’t have a cast iron skillet either. Hmmm gotta go look around in the cabinets for something that would work ;)
Can you use the regular style yeast? What method would I take with that? Or is the instant best for this recipe?
Instant is best because it can be stirred in with the dry ingredients without “proofing” first. If you only have regular yeast, proof it in the 3/4 cup of water before adding it to the dry ingredients.
Well….YUM, I love pizza too and sheepishly admit I’ve never made my own dough! But this looks so easy! Could I use less dough for a thinner crust pizza? That’s typically what I really like! And I almost bought a large cast iron skillet last week…now I just might have to.
You probably could just use less dough, yes. :) This type of dough tends to be a bit fluffy, though, so it won’t be like a real thin, crispy crust or anything.
This may be a dumb question, but how well would this recipe work with whole wheat flour?
I’ve made bread with this type of dough with up to 50% ww flour and it works pretty well, although it takes on a strange grey-ish hue.
You have changed my life! This looks incredible. Adding it to next week’s menu ;)
You have GOT to get a cast iron skillet. It will replace most of what you’re using now and last FOR.EV.ER! You will love it. Ultra-cheap “Lodge” classic at Walmart. Go now!
This looks fantastic. I will be making it this weekend.
This looks great! Sadly, I don’t have a cast iron skillet — any suggestions for a substitution? Thanks.
Cast iron definitely works the best, but you might be able to get away with another heavy material, like ceramic (I’m thinking maybe a ceramic pie plate?)
This looks fantastic! I’ll have to try it this weekend!
How thick is the finished pizza? About an inch or less than that?
An inch, or inch and a half?
Yum! I definitely want to try this. How did you slice your pizza?
I sat there for a minute contemplating how I’d do it, too! I finally used the pizza wheel and just had to cram it into the corners. I used a sharp knife to get into the crevices where the roller wouldn’t go. You could wait till it cools a bit, then slide the whole thing out onto a cutting board. All the oil keeps it from sticking.
I don’t have a cast iron skillet. Is there any other way to make this? Looks delicious!
Cast iron will definitely work the best, but another heavy material like ceramic might give acceptable results.
It might sound odd, but I’ve made pizza similar to this and I used my cast iron enameled dutch oven (lid off). I had to slide/dump the pizza out onto a cutting board to slice it, but it all seemed to work out well.