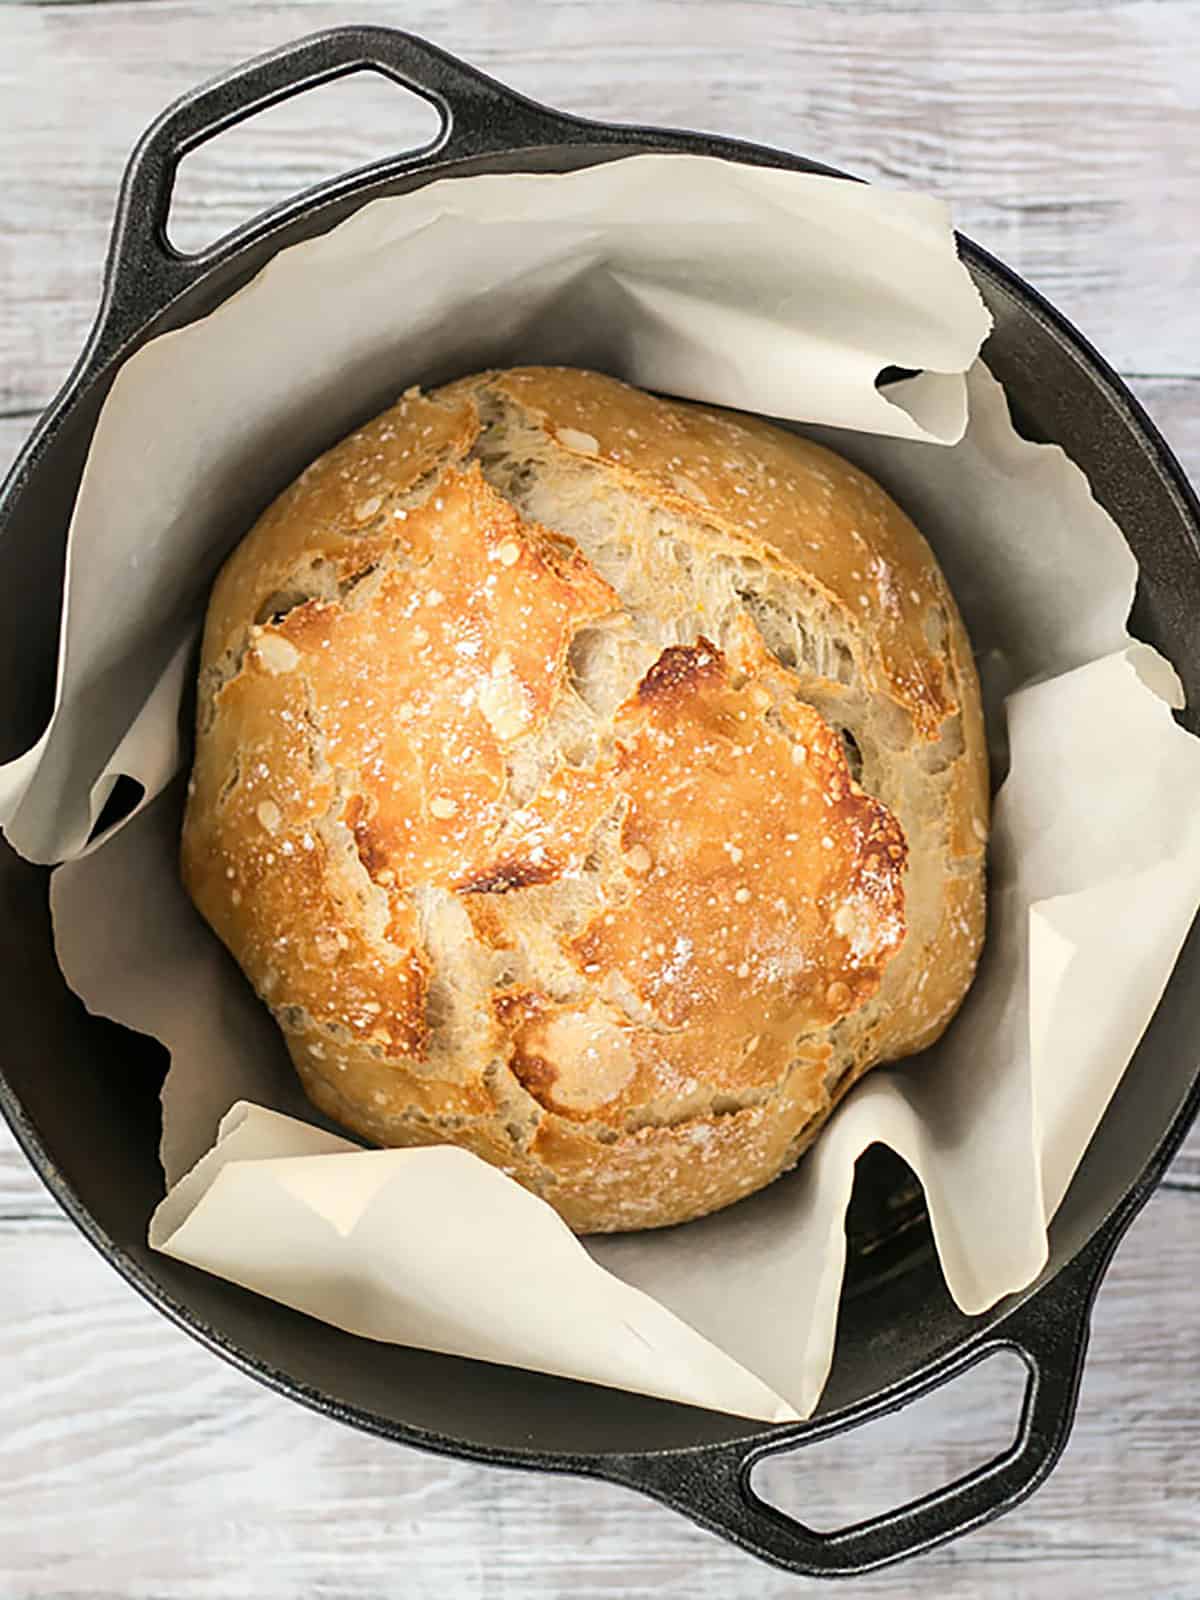
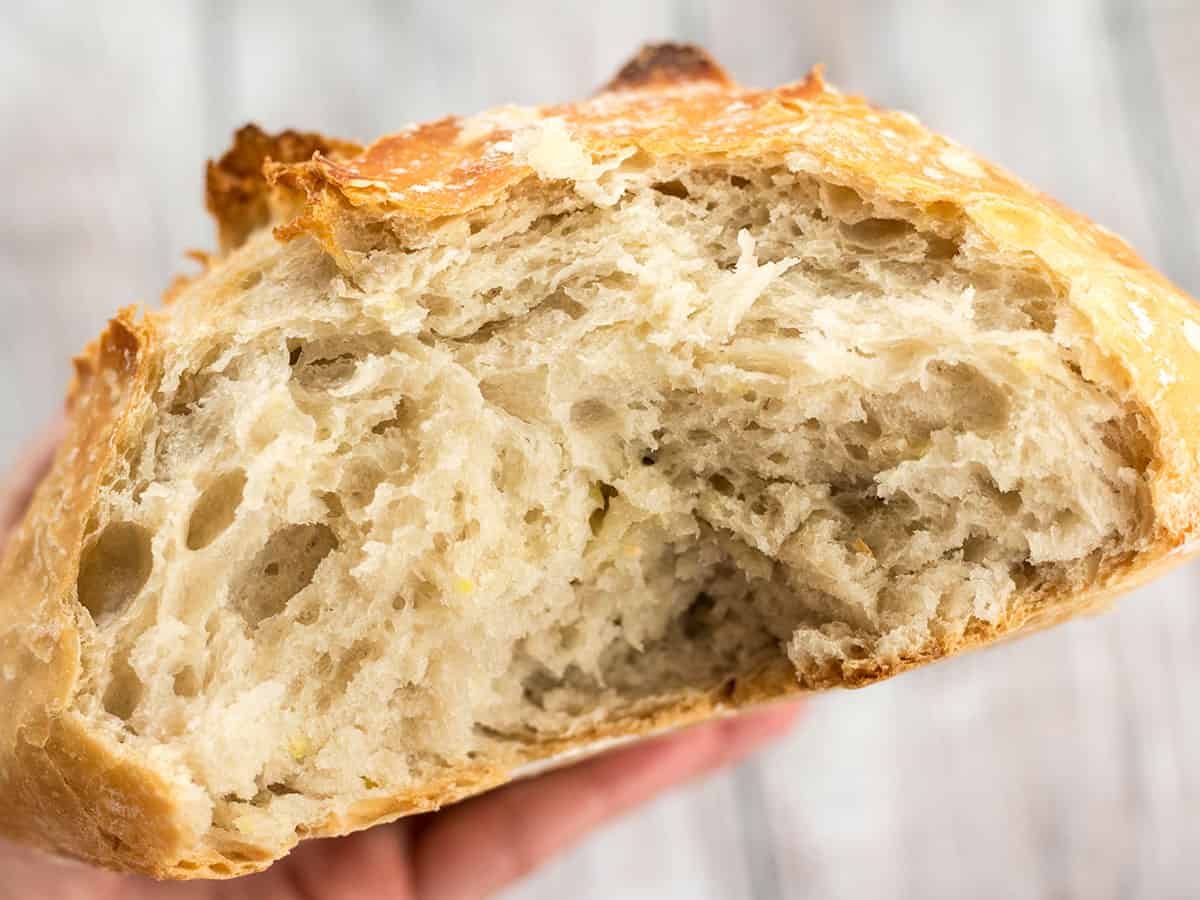
I started making no-knead bread in 2010 and it has continued to be my favorite way to make homemade bread because it’s incredibly simple, it doesn’t require a lot of effort, and it makes the most deliciously crusty bakery-style bread ever. To make this no-knead bread recipe you only need four ingredients (including water) and a little bit of time. No fancy equipment or techniques needed!
This post contains some affiliate links, which means that we make a small commission off items you purchase at no additional cost to you.
“I’ve made this twice and it was amazing! Hard to believe something so simple can come together to be something so amazing!”
-Melissa
What Is No Knead Bread?
No-knead bread is an ancient technique for making delicious loaves of bread by utilizing a long fermentation time to develop the gluten the flour instead of hand kneading. Gluten is the protein that gives bread its strength, allowing it to rise into a fluffy loaf, and have that deliciously chewy texture. Kneading bread dough develops gluten quickly, but is quite labor-intensive. If given enough time, yeast can develop the gluten in the dough without the need for manual needing.
Ingredients for No Knead Bread
The best part about this no-knead bread recipe is that it only requires four ingredients, including water, and you still get an incredibly flavorful bread. Here’s all you’ll need to make your own homemade no-knead bread:
- Flour: Our version of no-knead bread was developed using all-purpose flour because that is what we most commonly have on hand. That being said, using bread flour will create even better results. Just keep in mind that bread flour tends to absorb more water than all-purpose flour, so you may need to adjust the ratios slightly.
- Yeast: For this type of bread, we use instant yeast or bread machine yeast, both of which do not need to be activated first by proofing in warm water. You can simply add them to your dry ingredients and go!
- Salt: Without the proper amount of salt, homemade bread will have no flavor, so it’s imperative that you do not skip the salt.
- Water: Water hydrates the flour to create the dough. Because this technique uses a longer ferment time, you can use room-temperature water and you do not have to “wake up” the yeast with warm water. The yeast will have plenty of time to activate as it rests.
What Kind of Yeast to Use
It’s very important to use the correct type of yeast for this recipe. Instant yeast and bread machine yeast are special because they do not require mixing with warm water to “wake up” before adding to a recipe. You can simply stir them into the dry ingredients and they will activate instantly upon hydration, so that is what we use for this super simple no-knead bread technique. Active Dry yeast, on the other hand, needs to be specifically activated in warm water first. If you use active dry yeast in this recipe using the technique below, the bread will likely not rise.
Do I Need to Use a Dutch Oven?
Using a preheated Dutch oven does create the best results because it gives the bread an extra intense boost of heat while retaining all of the moisture and steam. That being said, I have made no-knead bread on a sheet pan with great results! I suggest adding a pan with an inch or so of water on the bottom rack of your oven to create steam if you’re baking your bread on a sheet pan.
If possible, I would suggest investing in a Dutch Oven because they are easily one of the most flexible and useful pieces of cookware. We love our Amazon Basics 6-Quart Enameled Dutch Oven as a very affordable alternative to Le Creuset. Lodge also makes very affordable Enameled Dutch Ovens and plain Cast Iron Dutch Ovens (like the one used in the photos here).
Short Fermentation vs. Long Fermentation
You can make no-knead bread using either a long fermentation (12-18 hours) or a short fermentation (about 2 hours). The difference is that you’ll need more yeast to do the short fermentation and the flavor does not develop quite as deeply. That being said, short fermentation no-knead bread is a great option when you haven’t planned ahead!
Long Fermenation: Follow the instructions below, using ¼ tsp yeast and fermenting the dough for 12-18 hours.
Short Fermentation: Use 2 tsp yeast (or one ¼ oz. packet) and ferment the dough for about 2 hours at room temperature.
No-Knead Bread
Ingredients
- 3 cups all-purpose flour ($0.29)
- 1/4 tsp instant yeast or bread machine yeast* ($0.02)
- 1.5 tsp salt ($0.02)
- 1.5 to 1.75 cup water** ($0.00)
Instructions
- The day before baking, combine the flour, yeast, and salt in a large bowl and stir until they're well combined. Stir in about 1.5 to 1.75 cups room temperature water until a shaggy, sticky ball of dough forms and there is no dry flour left on the bottom of the bowl. The dough should be wet and sticky, but not so wet that it appears glossy. Cover the bowl loosely with plastic and let it sit at room temperature for 12-18 hours.
- The next day, the dough should be fluffy and very bubbly. When you're ready to bake, sprinkle a little flour on top of the fermented dough and scrape it out of the bowl. With well-floured hands, shape the dough into a ball and place it on a piece of parchment paper. Let the dough rise for 30-60 minutes.
- While the dough is rising, preheat the oven to 425ºF, or the highest recommended temperature listed on the packaging for your parchment paper. Place the Dutch oven inside the oven as it preheats, and make sure it sits in the fully heated oven for at least 15 minutes before baking the bread.
- Once the bread has risen and the Dutch oven is fully heated, carefully remove the Dutch oven from the oven (it will be EXTREMELY hot). Lift the parchment with the dough straight into the dutch oven and cover it with the lid.
- Return the Dutch oven to the oven and bake for 30 minutes. Carefully remove the lid and bake for another 15-20 minutes, or until the crust is a deep golden brown. Remove the Dutch oven from the oven, lift the bread out by by using the parchment paper, and allow it to cool before cutting open and serving.
Sheet Pan Instructions
- Ferment and shape the dough as described above, then place it on a parchment-lined sheet pan to rise for an additional 30 minutes.
- Place a baking pan with about an inch of water on the bottom rack of the oven, then preheat to 425ºF while the dough rises.
- Once the loaf has risen for 30 minutes and the oven is fully preheated, carefully score the top of the dough with a sharp knife (use horizontal motions with no downward pressure). Transfer the sheet pan to the oven and bake for 40 minutes, or until the crust is deeply golden brown and the loaf sounds hollow when tapped.
See how we calculate recipe costs here.
Equipment
- Cast Iron Dutch Oven
- Mixing Bowls
- Parchment Paper
- Liquid Measuring Cup
Notes
Nutrition
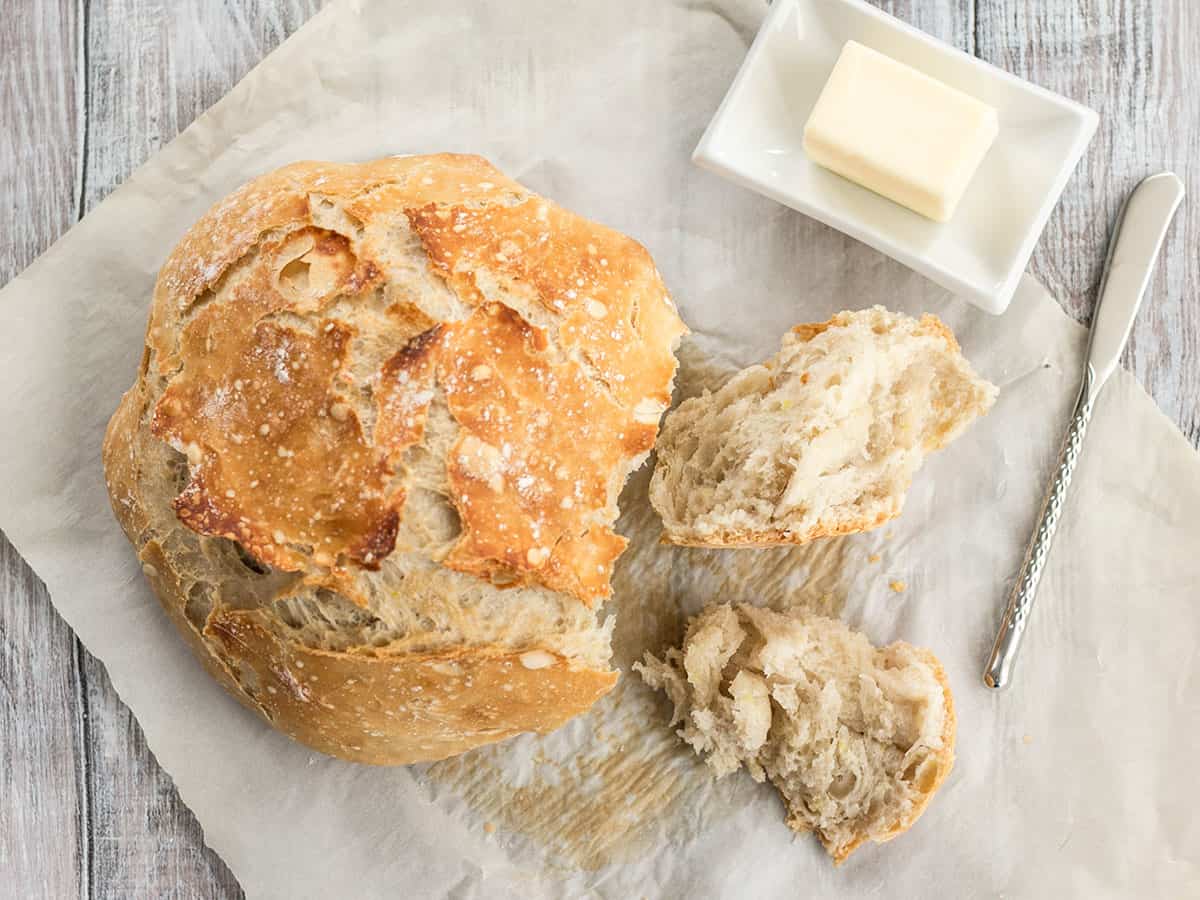
How to Make No-Knead Bread – Step by Step Photos
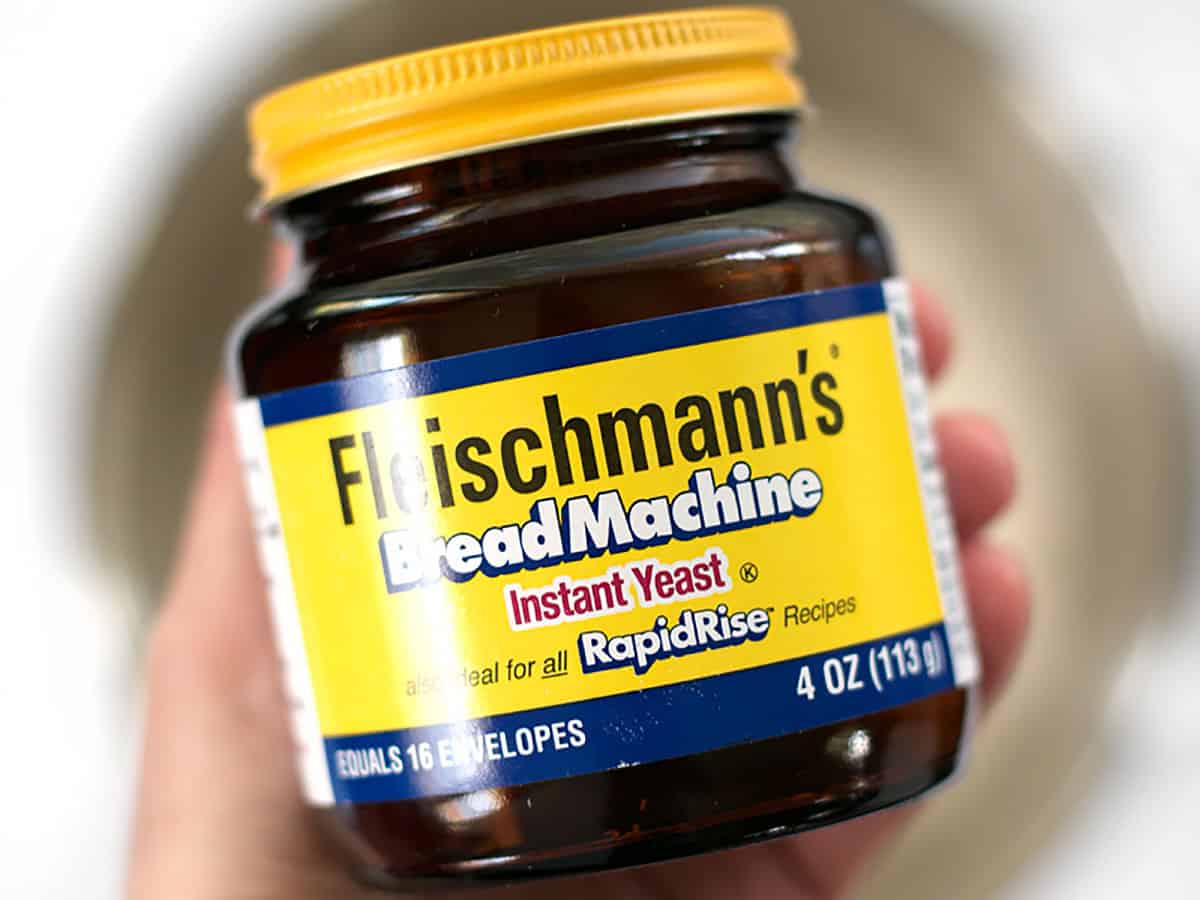
Before you begin, make sure you have “instant yeast” or “bread machine yeast” rather than “active dry”. The reason you need this type of yeast specifically is because it does not need to be kick-started by mixing with warm water first. You can add it to a recipe dry and it will still activate. I buy these little jars, which I keep in my fridge, and they last for-ev-er (especially when you’re only using 1/4 tsp at a time)!
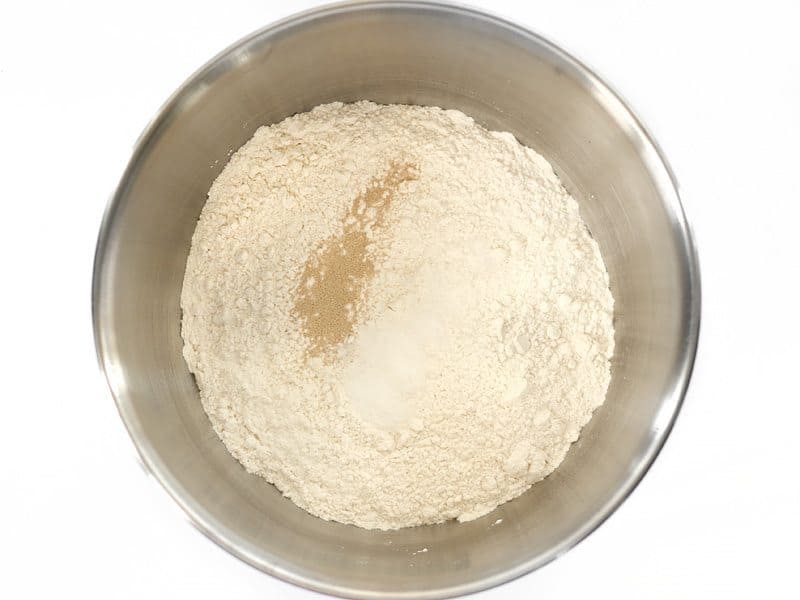
The day before you want to actually bake the bread, combine 3 cups all-purpose flour, 1/4 tsp instant or bread machine yeast, and 1/2 Tbsp salt in a large bowl. Stir them together really well.
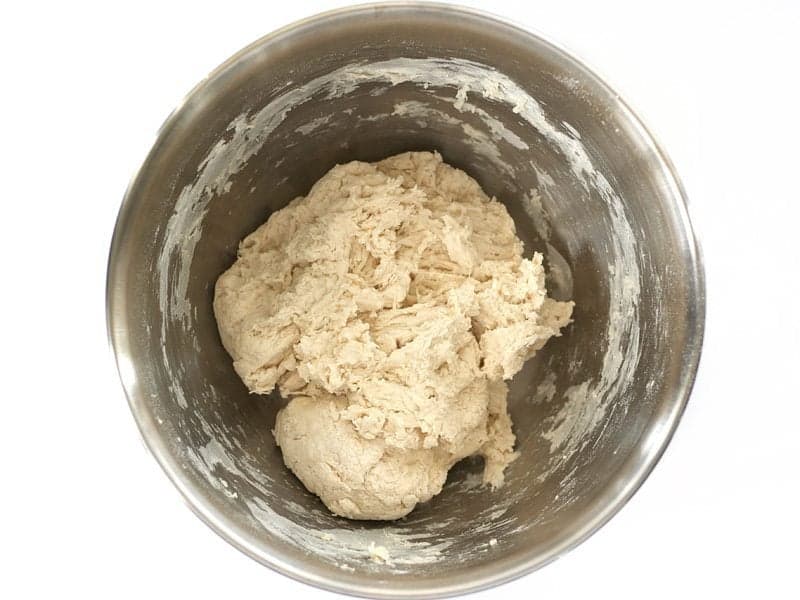
Stir in about 1.5 to 1.75 cups of room temperature water, or just enough to form a shaggy ball of slightly sticky dough, and no dry flour is left on the bottom of the bowl. The total amount of water needed may vary from time to time depending on the ambient humidity and moisture content of the flour, so go on visuals here. Make sure it comes together in one ball and no dry flour is left on the bottom of the bowl. It’s okay for it to be a bit sticky.
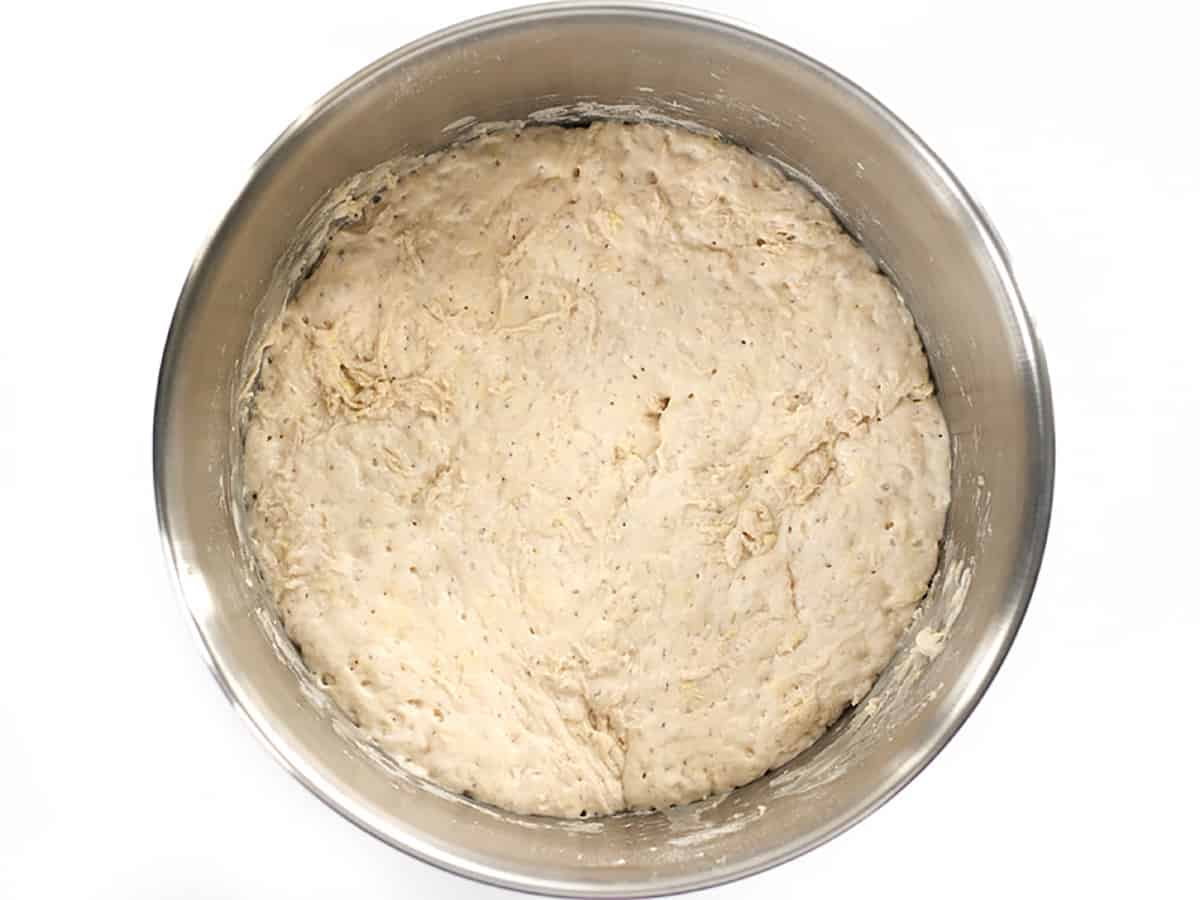
Loosely cover the bowl with plastic and let the dough ferment at room temperature for 12-18 hours. If you need to let it sit longer than that to fit your schedule, just transfer it to the refrigerator. As the dough ferments, it becomes very big, light, fluffy, and bubbly.
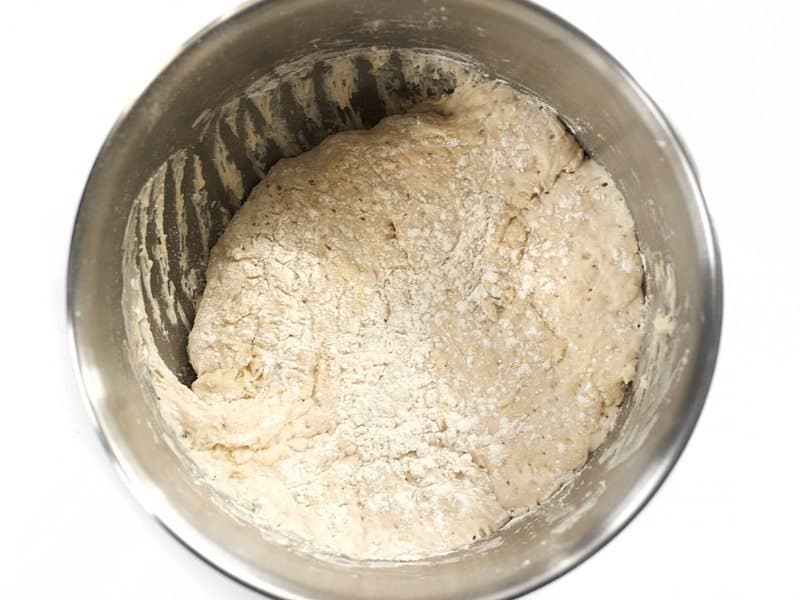
Sprinkle a little flour onto the dough (because it will be sticky) and scrape it out of the bowl. It will begin to deflate as you scrape it out.
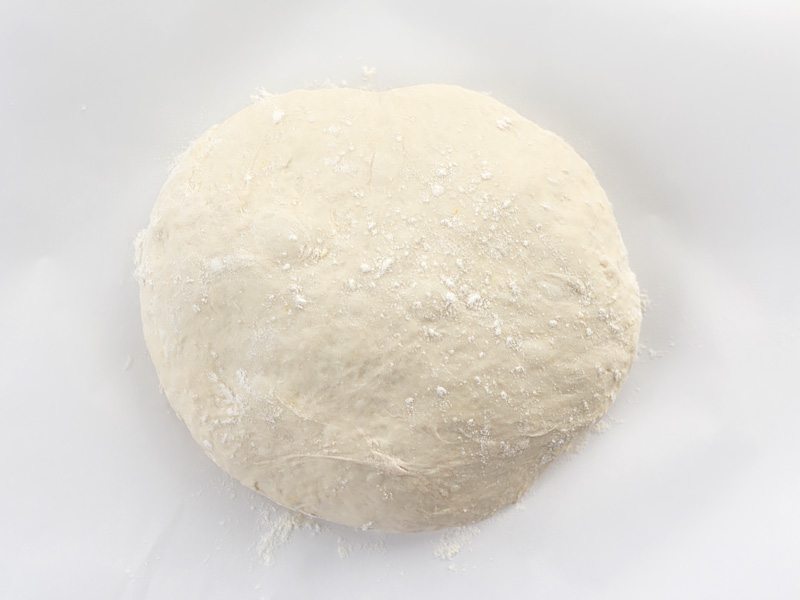
Using floured hands, shape the dough into a ball, then place it on a large piece of parchment. Let the dough rise for 30-60 minutes. The shorter rise time will produce a slightly more dense bread and the longer rise time will have larger bubbles.
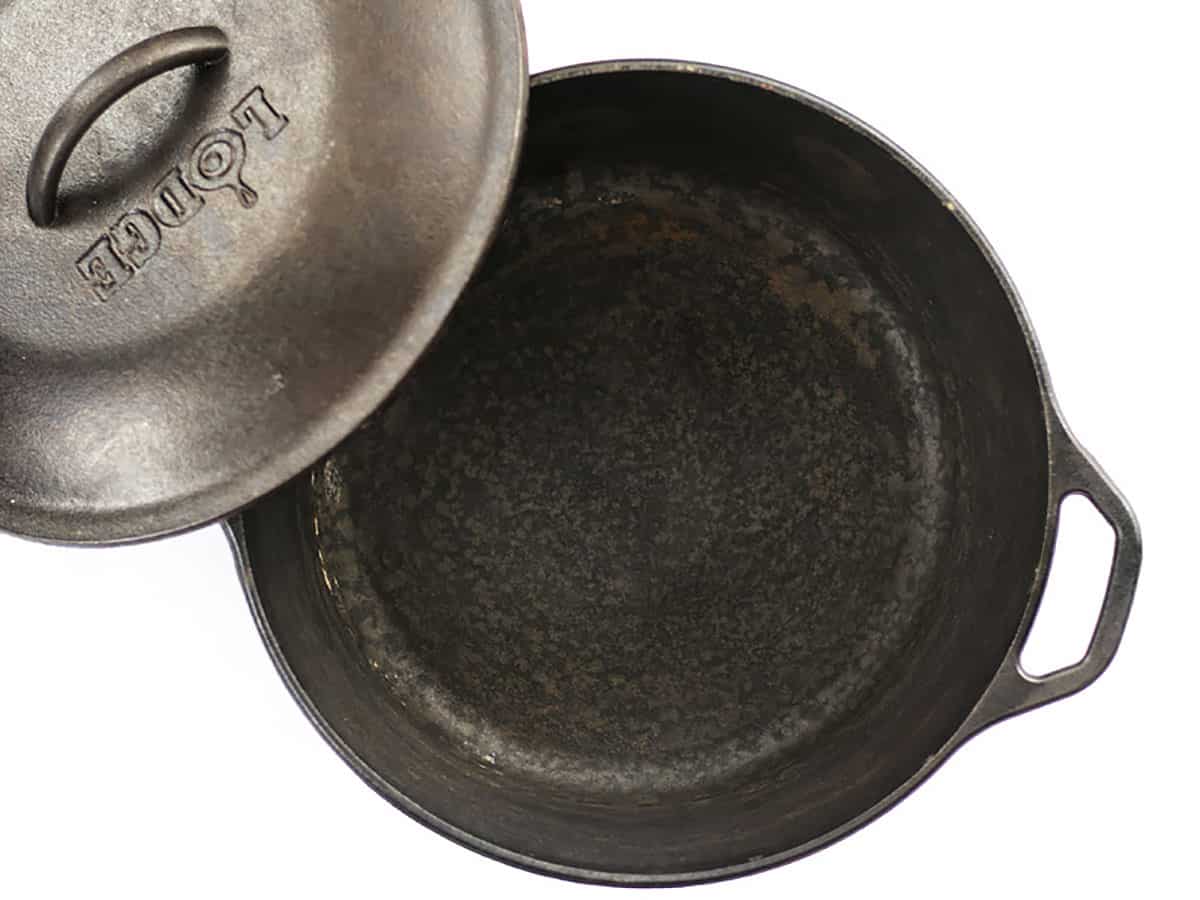
While the dough is rising, begin to preheat the oven and the Dutch oven. Set the oven to 425ºF, or whatever the highest safest temperature is for your brand of parchment (it will usually be listed on the box somewhere). Make sure your Dutch oven is inside the oven as it preheats, and then let it heat for an additional 15 minutes or so once the oven is up to temperature. This makes sure that the Dutch oven is nice and hot.
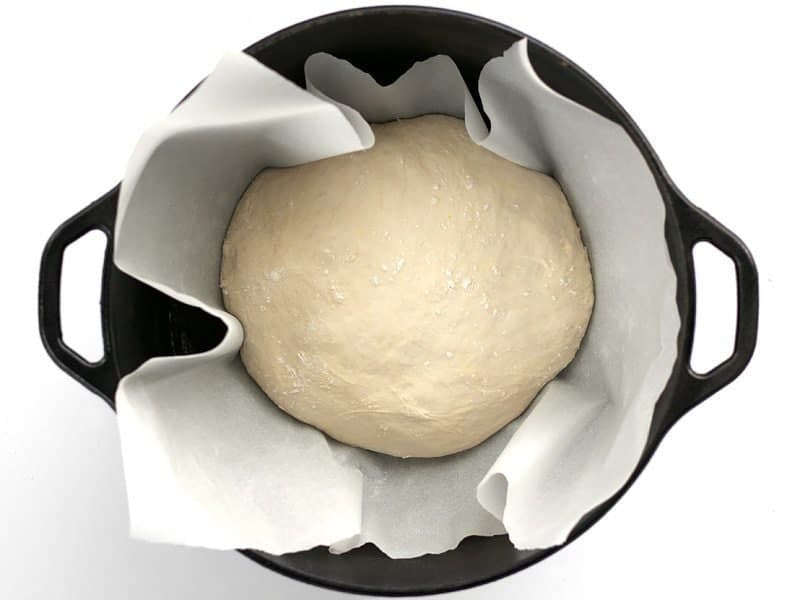
When the dough is risen and the Dutch oven is fully preheated, carefully remove the Dutch oven from the oven (it will be extremely hot!). Lift the risen dough by the parchment and place it inside the Dutch oven, parchment and all. Place the lid on the Dutch oven and return it to the hot oven.
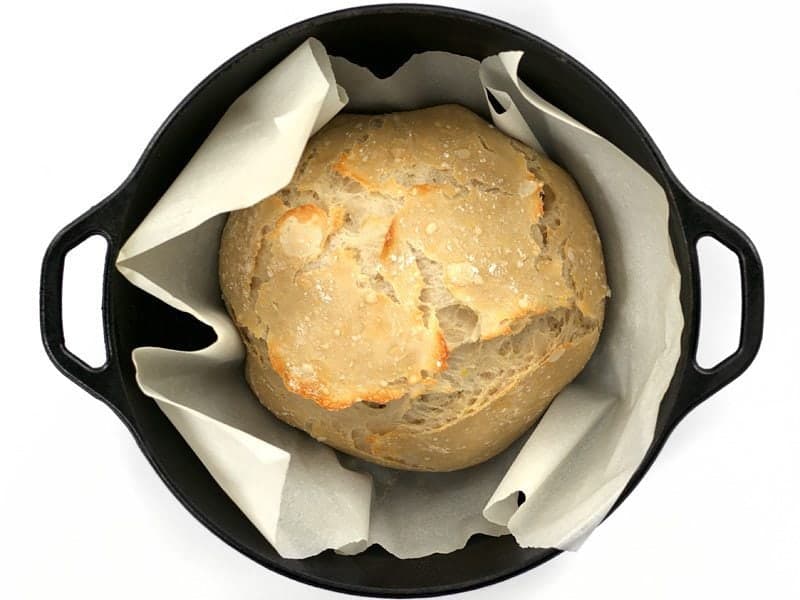
Let it bake for 30 minutes with the lid on the Dutch Oven, then carefully remove the lid…
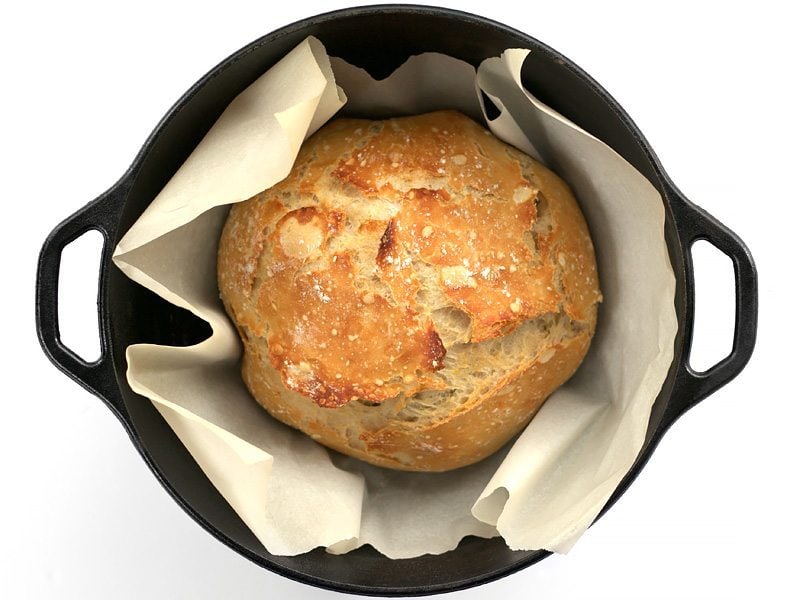
Then bake it for an additional 15 minutes or so WITHOUT the lid to allow the crust to brown.
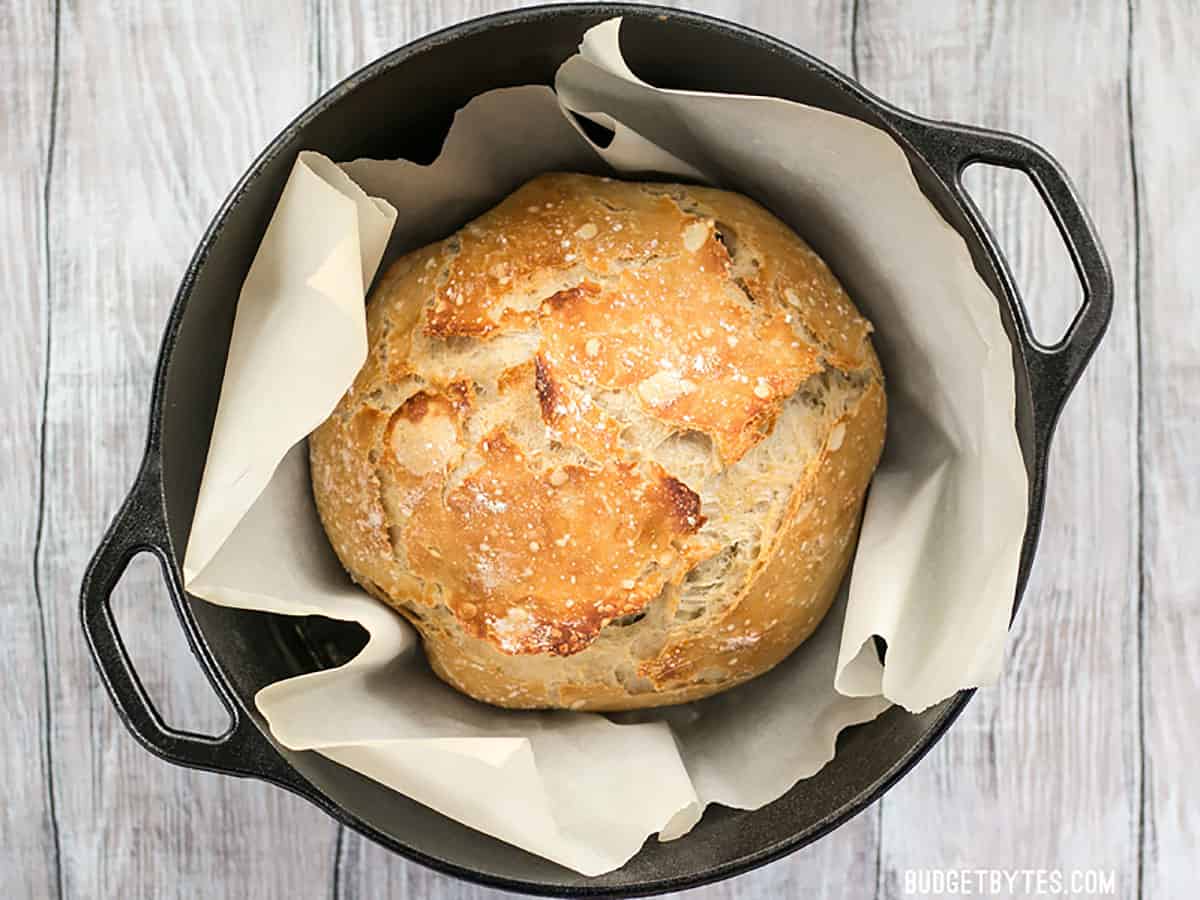
Once the crust achieves a nice deep golden brown color, carefully remove the Dutch Oven from the oven. Lift the no-knead bread out of the Dutch oven by the parchment, and allow it to cool before serving.
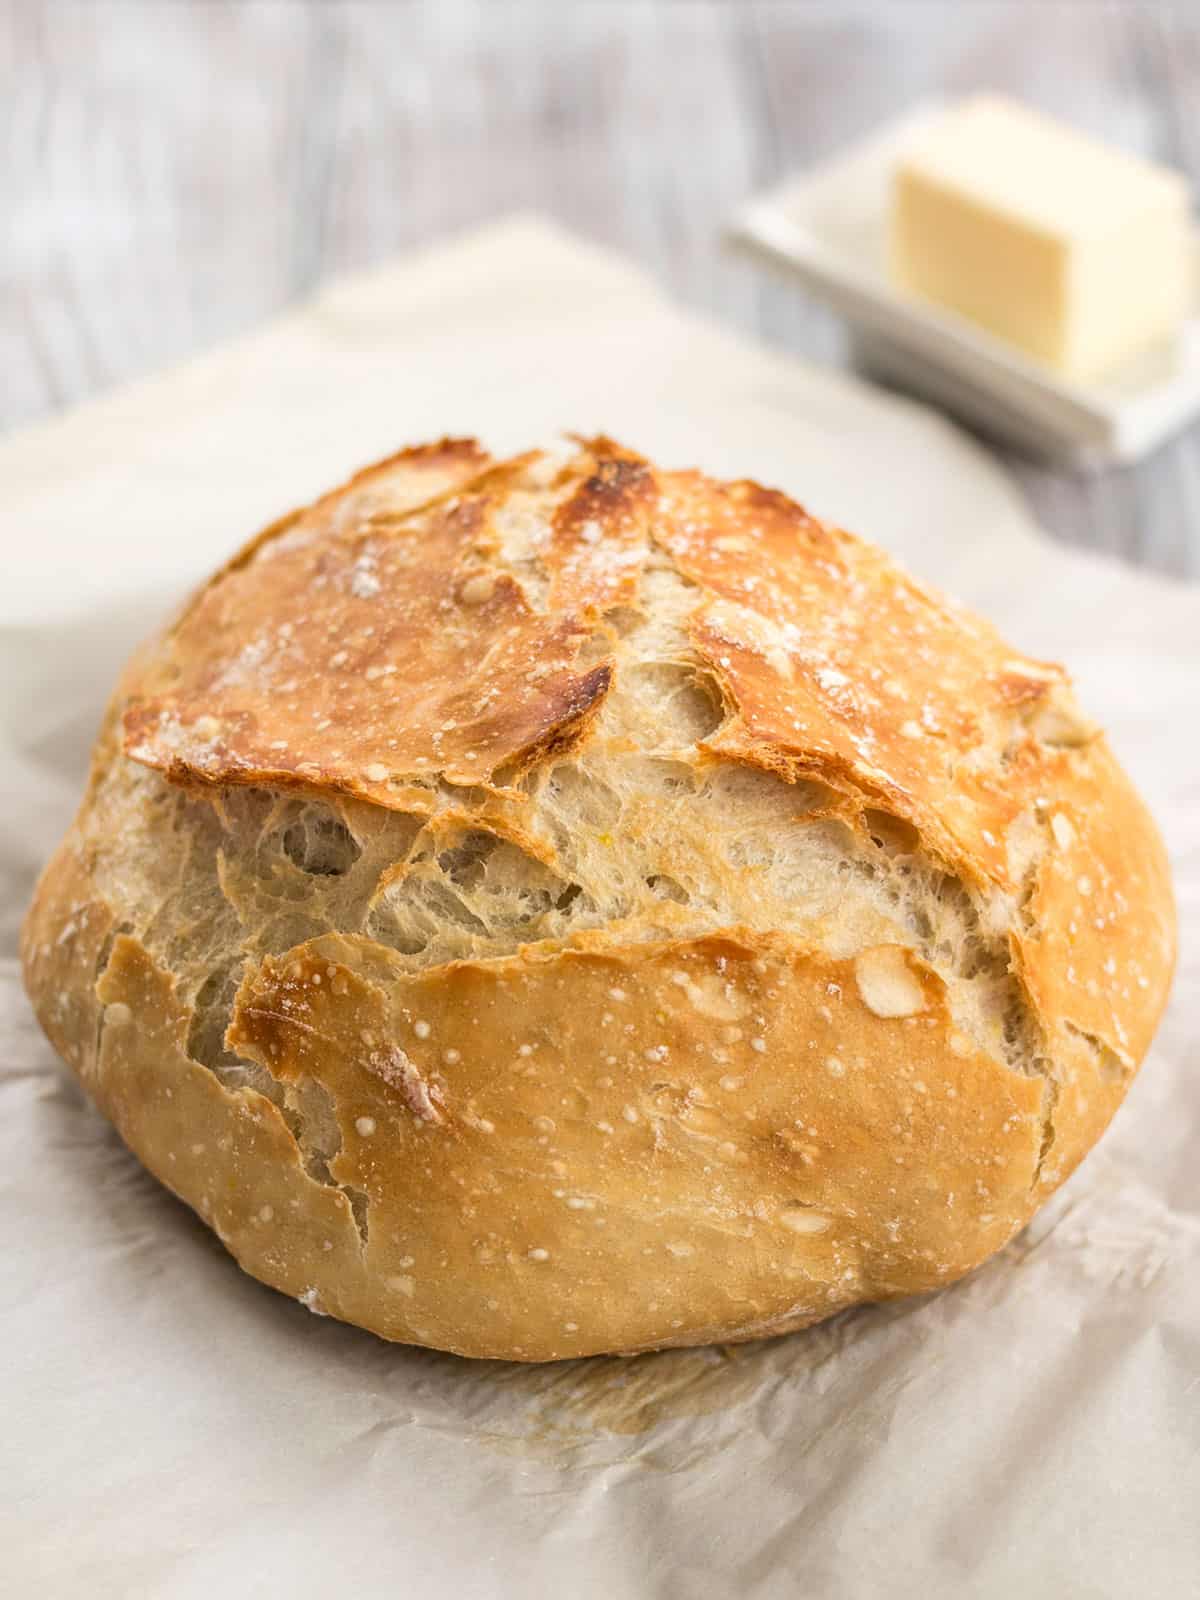
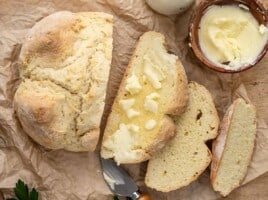
And just be prepared for the BEST bread you’ve ever made yourself. ;) The crust on this no-knead bread is seriously amazing.
No Dutch Oven and Short Fermentation Instructions
So, as I mentioned before, you can still bake this bread without a Dutch oven and with a short, 2-hour fermentation time. Here is a photo of my no-knead bread using just 2 hours of fermentation (plus another 1 hr rise time) and baked on a baking sheet.
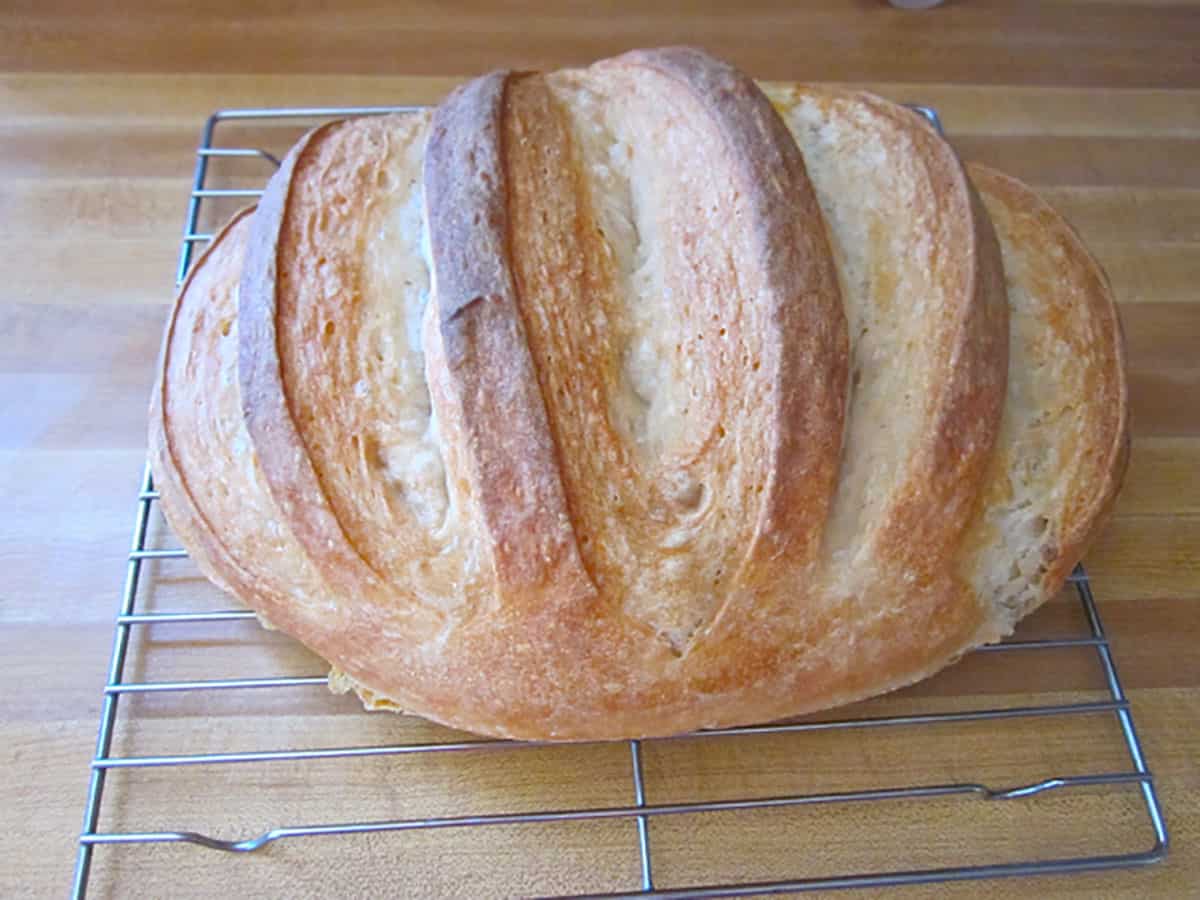
If you only have about 2-3 hours to ferment the dough, you’ll need to increase the amount of yeast used to 2 tsp (instead of 1/4 tsp).
Let the dough ferment in the bowl for 2 hours, then shape it into a loaf, transfer it to a baking sheet covered with parchment (and sprinkled with cornmeal, if desired) and let rise for about another hour. I like to make slits in the top with a sharp knife after the loaf has risen. Be careful though, if the knife is not sharp enough or you use too much downward pressure, it can deflate the dough.
Brush the surface of the dough with water, then bake it in a preheated oven (again, as hot as the parchment will allow, usually around 425ºF) for 30-40 minutes, or until the crust is nicely browned.



I apologize for the dumb question but when you put the dutch oven in the oven to heat up, does that include the lid? Or does it not matter?
Thank you.
Yes, that includes the lid!
Delicious bread and super easy to make!
I also get a big blobby mess. I did use active dry yeast but it says online you can do either /or. also since people in the comments didn’t mention not using instant yeast I just assumed that they did and got the same blobby thing so I don’t think that the yeast is what matters. I also did the fast rise method, where you add 2 tsps of yeast(aka pretty much a whole packet) and let it rise to 2 hrs, then sprinkled some flour on, tried to make a loaf shape, put it on parchment and let it rise some more for another hour. (it did not rise, just stayed in a blob). I baked for about 35 minutes and it was very flat. it smells good, not sure on the taste yet. I don’t know, I guess I will have to look into other easy bread recipes.
Yes, it does sound like the yeast was the issue here. You must use instant yeast or bread machine yeast, both of which do not need to be activated in warm water before adding it to the dough. If you do not mix the active dry yeast with warm water (and usually a little sugar) to wake it up before adding to the dough it will not rise, unfortunately.
It might not be the type of yeast, but the brand and age. I did this bread many many times and it came out beautifully. Then I had several liquidy blobs in a row. It was a brand of yeast that I don’t normally use; could have been the brand or could have been old yeast I’m not certain. Bought new yeast of a different brand and everything was fine.
I’ve made this recipe dozens of times over the past couple of years. It’s delicious. That said, I have never, ever been able to get the dough to form a ball, just a sticky, blobby puddle. I’ve tried different flour and water combinations and am no closer to achieving the coveted ball status.
Hmmmm, try adding a little more flour to the surface when shaping. After the initial mixing and during the rise you definitely want it to be a blob, but dusting with a little extra flour after you scrape it out of the bowl helps shape it into a ball without actually drying out the dough would if you mixed more flour into it.
This was so easy and so good. The only thing is that the bottom of the loaf was really tough. Any suggestions?
I had that happen once; I hadn’t heated the lid with the bottom of the dutch oven so when judging if it was done by the top crust, the bottom was more done and thus tougher.
Got to make sure that lid is just as hot. And keep it on for thirty minutes.
Can you ferment the dough for the longest time and still bake on a baking sheet like the bottom example? Or do you have to have that extra yeast to bake it on the baking sheet?
The amount of yeast needed is based on the fermentation time, not the baking method. :) So if you plan to only let it ferment for two hours, use more yeast (2 tsp). If you plan to ferment overnight you can use less yeast (¼ tsp) because the yeast has several hours to multiply and grow into the amount needed for that sized loaf. I hope that makes sense!
I’ve made this twice and it was amazing! Hard to believe something so simple can come together to be something so amazing!
Question, can regular yeast be used if I’m out of Rapid rise instant yeast?
Great recipe! Everyone loves it at my house and it’s so quick and easy. Is it possible to split the recipe into two loaves? Any recommendations on bake times since they would be smaller?
Since we haven’t tested it, I’m hesitant to give you any specific suggestions that might not be successful. We do have a recipe for No-Knead Foccacia Rolls that you might enjoy, too! https://vitalityholisticwellnessguide.com/focaccia-rolls/
But don’t let me stop you from giving it a shot! I’m sure with some tweaking it will work out great! I’d keep the baking temperature the same and use an instant-read thermometer as a guide to get the timing right (although the baking time will be roughly the same, too!). Check on the smaller loaves about 15-20 minutes into the first bake time. The center will register around 205*F once FULLY cooked, so when it hits somewhere around 190*F, you can remove the lid of the dutch oven and start browning the top of the loaf.
We have a great, budget-friendly thermometer in our Shop, if you need one! https://vitalityholisticwellnessguide.com/shop/
So I have made this many times and everytime the dough is so wet I don’t know how you are able to form it into a ball. I use the least amount of water but it’s always so sticky that I can’t even touch it. It just sits in the counter spreading out for the second rise. It bakes great but is not a nice round loaf like I want. Any tips?
Since this is a no-knead bread recipe, the dough should be pretty sticky. (You’re not wrong!) I would suggest keeping the dough in the bowl while you form the ball rather than turning it out. Dust it with flour, and then if you don’t like to get your hands sticky (as I do not!) use two forks to pull the dough off the sides of the bowl and tuck it into the center (give the bowl a quarter turn, and repeat 3-5x until tight ball forms, then turn it out of the bowl. It will spread out and rise again, but shouldn’t be like the goo monster in Stranger Things. It should rise upward as well as spread out. ~ Marion :)
These recipes are great and I love your descriptions, method and format. Thank you Beth.
I used this recipe for the first ever bread I have made and it came out awesome. My family loved it. So I tried making it with whole wheat which came out just as awesome but better because it’s whole wheat… healthier. My wife said it’s better than the white. I did double the yeast because of other’s previous comments.
What is that weird dark spot on your bread pic? It looks like concentrated oil and pepper.
anyway this recipe absolutely works, as imprecise as it is. My family loves it. Omg you made homemade bread?! “Yeah it just took some doin.”
,
For years I was intimidated by making bread but this is fool-proof. Literally takes 5 minutes to mix up and then you just wait for the magic to happen. I’ve almost entirely stopped buying store bread in favor of this recipe. It’s cheaper and tastes infinitely better, not to mention it makes my house smell heavenly while it bakes.
Thank you for all the cheap and easy recipes. This site is raising my confidence in the kitchen. My family was so impressed when I told them I make bread from scratch… They don’t know how easy it is, ha!
Hi Beth! I just got into cooking/baking and have been religiously combing through your recipes. I have already tried a couple and all have been amazing! I’m wondering if you could tell me the difference between bleached and unbleached flour and when you use which. Thanks!
I don’t know very much about it, to be honest, but from what I understand one is just bleached (I’m not sure through what method or bleaching agents) purely for cosmetic reasons. I’ve made this bread with both and it works fine either way. If both were available at the store, I’d buy the unbleached because I don’t see the point of it. 😂
I’ve made this quite a few times and it is AMAZING. A couple of times, I roasted some garlic and added that and rosemary. Somehow even more amazing.
But, I’ve also had issues with adding it the next day (after the 18 hours), and I don’t know if it was because it got mixed too much…it turned out like a semi fluffy pancake.
If doing any mix-ins, when would you suggest adding?
I would definitely add any add-ins when you combine all the ingredients in the beginning. It is possible that the dough got overworked when you tried to add stuff in later. :)
Thank you so much Beth!! Will definitely try that :)
I’ve been making this bread for years and it’s a winner every time! I typically double the recipe and freeze one loaf for later. I use a 50/50 blend of white whole wheat flour and AP flour, and 2.75 – 3 cups of water. I use less salt than the recipe calls for — only about 1 tsp — due to dietary restrictions and it still has great flavor due to the overnight fermentation. Since it is a wet dough, I find it helpful to use a round proofing basket for the second rise. I pull off half the dough, shape into a loose round, and proof in the basket. Then while the first loaf is in the oven, I proof the second loaf in the basket and pop it in in the same hot dutch oven when the first loaf comes out.
I used two cups of all-purpose flour and one cup of whole wheat flour. When I turned the dough out for baking, it was really sticky. I wonder if that had to do with my choice of flour, or did I use too much water? Anyway, I had to add nearly a cup more flour to make it manageable.
No Dutch oven, so I used a ceramic baking dish. I baked it at 410F for 35 minutes with the lid, and another 13 minutes without the lid. The end result was wonderful! :P
Bill, I was in an RV without proper tools. Used a Pyrex mixing bowl with a disposable pie tin for a lid. Wasn’t the prettiest loaf but tasted great. One of my best ‘make-dos”.
Does it need to be a 4 quart Dutch oven? I have a 4.5 quart.
4.5 will be fine. :) 4 is just the minimum size that would accommodate this size loaf.
Been wondering about this recipe and other one pot meals. Will a 7-quart Dutch oven be too large? Not sure what the pros and cons of a bigger one would be. Thank you!
I would love to try this recipe, it looks fantastic. When pre heating the Dutch oven in the oven, do you put the lid on?
Yes :)
Do you use table salt or rocksalt for the half a tablespoon listed in the ingredients?
Table salt. :)
I tried the rye version, exchanging one cup wheat flour for rye flour and adding ⅓ cup caraway seeds. It needs a bit more yeast and slightly more water, because the seeds drink it, but it is a really tasty alternative..
For a healthier and heartier (over plain white) bread, I add ⅓ cup ground flax to the regular recipe. I don’t adjust the water.
I’ve also taken to activating my yeast first, because no matter what I tried when adding it dry, it just never rises the same way.
This recipe is the kind we have been looking for as newbies to baking bread. We both are on a 1,500 salt allowance daily and are looking for a low sodium no kneading recipe!! Can you help us!!??
You can adjust the salt as needed, but it will affect the flavor. The amount listed in the recipe is just the right amount for good flavor, in my opinion.
I do just a couple shakes from a salt shaker, and make sure to do as long a rise as possible. It’s still delicious and gets tons of compliments!
This came out perfectly! Just like the pictures. The only thing I did differently was I used one cup of bread flour and 2 cups of all purpose.
I was not optimistic when it went into the oven, it was still on the flat side, but it really rose in the cast iron pan. The crumb is simply outstanding.
This will be a go to recipe for me. Thank you so much!
Hello Beth,
I made this recipe and my (first ever) bread came out great looking and tasting! I took a photo it was so beautiful! Thank you.
I find that when I make this, it’s really dense and I can’t get those beautiful bubbles like in the picture. If I do knead it a little, will that help?
There could be several things causing that problem, so it’s hard to say without being there to see and feel your dough, or watch your process. My first guess is that it hadn’t risen enough (maybe the room is too cold?) or the yeast is no longer active. But it could be other things like the dough being too dry, the oven or vessel not being hot enough.
I tried the bread for the first time yesterday/today I baked it. I let it cool completely. I found that by dinner time, the crust was incredibly hard…even so hard it was difficult to cut through it with a bread knife. What did I do wrong? I’d like to get this perfected…love the idea!
Hmm, I’m not sure. It’s hard to say without being there to actually see and feel that crust. Homemade bread like this will have a much tougher crust than store-bought, but it usually gets softer (less crispy) for me as the bread cools.
Just baked this bread. Easy and Delicious and I am not even a regular baker. Thanks very much for the recipe. No more buying bread from the store 😌
That should be “my sister”
My makes her bread this way in many varieties. White bread with chocolate chunks is a favorite.
What is the purpose of the parchment?
It allows you to lift the dough into the hot Dutch oven without it deflating and keeps it from sticking to the pot. :)
Does it matter what size Dutch oven is used?
It needs to be at least big enough for the expanded loaf of bread. Mine is a 5-quart, but I wouldn’t go any smaller.
Mine is a 7 qt, do any adjustments need to be made on time or quantities?
Nope, just make sure your oven rack is adjusted to accommodate the height of the pot before you start preheating. :)
Ever try Whole wheat flour?
Chris
It works pretty good with up to 50% ww flour, but any more than that and it just becomes really dense and doesn’t rise quite as well.
This was my first attempt at making bread, and it did not disappoint. So easy to make and so delicious.
So I made this bread without reading the comments and also experiences the wet blob that others mention. After folding a bit more flour into the dough after the first rise, I placed the blob on parchment into a bowl for the second rise. This encouraged the dough to stay in a round shape. After the second rise, I lifted into the dutch oven as directed. Perfection! Thanks Beth!
I’ve never baked bread before, so there was a bit of a learning curve, but now I’m a bread pro! …For this specific bread, lol.
This recipe has been one of my COVID mainstays. There’s something so cozy and comforting about a house that smells like baking bread! The amount of water I need to get the correct consistence is generally towards the lower end of things – 1.5 cups, if that. And when I transfer the dough from the bowl onto the parchment paper, it does end up as more of a thick puddle or a wet patty than a nice round ball, but it bakes perfectly every time.
I finally got my hands on some yeast! And it’s the kind I love which is in the jar. I guess I’ll list the steps I took since the outcome wasn’t ideal…I let the bread proof for the full 18 hours in a plastic mixing bowl. It grew quite a bit and like otherwise it was quite sticky and stuck to my parchment paper some. So I put it back into my plastic bowl and layered on the flour a few times after “kneading” it some. That helped. From there when forming it into a ball-ish, I just put it into the oven…I didn’t allow it to proof an extra our on the baking sheet. I’m wondering if that’s why it caused the bread not to grow in height much. Also, my parchment paper said up to 400° so I did the first 30 mins and then the last 10 mins I increased it to the 425° since the color of my bread wasn’t looking like that in your pictures. My bread was also pretty hard when first coming out of the oven but after it cooled it was softer but still had a nice crunch. I think next time I’ll allow my bread to rise that extra hour once on the baking sheet and stick to the 425° (I think I saw in a previous comment, Beth, that you said that was okay?). If that doesn’t work then I may have to get myself a Dutch oven finally. :-)
Yep, you definitely need to let it do that second rise. :) It will rise up some once it hits that hot oven, but it needs a little time before that as well for the yeast to produce some more gas. It’s like a one-two punch. While I can’t legally tell you that it’s safe to put the parchment in the 425ºF oven, all I can tell you is that I’ve done it successfully many times in the past. Bake at your own risk or search to see if you can find another brand that specifies that it’s safe at 425. :)
I ended up using the instant yeast, after all. However, after I let it sit 18 hours or so, the dough ended up being a slimy patty when I set it out to rise. I feel like I did something wrong (too much water?). I’m going to see if it rises after an hour, but it hardly held together as I tried to form a ball of it. What did I do wrong?
Oh my god, same. It always looked a little wet so I added more flour and still the result is more of a disk than a ball. I’m midway thru the second rise and can’t wait to see how this bread turns out. It may be a mess! 😂
I have plenty of flour and yeast so I won’t feel bad if this comes out weird cause I can always try again.
Mine never forms a ball either – more like a thick puddle. But it always seems to come out of the Dutch oven as a well-formed loaf, so I’m not too worried about it.
I’m interested to hear how yours came out – was the end result a loaf, or more like a pancake?
If I have the “active dry” yeast, will this still work if I just kick start it and then add it as your recipe instructs?
The first time I made no-knead bread, I used active yeast, activated it first in a little bit of warm water, and just used a little less room temperature water. let it rise/sit for 15 hours, or around that. It was great!
Thank you! I will try it.
So I got instant yeast after all. However, I got a slimy patty after letting it sit out at room temperature for the max time. It is sitting there trying to rise, but it looks like a raw pancake and was very sticky and slimy in my well-floured hands. How did I mess this up?
I’m sorry to hear that! It’s hard to say what happened without being there and seeing what happened.
I will try again. I’m wondering… when measuring the flour, should I pack it tight?
I have made this several times and love it. This time I noticed a sort of vinegary smell while it was baking so I think that means it is now sour dough? The dough sat covered on the counter for about 16 hours. It was very well-risen after a couple hours but didn’t realize that there was a short-fermentation alternative until I went to the comments section today. I definitely prefer a yeast smell and taste to sour, so going forward will use the short fermentation method and then repost.
So easy and hits the spot every time.
Question – Can I break this into two small loaves and bake both in the dutch oven? I want to make smaller loaves in one batch so I can gift mini-loaves.
I love this recipe! I haven’t tried the shorter fermentation method with the extra yeast yet, but I want to give it a go. My question– can I use the shorter fermentation recipe but still bake it in the Dutch oven like the original recipe, or does it need to be baked on a sheet? I would vastly prefer to use the Dutch oven. I live in the desert and it’s sooooo incredibly dry here. I have found that a wetter dough and a Dutch oven are about the only way I can make any bread that isn’t inedible!
You definitely can still use the dutch oven. Enjoy!
What am I doing wrong? I can’t form my dough into a ball. I get as close as I can and put it on the parchment paper but it just forms a puddle of dough. The first time I made it I had the same problem so assumed I had added too much water. The first time I used 1 3/4 cups and this time 1 1/2 but have gotten the same results.
Hi Carol, because this dough is quite a bit more wet and loose than traditional bread dough, it doesn’t shape quite the same. Just form it into a circle as best you can. It won’t be fully round like a globe, but more flat. As it rises it will rise more out than up, but once it hits that hot air in the preheated Dutch oven it will rise up instead of out.
I love how easy this recipe. Is. I am wondering how to get a loaf of bread that doesn’t crumble s much. I used the short-rise/more yeast version of the recipe.
OMG!!! This bread is just delicious. Easy, simple and delicious. Thank you for this recipe.
This is an awesome recipe and I’ve made it dozens of times over the years. I feel like I’ve finally perfected it. First, I use just 1.5 cups water for the 3 cups flour and the consistency is always right now. Secondly, I rise it for just about 12-13 hours on the countertop, I don’t go for the full 18-24 anymore. I think my failures with this recipe (and previously thinking it was inconsistent) stem from it deflating during the rise when I left it too long. Cool the bread almost completely – should barely be warm to the touch – then slice the whole loaf. It’s much easier to slice when it’s fresh but you have to let it cool and the steam distribute for a perfectly soft loaf.
All that said, this is the easiest and most perfect bread recipe that I’ve been making multiple times a week for over a year. I’ve also introduced many others to no knead bread this way! Although I know the concept isn’t a Budget Bytes original this is a wonderful starting point. Going to pop my loaf in the oven now!
We’ve been using this for a couple weeks now. Turns out fantastic every time. Great recipe and the guide was a breeze to follow. Thanks!
Easy and delicious recipe! Has anyone tried adding any flavoring or extras such as garlic, cheese, nuts? Just wondering if that works and at what point in the recipe would you add it.
I add about 3 oz shredded Asiago cheese. 2 oz after I scrape the dough out of the bowl, that gets folded in as I shape the dough. Then I add 1 oz on top once it’s on the parchment paper. Beth also posted a recipe for sun dried tomato no knead bread where she mixes things in before letting it rise, so that should work too!
Is there a reason that this recipe doesn’t have sugar or oil / shortening?
This type of bread doesn’t need oil and it’s not a sweet bread to need sugar.
Hello, thanks for this nice recipe. My friend in Brazil doesn’t have any parchment paper. Can she bake it directly in a baking sheet?
Thanks!
Yes that would be okay! She could use foil too.
Just made my first loaf. Followed recipe exactly and it turned out beautifully! Eating it tonight with your zuppe toscana soup. Thanks for the recipe!!
Can this be made with whole wheat flour? Thanks!
I wouldn’t suggest using more than 50% whole wheat flour because at that point it starts to affect the texture and density too much. You may need slightly more water if using some whole wheat flour as well, since whole wheat flour absorbs more than white flour.
Fantastic recipe. I find myself making it once a week. I love to experiment with different flavored salts!
Love this recipe! Can I make it with gluten free flour?
Unfortunately I haven’t tried that, but I do know that the gluten in the flour is critical to creating the texture in this bread, so I’m guessing it wouldn’t work so well.
I’ve tried it many times with gluten-free and regular flour, and I can safely say that it does not work with GF flour – it turns into sort of a big, crusted pancake. I’ve heard that adding xanthan gum helps GF bread to rise, but I haven’t experimented with this myself.
hi- I only have regular yeast and can’t get instant bc covid :( How can I adapt this recipe?
The first time I made no-knead bread, I used active yeast, activated it first in a little bit of warm water, and just used a little less room temperature water. let it rise/sit for 15 hours, or around that. It was great!
when the dough is rising , is is necessary to cover?
You can cover lightly with a kitchen towel.
Just baked my first loaf and it is so delish!! Thank you for this great recipe. My question is about storage after it is all done. What will allow it to last longest and taste best over a few days? Should it be put in a plastic zip lock after completely cooling? Paper bag? Refrigerated? Frozen?
Definitely wait until it has completely cooled to room temperature before wrapping it anything because otherwise you’ll get condensation. I like mine kept in a zip top bag at room temperature, best. The crust won’t stay crusty that way, but it does prevent it from drying out. If you do paper or a waxed cloth wrap the crust will stay nice, but the inside will dry out sooner, so it’s kind of a give and take. :)
I love the bread. It is so easy. and makes one nice sized loaf for us singles…..I have been making bread for my neighbours during Covid 19 lockdown… Gives me something to do and keeps neighbours happy.
I must be doing something wrong here, but I can’t figure out what it is. Whenever I try this recipe (or other no-knead recipes for that matter, like the Mark Bittman one) the dough is very, very wet – more like a quickbread batter than dough. I measured the flour using the King Arthur flour “fluff, sprinkle and scrape” method and double-checking with a scale (12.7 oz for three cups). I’m using saf-instant yeast, iodized salt, tap water, and all purpose flour (it is some fancy unbleached stone-ground all purpose flour because that’s all that was left at the store) and mixing it up in a bowl with a rubber spatula. Anyone have any ideas about where I’m going wrong here?
The dough should be very wet. :) You want it to almost be kind of sticky, but not so wet that it’s glossy. If it is glossy wet, simply add a little more flour.
I have had the same problem as CONFUSED. I used three cups flour and only 1 1/4 cups water. My room temperature has been about 68 F and I let it rise the full 24 hours. There was no way my blob of dough could ever be shaped into a ball. Do you think I should try a shorter rise time?
The dough will be very stick and loose after the fermentation. Just sprinkle it with a little flour and fold it onto itself until it is a more round “blob” haha. It’s not the same as traditional bread dough. :)
Hi, the first time I tried I followed the amount of water listed in the recipe and I got the same problem as you. The consistency of a cake batter. The next time I tried, I started putting 1/4 cups at a time until I reach the same consistency as the photo representation here, so I found out the perfect amount for me was 1 and 1/4 cup of water. less than the amount listed. Humidity in the air and in the flour will vary so start putting smaller quantities until you reach the photo and you will have the correct amount for your situation. It’s still sticky but it holds it shape.
Hi there, I only have a 2 3/4 quart cast iron, should I half the recipe or amount of dough I put in it?
Yes you could make two loaves that way.
Love this recipe but we always eat it too quickly! Was wanting to perhaps double the recipe but I am unsure how that would change the fermentation and cooking times, any tips?
Yes, you should be able to double the size, although it may need longer to bake.
Thank you for the great recipe.
When adding the costs up for each ingredient of the recipe, don’t forget additional components like the electricity/gas cost required to heat an oven to over 400 degrees, as well as the labor costs involved. Using “activity-based costing” would show the recipe to be more expensive, ultimately.
Should my oven rack be at a high or low level? Thank you. Trudy
Lower to middle is best.
Hi,
should I use the program bake or conventional bake?
Thank you,
Silvia
I can’t cook or bake to save my life, but I’ve made this bread twice (once plain, once with sliced kalamata olives) and it turned out beautifully both times! Thanks so much for this recipe, it’s going in the regular rotation at our house!
It tastes amazing but it keeps coming out wide and flat rather than round. Any thoughts here on why?
It should puff up quite a bit in the oven. Are you using a Dutch oven to bake it or are you using a flat baking sheet? Is your oven fully preheated before you begin baking the bread?
Can’t wait to try this recipe this weekend! I wonder if I can use bread flour instead of all-purpose? Or would that cause it not to rise as well… I’m new to baking bread and very interested in the science behind the recipes!
With the quarantine I cannot find the instant yeast, I do have dry active yeast could I use that and if so how much would I need to use and what did change the recipe instructions? I’ve never made bread before so I don’t want to screw it up the first time you get discouraged. LOL. Thank you
The first time I made no-knead bread, I used active yeast, activated it first in a little bit of warm water, and just used a little less room temperature water. let it rise/sit for 15 hours, or around that. It was great!
I’ve done variations on this recipe for a few years — but this is the best one, Beth. I’m planning to play with adding fresh rosemary and other fresh herbs for variety. However, this is the easiest, best recipe for those who love the taste of artisan breads. The Dutch Oven continues to be the best investment I ever made in the kitchen — bought one at Sam’s Club years ago. It’s really heavy, but the results are simply spectacular. Thank you for bringing this recipe back!
Fantastic recipe – we’ve done it twice in one week already and loved it!
However both times we’ve had the baking paper completely stick to the base of the loaf :( Any tips on avoiding this? Always very said have to saw off the bottom curst of every slice.
Thanks again!
Happy to hear it Rory! You can sprinkle some flour down before you put the loaf onto the parchment. Or cornmeal too.
Great recipe, so easy, thank you! My daughter and I, both bread novices, baked it in a deep cast iron skillet. So much better than anything I ever made in my bread maker years ago.
Where have you been all my life???? If only I’d known how easy this is!!! My father and grandfather were professional bakers and frankly I was a little intimidated by the old man’s finesse with kneading, folding, rising, punching….it was like some kind of magic that summoned the aroma and tastes of Heaven. But this!!!! I don’t “need” any other bread! (Pun intended.) This 1. The BEST bread ever! 2. Cheap! 3)EASY!!! My life is forever changed for the better! Thank you!!!
Dutch oven won’t be coming in the mail for around a month.
But I did the baking sheet method, and then covered the dough using large stainless steel mixing bowl. This helped trap a lot of the steam and got some pretty good results.
Here’s a photo.
https://imgur.com/kUTMrHV
I have been making a variation of this bread for a few years and want to share this tip – beer! substitute a can or bottle of beer plus one tablespoon white vinegar for part or all of the liquid, set it to rise overnight and the results are as good as any sourdough!
My question is another Dutch oven related one–sorry if it has already been asked. Is the Lodge Cast Iron model mentioned at the top suitable for use on a smooth, glasstop stove? Or would an enamel-coated version be better? I do not yet have one, but it’s a piece of equipment that I see mentioned frequently.
Thank you!
Hi Lori, unfortunately I’m not sure what materials are safe for glass cooktops. That might be something you’ll need to ask the manufacturer, or Google to see if that info is available online somewhere. But personally, I like my enamel coated Dutch oven a lot better than the plain cast iron. It’s so much easier to clean. :)
This is seriously the most forgiving bread recipe I’ve ever used. The first go around I had a bit too much water and accidentally did 1/2 tsp instead of 1/2 tbsp of salt, but still somehow resulted in a delicious loaf with great texture! The second time I had too little water and as a result not a great first rise. The result? Still a great loaf!
Well dang. Now I just realized I did 1/2 teaspoon too. Never in my life have I seen 1/2 TBSP in a recipe! Now I know to keep an eye out..,,
I was scanning the replies to see if I could find out if adding more salt would be detrimental to the yeast rise and thanks to you ladies I’ve realized I only added 1/2 tsp as well. It definitely needed more salt than that. I will try this recipe again with the correct amount of salt and see how it goes!
Can you use self rising flour instead of all purpose and if so what adjustments would you suggest?
I didn’t have instant yeast, only active dry and it worked just as good! The bread came out great. I let it sit for 15 hours, rise for 45 minute, then baked the same as the recipe! It’s so good.
Did you proof the active dry yeast first or just throw it in and make it like the recipe states?
I just followed the recipe!
Because I have a Dutch oven smaller than a 5qt and this will be my first time to make bread, I don’t want to waste ingredients, can I cut the quantities in half?
Thank you for sharing your recipes!
You should be okay or you can follow the baking sheet instructions.
I just use more water, skip the floured board part. Dump into a pre heated, buttered, cast iron skillet. Bake immediately with a pan of hot water in it. Ultimately the only thing that needs washing is one bowl and one rubber spatula.
What if I want to use my starter instead of yeast. How much would I add?
Hi Ronni, I’m just learning how to make sourdough starter myself, so unfortunately I haven’t gotten to make any bread with the starter yet and can’t offer advice on that at this time.
I believe it is 1/4 cup starter.
Hi! My parchment paper can only be used up to 400 degrees – should I bake it longer if I need to use a lower temperature? Thanks in advance!
You could be okay Emily, my parchment says that too, but I still use it :|
Have you tried this with any wheat free flours?
Unfortunately I haven’t tried that, but I do know that the gluten in the flour is critical to creating the texture in this bread, so I’m guessing it wouldn’t work so well.
I have a 3qt Dutch oven, should I attempt to cut down recipe or do you think I should just try it?
Thank you in advance, I’m excited to try this method. I’ve used a bread machine in the past because I’m afraid of not kneading properly.
You could make two smaller loaves if you wanted to but the 3 quart could be okay!
Going to attempt this today, since we’re all stuck in our homes for an indefinite amount of time. Have you been successful making this recipe with wheat flour?
I wouldn’t suggest using more than 50% whole wheat flour because at that point it starts to affect the texture and density too much. You may need slightly more water if using some whole wheat flour as well, since whole wheat flour absorbs more than white flour.
I’m out of parchment paper and avoiding grocery stores because of the pandemic. Would lining the Dutch oven with foil be ok?
I wouldn’t suggest foil. I would simply flour the bottom of the loaf or put some cornmeal down. You’ll be okay! Just take extra care in getting it out with mitts on.
I’ve made a similar bread and just sprayed the dutch oven (after preheating it) with non-stick spray and sprinkled a little cornmeal and it came out great! No need for parchment if you don’t have it.
Hi! What to do if I can’t preheat my dutch oven/baking dish?
Thanks!
You can try using the baking sheet method outlined above :)
Thoughts on using this in the breadmaker? :)
Unfortunately I’ve never used a bread machine, so I can’t give guidance on that.
Has anyone tried this recipe or any similar using a piece of dough from the last loaf made as a replacement for the yeast. I keep reading vague references to this alternative to using fresh yeast each time, but no definitive instructions.
I might have to just suck it and see.
My dough is all wet and goopy. It keeps on sticking and when I add flour it just does not work. What does this mean?
Unfortunately I don’t think I have quite enough information to help troubleshoot this. I’m not sure which step in the process you are experiencing the issue (just after mixing? After fermentation?) and it can be hard to guess what might be the problem without actually seeing the dough myself. Sometimes words can’t accurately describe what’s going on. I have a video of me working with this same type of dough in my No Knead Focaccia Rolls blog post, if you want to see the texture of the dough in video form, and see how I work with it.
I thought I had this same problem, as my dough was really runny and I couldn’t really shape it. However, I tried baking it anyway and it came out as a pretty decent loaf! Might be worth seeing what comes out anyway as it might surprise you.
Can I use active dry yeast instead of instant yeast for this?
Active dry yeast does not activate unless it’s proofed in warm water first, so it won’t work with this particular method. You would need to adjust the method of the recipe and unfortunately I haven’t tested that variation.
I accidentally used active yeast without knowing and it turned out great. I didn’t put it in hot water first. Whoops! But I’ve made it before with instant and it tasted the same.
Can this bread be made with Gluten Free flour ?
I make a French loaf with GF flour / all purpose – either Bob’s Red Mill or King Arthur.
Unfortunately I haven’t tried that, but I do know that the gluten in the flour is critical to creating the texture in this bread, so I’m guessing it wouldn’t work so well.
Do I need a lid if I’m using a cast iron frying pan? Or just a baking sheet? Thank you!
Hi! Thank you for your great recipes :) I let my first batch of dough ferment for 18 hours, then my dog jumped up on the second rise and pulled it to the ground lol so I’m on my second batch and it’s risen for about 13 hours. I took it out of the bowl and it is VERY jiggly, like I couldn’t shape it into a ball, it just spread out into a large flat circle. I’m letting it rise again for the second time before I bake – but what should I do different next time if this happens after the fermentation period? Thank you!
Yes give it a little more time, sometimes it needs a little extra time! Also could be temperature in your home if it’s in a drafty area it can take a little longer.
How about using a cast iron frying pan instead of a baking sheet?
That could work wonderfully!
If using a cast iron skillet instead of a Dutch oven, what would you suggest as a “lid”?… foil? Also, do my cast iron skillet isn’t as deep as a Dutch oven, so I’m wondering if this bread would “overflow” in it? I’ve also occasionally used my all-clad stainless steel larger pot & lid to make roasts in, so I’ve thought of doing that, but the temperature on a roast is typically much lower than what this recipe calls for, so I’d have to see if my all-clad is safe for the 425 temp.
I just made the dough and will be baking it tomorrow! I’m excited to see & taste the finished product :)
Yes you can use foil as a lid, or just try the baking sheet method as Beth has outlined above :)
Just a heads up you may want to alter the water needed to “1.25 to 1.75.” I live in a humid area and the first time I made this I made the mistake of just quickly adding an additional half cup of water, assuming that was the least I’d need. It ended up being way too much water, and even with a lot of additional flour and cooking time, the bottom middle of the loaf was slightly damp at the end.
My mistake, as it’s clear in other parts of the recipe that water should be added slowly, but clarity in the ingredient list will help others not do the same thing.
Would this work in a regular bread loaf pan? How about making dinner rolls out of it?
I’ve definitely had good success making rolls with this type of bread (see my Focaccia Rolls), but I haven’t tried a loaf pan. I feel like that might impede the dough’s ability to rise correctly in the oven? Not sure, though.
I have a stainless steel dutch oven (Cuisinart). Would that be OK to use, or would you recommend the baking sheet method instead?
I’d recommend the baking sheet method. You really want the dutch oven to be cast iron or thicker in it’s properties.
Before I got your reply, I decided to try both methods my first time out. The baking sheet method worked great. The stainless steel dutch oven (actually it’s a “saucepot with lid”) seemed to work fine, too, but we haven’t tasted that loaf yet. In both cases, I used 1.5 cups of water, but I think I’ll cut back on it next time, as after the first rising, both loaves were so loose that I couldn’t shape them at all… I just plopped them onto the parchment paper. As a result, the loaves were flatter than I expected. Still, very tasty. I’m looking forward to experimenting some more. Thank you!
I don’t have instant yeast, only regular. How do I adapt this recipe to use that instead?
Can you halve the salt and add a bit of “sour salt” aka Citric acid to make a “mock sourdough”? I know it wouldn’t technically be true sourdough…..which is a problem for me since I always have trouble with making the starter, but this looks like it could be a perfect recipe for the culinaryily challenged such as myself.
Unfortunately I’ve never used a citric acid in bread making, so I’m not sure how that will affect the bread.
I tried this yesterday and it really good! But I suspect my flour to water ratio is off, since the dough was really wet and almost impossible to shape after rising. Awesome that the recipe is forgiving, but could you add in a weight for the flour, so there is no under/over packing during the measurement?
Beth doesn’t use weighted measurements but 1 cup of flour is about 120 grams.
We like a soft crust. If I brush this with olive oil instead of water, do you think it will yield a soft crust? Thank you so much for such an easy recipe. It makes homemade bread seem doable!
My enameled cast iron Dutch oven (Tramontina brand) says it’s only safe to 400 degrees. Would this recipe work at that temperature? Thank you!
Yes you should still be just fine!
Thank you. Dough is rising as we speak and I’ll bake tomorrow morning. Going to sprinkle some “everything” seasoning on top. Should I brush with butter or water first?
Could you make this recipe with whole wheat flour?
I wouldn’t suggest using more than 50% whole wheat flour because at that point it starts to affect the texture and density too much. You may need slightly more water if using some whole wheat flour as well, since whole wheat flour absorbs more than white flour.
How can I make this in a bread machine and with no Dutch oven?
Unfortunately I’ve never used a bread machine, so I can’t give guidance on that.
OMG. This bread is so delicious that I have to be careful not to eat the whole thing all by myself! I don’t have a dutch oven so I followed the “No Dutch Oven and Short Fermentation” instructions. Being a novice bread maker, I was surprised as how easy this bread was to make. Will be making this again.. and again..
Love it Sarah! Great work!
Can I make the no Dutch oven but let Stan a the bread to rise for 16-18 hours?
You could certainly give it a try!
I have active dry yeast. Can I still use that if I let it “wake up” in the water with 1/2 tsp or so of sugar?
I haven’t tried it to know for sure, but it seems like that would work.
I used active dry with the normal instructions and it came out fine. I just let it stand for a little extra (20 hrs instead of 12-18) and full 60 minute on second rise and it came out exactly as you would expect having use instant yeast. The only modification I had was that I used filtered water from the fridge (cold) so I microwaved it for about 35 seconds to get it to room temperature-ish. Wasn’t warm, but may have been a couple of degrees above 70F (‘room’ temp). I’ve made this twice now and it is great. The crust is perfect, the inside is a little ‘sponge’ like, but has good hole formation, and looks exactly as it should. I may try to cut the water by a bit next time too see if a little less moisture will have a drier texture. Still tastes awesome though, and everyone loves it.
Hey Beth! I’ve actually tried a similar variation on this recipe before a few times – but I swear every time I make it, the inside is thick and almost moist and undercooked. I thought that was literally the case the first time so I stated cooking it for longer and longer times, but no matter how long I baked it, it maintained that texture. Then I thought “maybe I’m not letting it cool long enough,” but no – letting it cool until completely cooled didn’t help.
Do you have any advice?
Hmmm, I haven’t ever had that experience, but I’m wondering if maybe it needs to rise longer? Give the center more time to expand? That’s my first guess without being able to watch your process and catch anything that might be happening.
1/2 tbsp salt seems like a bit much – if you are watching your salt intake can you use less salt?
Yes you certainly can.
I’ve made this recipes eaisly 20+ times now. When that happens to me it’s due to the water/flour ratio. Try staying as close to 1.5 cups of water as you can and letting it rise longer for the second time!
I love this bread but am limited to making it by the 12 to 18 hour fermenting time. Would it be okay to mix it the evening before, then after 12 to 18 hours place it in the refrigerator for up to 6 hours and then take it from the bowl to finish the steps? Would it need to get to room temp before removing from the bowl?
Thanks.
Yes, you can absolutely let it do an even slower ferment in the refrigerator. I think you can go ahead and take it out of the bowl while it’s still cold, and then just let it sit and rise a little longer on the parchment. :)
Hi Beth,
I’m excited to try this recipe and others on your blog! My question is – if I don’t have a Dutch oven, do I have to use the short fermentation process? I’d like to try the long fermentation and bake it in my regular oven, but I noticed you only mentioned those processes together. Thanks! :)
Yes, sorry for the confusion! You can do the long fermentation time without the Dutch Oven. The crust and upward expansion aren’t quite as good, but you can definitely do it. :)
Awesome. Thank you! :)
Beth, yes, no-knead bread is a wonderful way to make bread easily with an artisan look and taste. Someone asked about using beer as part of the liquid. Beer is indeed used in the America’s Test Kitchen “Almost No-Knead Whole Wheat Bread” recipe. They call for 3 oz of “mild-flavored” lager, along with 7 oz of water. Interestingly, they also mix in 2 tablespoons honey and 1 tablespoon white vinegar. Also, they suggest laying the parchment paper in a skillet for the first rise is better than placing the paper in a typical deep mixing bowl.
An earlier recipe I found in Mark Bittman’s “How To Cook Everything” cookbook. He gives credit to Jim Lahey, owner of the Sullivan Street Bakery, a Manhattan bread baker, who came up with the “No-Knead” idea which has spread across the US.
Thanks for sharing Dee!
does this work with whole wheat or partially whole wheat flour?
I’ve substituted up to 50% of the flour with WW and had good success. :)
Hi, I have a cast iron pan but no lid, would this work?
I made this bread the first time. It is very easy to prepare and we all loved the taste. Never had homemade bread out of the oven for breakfast. I will make this bread next weekend again. :-)
Hooray! Congrats Ela!
Is there any way I could make it in a bread pan? I wanted to achieve the more square shape so it fits into containers and bags better than round bread.
Unfortunately I haven’t tested this in a bread pan, so I’m not sure how it will affect the outcome.
yes, i’ve done it in a bread pan. takes a bit longer to brown, but it works great for sandwiches. comes out more like a hearty texas toast (heavy, thick, good for soups!)
What size Dutch oven do you recommend? Thank you!
The one I’m using is a 5-quart and you can find more info about it in the paragraph titled “What Dutch Oven Do You Use?” above the recipe.
I’M GIVING THIS FIVE STARS FOR THE TIMES IT TURNS OUT OKAY. MOST TIMES IT IS TOO WET AND DOES NOT RISE. I’VE BACKED OFF THE WATER TO 1 1/4 CUPS. WOULD IT WORK WITH JUST ONE CUP OF WATER? IT’S SO EASY TO MAKE AND MY HUSBAND LOVES IT, BUT I JUST WISH IT WOULD RISE MORE FOR ME.
The dough should be a lot more wet than a traditionally kneaded bread dough. Make sure your oven and the Dutch oven are very hot and have fully pre-heated to get the most “spring” or expansion in the dough when you cook it.
If I want to add black olives to make black olive bread or rosemary olive oil bread, when would you add these ingredients to the dough?
I made a Kalamata version once and added the chopped olives when mixing the dough in the beginning.
I tried your recipe twice with 2tsp of yeast. It does rise as big as your did, maybe like 70%. For some reason it is dense. I gave 2 hours for fermentation and 1 hour for rise time. It did not rise much. Don’t know what i am doing wrong.
How long should I let it sit in the refrigerator instead of just in a bowl on the countertop? I have long hair pets so ew lol
I haven’t tested a refrigerator only version, so I’m not completely sure. You may have to experiment with it the first time. Take a look at the photos in the step by step section and try to wait until it looks like the photo where it has fermented. It should have expanded quite a bit and it will look very fluffy with a lot of bubbles.
I remember my mom would always cover the bowl with a clean dry kitchen towel when she would let dough rest or rise on the countertop. This way, the dough should still be able to breathe, but the towel will keep out anything that might be floating through your kitchen.
Tried this last weekend. Have made it four times since then, my husband and coworkers are obsessed. Perfect recipe, thank you so much!
I lost a no knead beer bread recipe which my husband really liked.
Can I use beer instead of water?
Thank you.
Hmm, I’ve never tried that so I’m not sure how it will work out.
On the water amount, tried with 1.5 cups and it was very runny so backed off to 1.25 cups and still too sticky when trying to make a ball so looks like I’ll have to go with 1 cup only. Any idea where all the moisture is coming from.?.
The dough should be very soft and sticky. If you sprinkle it with a lot of flour when you go to shape it, that will help prevent it from sticking to your hands. But if you don’t add enough water the dough will be too stiff and it will make a very dense loaf.
What if you only have active dry yeast?
Active dry yeast does not activate unless it’s proofed in warm water first, so it won’t work with this particular method. You would need to adjust the method of the recipe and unfortunately I haven’t tested that variation.
I absentmindedly made this exactly per recipe except with active dry yeast, and it came out beautifully, no added steps or ingredients. It was so good that I’m making my fourth loaf in as many days, and only just now noticed the no-active-dry recommendation! (I only swung thru the comments to see if anyone had asked about heating the dutch oven with vs without the lid)
That’s good to know! It may differ depending on the brand, too.
Just add the yeast to lukewarm water and a pinch of sugar first and let it proof. Mix everything else (dry ingredients) per recipe. Once yeast has proofed, add it to the dough when the recipe calls for the water. Voila!
made this with active yeast yesterday-i changed the flour:yeast ratio to 90:1, proofed the yeast in 1 cup of warm water + pinch of sugar first, and followed the rest of the instructions. came out great!
Do you have a gluten free bread recipe? Thanks.
Unfortunately I don’t.
Holy cow this is so good!! Already made it twice in the past week or so. Now I’m excited to try all sorts of different breads. From all my bread-making-challenged friends and me, thank you!!
Have you tried adding flax seed or sunflower seeds, etc to try to add some nutrition. Thanks!
I have a Seeded No-Knead Bread recipe that has chia, hemp, and flaxseeds. It’s so good! :)
Let me start off by saying I love your blog! Is there a video of this somewhere bc something went horribly wrong and based on the reviews it must be me. No matter how much flour I used I ended up with an awfully sticky dough that was not even remotely close to being able to be formed into a ball. Half of it ran through my fingers and another 1/4 I managed to scape off my counter and plop it down into a blob on some parchment. I need bread making for dummies or something 🤦♀️
Hmm, I don’t have a video of this particular recipe, but my No-Knead Focaccia Rolls are pretty much the same dough, and there is a video of that one. The dough should be sticky, but not so loose that it falls between your fingers.
To make this sourdough bread, can you use buttermilk instead of water ? If so, how much milk? Should milk be room temp?
P.S. you mentioned sprinkling the top with water to soften the crust does this also apply to the bottom crust?
Thanks
Unfortunately I’ve never experimented with sour dough or using buttermilk, so I can’t offer any recommendations there. Yes, if you wanted the bottom a bit softer, you could brush a little water there as well.
If I don’t have parchment paper, can I just put some oil in the Dutch oven so it doesn’t stick?
Can’t really wait to try this! Have you used whole wheat flour before? Trying to up the nutrition/fiber!
Mariela
The only problem you’ll have is that you won’t be able to lift the risen loaf into the hot Dutch oven. The loaf is very delicate when it’s not baked. :)
Have you ever used whole wheat flour?
I’ve used up to 1/2 whole wheat flour and it works great, but you may need slightly more water. :)
Any chance you have tried this as gluten free with a gluten free flour? I’d love to find an easy bread recipe!
Thanks!
Unfortunately I haven’t tried that, but I do know that the gluten in the flour is critical to creating the texture in this bread, so I’m guessing it wouldn’t work so well.
Can you use whole wheat flour? We don’t use white flour for much at all. Thanks!
I wouldn’t suggest using more than 50% whole wheat flour because at that point it starts to affect the texture and density too much. You may need slightly more water if using some whole wheat flour as well, since whole wheat flour absorbs more than white flour.
Hi Beth any tipps how i can avoid the crust becoming to crunchy and the bottom to hard, the inside turned out very well but the bottom is tooth shattering hard. I baked it for 30 min in the dutch oven and 15 minutes without lid, at 220 degrees Celsius. Was that too long or to hot?
You can try brushing the crust with a little water before you bake, that should help keep it a bit softer.
Can I bake this in a cast iron skillet with no lid? I don’t have a Dutch oven.
Yes, but it won’t produce as nice of a crust. The Dutch oven holds in the steam, which makes a really nice crust.
Thanks! I have remade this bread a bunch now. It is so awesome and so easy! I ended up using my cast-iron skillet and covered it with my other cast-iron skillet (of the same size) as a lid. I’m pretty sure it worked just like a Dutch oven because the crust turned out just like your pictures! I love the crunchy crust so much! My husband likes it a little softer so I take it out after that first initial 30 minutes of covered baking time when I make it for him. The crust is a little less crunchy but the bread inside is still done and baked nicely.
I make this a lot as written, but recently I made a rosemary-garlic version that tasted AMAZING. I added 2 Tbsp olive oil, 4 minced garlic cloves, 1 Tbsp dried rosemary, 0.5 tsp oregano, and 0.25 tsp black pepper. Then, right before it went in the oven, I coated the loaf with more olive oil and sprinkled it with extra rosemary. So, so good! (If you crush the dried rosemary in a mortar and pestle before adding it in, it helps release the flavor.)
Love it! Thanks for sharing!
Hi , I really want to make this . Can I use bread flour ? Thanks !
Yes, I’m sure that would work, although you may need to adjust the liquid amount as that type of flour might absorb a little more or less water than AP flour.
This turned out so good! Pretty sure this is going to be my regular go-to bed baking recipe.
Hello,
Regarding the No-Knead bread recipe: All I have on hand is active yeast. Can I use the active yeast as long as I use warm water? If so, how much do I use? Same amount of fermentation time?
Thanks!
Yes, you would need to activate it in warm water first. The warm water will change the fermentation time, but unfortunately it’s hard for me to estimate without having tested it.
The first time I made no-knead bread, I used active yeast, activated it first in a little bit of warm water, and just used a little less room temperature water. let it rise/sit for 15 hours, or around that. It was great!
The recipe notes that you can move the dough to the refrigerator if you aren’t going to bake it after the fermentation time is up. Does that mean that I should put in the fridge after the fermentation period is up OR let it do the fermentation thing slowly in the fridge . . . I’m thinking option 1 :D
Also, when I take it out of the fridge, do I need to let it come to room temp before proceeding?
Thanks!
You can do either, but depending on how long you need to wait to bake it, it might be a better idea to just let it ferment in the fridge the whole time. If it’s just a matter of a couple hours, you can put it in the fridge after fermentation. You can just let it sit out at room temperature for a half hour or so to let it come back up to room temp. :)
Thanks for the quick response!! I’m making today, baking tomorrow, so I’ll let it ferment in the fridge!
This bread is such a gem. My first EVER bread making attempt was this recipe and now I’ve made it over 30 times in about 6 months. This is the easiest beginner recipe there is.
The crust is perfect and the inside soft and moist. The ideal crunchy bread for soup dipping or a runny fried egg. I wouldn’t recommend this one as much for sandwiches as the crust is quite crunchy.
I slice it when fully cool and store in a gallon bag in the refrigerator for easy access and freshness for a week (never lasts that long though!)
This turned out great! Excited to try more breads now. I used a stainless steel dutch oven which I was nervous about but turned out fine. My parchment paper only goes up to 400 degrees, so I would recommend adding 5-10 minutes on both the covered and uncovered portions for the lower temperature. Thanks Beth!
This turned out great! So easy to make too. Do you have any recommendations for the best way to store it? Have you frozen this bread?
Yes, you can definitely freeze this. :) No matter how you store it, it’s important to let it cool completely before transferring it to any type of container, bag, refrigerator, or freezer because you need to make sure there is no more steam, which will form condensation. So, let it cool completely and then I like to put it in a gallon-sized zip top bag and keep in the refrigerator for a few days or in the freezer for a few months.
I’ve made this before and it turned out wonderfully! The perfect crusty bread to pair with soup. I was wondering about making a smaller loaf from a half-batch of the dough next time. I find that no-knead breads have a pretty short shelf life (2 days max?), after which they taste really yeasty. A smaller loaf would be eaten up more quickly, before it had time to go bad. So, anyway, if you were halving this recipe, how would you alter the baking times, if at all? Thanks :)
I do half loaves all the time! But the weird part is that I don’t remember exactly how long I bake them. Ooops. I would try 20 min with the lid on, then 10 with the lid off.
That turned out fine. Thanks! :)
I make this recipe a lot and it’s my go-to bread recipe!
I do have a few comments though. 1. If you want to only let it rise for a few hours, double the yeast ( 1/2 tsp instead of the 2 tsp listed). 2 tsp yeast is not necessary! 2. It holds well to all sorts of flavor additions- dried chopped rosemary, garlic powder, Italian seasoning, caraway seeds, (soaked) dried onion flakes, everything bagel seasoning (as a topper), etc. Go wild and make your own flavor combinations! I usually do 1-2 tbsp of additions (so, for herby garlic bread, I do 1 Tbsp each of garlic powder and Italian herb blend).
3. I have made this in a slow cooker as well as an oven, and it turns out nicely, though with a much softer outside (which is very nice for slicing into sandwiches). Usually, I put a trivet in the bottom of my slow cooker, pour in a few cups of water, then add the dough to a greased glass baking dish and put it over the water. I let it rise over the warm water for ~30 minutes, then turn on the slow cooker to high, cover, and let bake for an hour. You’ll want to put a kitchen towel or a few layers of paper towel between the slow cooker vessel and the lid, to catch excess moisture, though. When it’s done, remove from the baking dish and let cool completely on a cooling rack (to remove excess moisture).
I’m sorry if this has been addressed and I’ve missed it. But does anyone know how much whole wheat flour I can use in this and still get a similar Result?
Never mind. Found my answer when I saw the older comments . Sorry and thanks!
I suggest up to half of the total flour.
I made this into pizza crust and it was SO delicious! Thank you!
Should I use bread flour or just ordinary flour?
I used all-purpose flour.
Thanks Beth. I did it with all purpose flour and it rose really well overnight, however when I put it on the parchment for the 2nd rise it didn’t seem to do much. It’s in the oven now so fingers crossed for a fluffy loaf and not too dense. 🤞😊
Hi Beth
It was very dense almost like crumpet. Not sure what I did wrong.
Are you using instant yeast or active dry? It has to be instant yeast (sometimes called bread machine yeast) because active dry needs to be dissolved in water first, so it won’t work with this method.
Yes I’m using instant yeast. I rose really well on first prove. I posted a pic of my loaf on the front page.
Can I make this using wild yeast that I made? How much would I use? Thank you!
Unfortunately I’ve never used wild yeast, so I’m not sure how to convert the recipe to use it.
Any tips on how to make a rosemary version of this? I was just curious if the fermentation would cause the seasoning to increase in flavor, requiring that you use less seasoning than a kneads bread?
This was fun and so dang yummy! Will make again. It didn’t quite have the look at your crust, but I will try with less water this time.
Hi B eth, I have made this recipe at least 100 times. Always turns out perfect and delicious. So good that I have even stopped buying store bread. Currently have this, along with your focaccia bread, resting for tomorrow (bake). Thanks for the great recipes – every recipe I have made has been successful,
Thank you!
I have been making double batchs of this bread for years. My question is how large of a batch gan I do at one time? 3,4,5 times???
That’s a good question! I’m really not sure. I’ve only done regular and half-sized batches. I do know that some people leave the dough in the refrigerator for a week or so, though, and just take off pieces to bake every day.
Every time I try to make no-knead bread, I end up with a pile of massively sticky, unshapeable dough after the first rise! No amount of added flour seems to make it pliable enough to do anything except dump onto a baking sheet in a blob.
What’s the secret to shaping this kind of dough?
I would try using slightly less water to begin with, but a sticky mass of dough is definitely what you should end up with. I add just enough flour after the fermentation to be able to scrape it out of the bowl without it sticking to my hands, and just kind of fold it over itself a few times. It’s definitely a wobbly blob and you don’t really “shape” it. That high moisture content helps it puff up into a nice dome when it goes into that super hot oven.
You speak of fermentation. So does this mean this is a sour dough bread recipe? Sorry, I’m newer to baking bread.
I love your recipes so far. Love that you have the function to increase serving sizes on some of your recipes. Saves calculation headaches. Going to try your rosemary beef stew this week. Want to make this bread but my kids don’t like sour dough. So that is the reason I ask. Thank you so much!
Nope, it doesn’t ferment long enough to actually become a sour dough, so you won’t have any of that tangy flavor. :) Sour dough requires a longer fermentation.
I really want to try this. However, it is now ‘not summer’ here in Minnesota, so room temperature is 68 when it’s warm. Will this affect the fermentation time or the rise time? I know for regular bread making/baking it does.
It might slow it down a bit, so I’d shoot for closer to 18 hours than 12. Check the photos in the step by step section to see what it should look like when it’s ready to bake. :)
If I wanted to alter the recipe to a beer based bread, do I just swap the water with beer? Thoughts/suggestions?
I’ve never made a yeast based beer bread before, so I’m not sure how that would work. All the beer breads I’ve made were quick breads (no yeast).
Do you think this would work with part whole wheat flour?
Yes, I’ve made similar bread with up to half whole wheat. The texture (and strangely the color) do change a bit, but it’s still pretty tasty.
I tried ur recipe yesterday and I made very tasty bread, except the crust in mine didn’t come out that nice like on yours, it was rather difficult to pull apart, I wonder if my Dutch oven is too big for the small bread. Do you think that I could double the amount?
Also great pictures and very easy step by step directions. Thank you.
Yes, you should be able to double the size, although it may need longer to bake.
I love Budget Bytes!
Thanks for all of the great, healthy recipes with easy-to-follow illustrated instructions! I’ve made bread this way MANY times and it’s very simple and foolproof. Sometimes before the last 30-60 minute rising of the dough, I’ll fold in other ingredients, like garlic or nuts…or event a nutty version of trail mix. Sunflower seeds are a great additive too. I also sprinkle a little kosher salt on the top before baking.
Although it’s a good idea, I don’t use the parchment paper but instead sprinkle some corn meal in the bottom of the cast iron dutch oven.
It never sticks. Cast iron cooking is fun…and I’ve started collecting, restoring and using vintage cast iron.
Dear Beth,
I notice that the date on this blog article is 2010, but you noted at the beginning that you had updated the recipe after making it for 6 years, so the new visitor expects that you had started making this bread in 2004 (prior to the Lahey and Hertzberg/Francois no-knead publishing phenomenons!) — but on a different recipe which you noted that you had updated after 5 years, the no-knead ciabatta which has a date of 2010, you put the update date of 2015 in parentheses, so you might want to specify the update date in parentheses (presumably it was in 2016) on this article as well, so it’s less confusing to the new visitor.
You might also want to add back the full version of the original recipe/instructions at the end of the article, because otherwise, a number of the reader comments don’t make sense to the new visitor (where they talk about putting water in an empty pan on a lower shelf of the oven to make steam, etc.)
It is also possible to approximate a dutch oven kind of steaming effect by using an oven-safe metal cooking pot with a lid (one that has all-metal handles and that the manufacturer says its oven-safe — I use a largish, all-metal Calphalon stovetop soup-making pot with a heavy lid to make this sort of no-knead “artisan” bread, and it works well), or even just putting aluminum foil tightly over the baking container for the first part of the baking time keeps some steam in and is worth the effort.
You mentioned in one of your most recent bread recipe articles that you actually don’t eat much bread anymore, and I’m wondering if you have talked about that change in your diet and your reasons why, anywhere on the blog. Of course, that’s a very personal decision and sometimes it comes down to necessity (celiac issues, etc.)
I came here through a link on a different blog that had quoted your recipe for no-knead ciabatta rolls — I am enjoying browsing around your blog — I have had about 20 of your recipe pages open on my browser for the last 2 days! So many good things that I want to try out, when I get some time in the kitchen. :-)
Can we use active dry yeast and get it started with warm water and sugar?
While I’ve thought of testing that method, I haven’t yet tried it. The only issue you might run into is that if you don’t need to use the full amount of water (because the amount can very from time to time) you may also miss some of the yeast that is mixed into it.
Outstanding photos
I’ve had great results baking in a cast iron dutch over BUT without preheating it.
I always found it difficult to get the risen loaf into the pan without hurting myself.
So I tried it and it worked! Would recommend this to anyone.
Sorry I failed to mention that the final rise is IN the cast iron pot itself – so It’s all set to bake without having to transfer it. Also I add 2 Tbls. oil and 2 Tbls. sugar to the dough.
Stirring with the HANDLE of a plastic / wooden spoon also works great rather than the spoon part.
Thanks Dee for sharing the tips. They were very helpful indeed.
On the other hand, thanks Beth for all the wonderful recipes.
Thanks so much! I just brought new yeast since when I started this last night, my yeast was way too old! I will try your recipe tonight when I use my fresh yeast.
I make bread using an almost identical version of this, but do add-ins. Diced jalapeños and cheddar chunks make an incredible loaf!
I don’t think I will ever buy bread at the store again! So easy! Delicious!
Just made this and it was absolutely delicious! Great with jam right out of the oven. Curious though, if I wanted to make this a sweeter bread, by adding sugar, when do you think I would do that? Would I mix it in with everything, or should I mix it with water and yeast and then add? Love to hear your suggestion!
I think I would dissolve it into the water.
I like to make bread like this at home, and I have two specific recipes I blend together to make mine, and at least one of them suggest using a container of water in the oven, but they called for putting the water in the dish/pan heating the water with the rest of the oven. I’ve not had a problem with getting a nice crisp crust when I do it that way, and the interior of the bread is moist but still has a good crumb… not that it lasts very long!
Okay, verdict is in! Great! I can’t believe how easy this was! Made a cool rise French breach recipe the other day that everyone liked, but this is a lot better. Gonna try your focaccia bread next.
Beth, this is cooling on the counter now. Shaped into a long loaf, brushed with oil, spritzed with water while baking at 424 for about 25 minutes. Looks fantastic. Nice crust, feels like a nice crumb. Can’t wait to attack it!
Did you make a change to your blog yesterday or early today. The layout after clicking on recipes is not as user friendly. Or I wonder if a Microsoft update changed how it looks on my computer.
Hey Beth, I love your recipes and thanks to you I made naan for the first time this week. I would like to make this bread and was wondering after reading your update, are the water pans still needed in the oven when baking? Thanks!
Nope, instead I brushed the surface of the loaf with water before putting it in the oven. That created even more moisture and made the crackly crust. :)
Hiya!
I’m planning to make this for the first time, but I’m a little confused on one point – it says let it sit for 2 hours, but if you don’t refridgerate it, then the next step on the list is letting it rise 45 minutes.
Is the additional 45 minutes necessary if you haven’t refridgerated it?
Yep, you want the formed loaf to rise again because as you shape it, it will deflate.
Thanks!
I’ve made this a bunch of times now – it’s so tasty and easy it’s addictive. I did find I had some trouble getting a non-gummy crumb at first, but have found that if I plop a tablespoon of unsweetened/natural applesauce in, it works every time. Go figure :)
Interesting! I’m going to try that!
Dinner rolls? Did someone say dinner rolls? Never even considered that! So for dinner rolls, I’m guessing I would just cut the dough into smaller pieces and shape/cut them. Any idea what adjustments might need to be made to baking time?
Hi Edee, I’ve made quite a fe no-knead breads since this original post and I’ve found this version is the best for dinner rolls. I hope you enjoy them!
I second the opinion of a couple of readers, dutch ovens work fantastically for this type of bread. Also, I find that if I let mine proof for 12-18 hours, it’s extra fluffy and delicious on the inside.
Love your site, thanks!
I’m making this right now. I’ve had it baking longer than the 30 min time, but it just won’t brown up nicely. But it smells amazing! What did I do wrong that it’s not browning as it bakes?
I’ve noticed that this recipe in particular takes longer to brown. I think it’s because the dough is so high moisture and it’s a little more dense that most bread doughs, so it takes the crust longer to dry out and brown.
Try using a cast iron dutch oven instead of a baking sheet, works brilliantly
Thank you for the tips, particularly the one about brushing on the water! Yummy, yum, yum, YUM!
Excellent suggestions, Carnifex! I can’t wait to try honey (I’m a honey fanatic)! :)
Your no-knead recipe inspired me to start baking bread! Before trying your above recipe I always thought bread would be “too difficult.” Six months later a fresh, homemade roll is my standard breakfast! I still use this recipe as the base, albeit with my own modifications. I’m not an expert baker, but I keep trying to improve–and it’s a delicious learning process! :)
Along with saying “thank you,” I want to suggest a change. Add honey to the dough! This produces a thicker and chewier crust, which I think improves on the recipe as written.
I mix approx. 1 to 2 Tbsp honey into the amount of water I’m using in the recipe. The water should be warm but not hot; this makes the honey dissolve easily and also helps the yeast “wake up” quickly. (Be careful, boiling hot water will kill yeast. You should be able to put your finger in the water without discomfort.)
I prefer about 1 Tbsp honey because I don’t want to add too much sweetness. But the precise amount is not important. Experiment and see what you like best!
Anon – You could bake it on a baking sheet with some parchment and skip the cornmeal.
Would it be possible to use flour in place of cornmeal? I like the taste, but sometimes it’s not on hand and an alternative would be very good to have!
I just made this bread with 1.5 cups whole wheat and 1.75 cups unbleached all purpose- so good! I just used a cookie sheet and the cornmeal gave the bottom a delicious chewy texture. I’ll definitely make this bread again. Thanks!
I’m trying this for dinner tonight, rolls are currently rising. I’m planning to use my stoneware cookie sheet for the bake. After reading through your blog about the slate I thought I might impart a little knowledge about tile. Quarry tile is not tile that is mined in a quarry nor are baking stones generally made of stone. Both of these are sort of misnomers. Quarry is a type of non porus kiln fired tile used in commercial kit hen applications and baking “stones” are actually ceramic “stoneware.” Any peice of tile made of actual stone is likely to fracture when subjected to the heat of an oven, but ceramic bakeware is kiln fired at much higher temperatures than what they see in your oven, thus allowing them to withstand the heat of cooking food, provided, of course, that you heat the stone gradually with the preheating oven.
My apologies if I missed this in another comment.
We had the EXACT same experience with the slate stone. Didn’t want to spend the money, saw the same Alton Brown episode you mentioned… looked for the tiles he mentioned, couldn’t find them, and came home with the same thing. KABLOOOOOOEY!!! Thankfully we heard it snap, crackle and popping as the oven preheated, and my husband quickly grabbed a pair of tongs, and was able to grab it and fling it out he back door (located RIGHT next to the oven) before it completely exploded. It actually continued to pop and crackle and explode in the backyard while it cooled down…
Darcy – I’ve used the no-knead technique for loaf breads and it seems to work out well. If your dough was a little on the wet side, try working in just a little bit of flour when you’re kneading it. That might give it more strength.
I made this bread, and it was absolutely delicious! I must have gone wrong somewhere along the way though, because it did not rise nearly as much as I was hoping, and the bread is fairly flat. How do you think this recipe would hold up in a pan with more structure, like a loaf tin?
No, self rising flour will not work in this recipe. Self rising flour does not work the same way as yeast and is more for items like biscuits.
Can I use self-rising flour?
I use the New York Times recipe for No Knead Bread (18 hours with no refrigeration) and have adapted it by doubling the recipe and using mixtures of flour (white and rye, white and wheat) and adding “crunchies” like seeds for extra texture. I do not use a baking stone, instead, I use two large Corningware round casserole dishes that I’ve sprayed with Pam baking spray (with flour). Cover with the Corningware tops to bake and remove covers about 15 minutes before the end. Two perfect round loaves every time.
I made this before going to bed last night (about 10:30) and left it on the counter until this morning. I formed it into a freeform loaf and put it on a pizza pan I have (not stone but metal with holes in it) let it rest for about 30 minutes, baked for 30 minutes at 400. It turned out great!! The sourdough taste was great! My husband wants me to make more!! Thank you for sharing!!
Made this last night and I have to say it is the best bread I’ve ever made in my life! LOVE IT! I can’t believe how easy it is to make, how simple the ingredients are, and how incredibly tasty it is. I may have bread with dinner most nights of the week now. Thank you for sharing!
Hi Beth, I am so excited about this recipe. I made it for the first time yesterday and it did take ages to rise, but I guess it was quite cool in my kitchen. When I was a young child, mom used to make ‘stottie cakes’, a flatcake which was soft and chewy in the middle with a crispy crust. Sometimes she made 5-6inch diameter ones or other times she would make one large one. She never had a recipe, her mom taught her how to do it. Dad got a job at a bakery so she stopped making it, and I never did learn how. None of the bakeries sold anything that tasted the same. When I came to Canada from UK I started making my own bread on occasions. I have tried to duplicate her recipe but have never been able to, until yesterday. I made one long loaf but today I have made stottie cakes as well as buns and they are great. Thanks for sharing.
Anon – the yeast can also feed on the carbohydrates in the flour, although it takes longer than if you were to add sugar. That is why it requires a two hour rise time. Also, the dough is quite wet so it rises a lot due to steam in the super hot oven. No knead bread is not as light and fluffy as traditional breads, but it’s super tasty for the amount of work that you put in! The more you make it, the better you’ll get at it (just look at the bottom photo compared to the original one!)
I’m concerned that there is no sugar in this recipe. I thought the yeast needed sugar to make it grow. I made the dough as the recipe says almost 2 hours ago, and nothing is happening. I’ll leave it longer and see if it progresses. Love your web-site, Pat.
Krinajean – Since writing this post I’ve discovered that you really do want to have “instant” yeast rather than “active dry”. Instant doesn’t need to be dissolved in water where as active dry does. So, since you have active dry, you can just dissolve it in the water that gets added. If I remember correctly, some other people had this problem and that fixed it! I hope it works for you!
I saw this the other day and had to try it asap! Bought new “active dried yeast” for the recipe. My problem was it didn’t seem to rise that much? Am I doing something wrong… It was quite warm and humid which I thought would have helped the bread rise? Do I need to dissolve this type of yeast in the water before I add it?
It still came out successfully, yummy and ciabatta-esque! Definitely going to have another go!
Claire – Actually, I only use dry yeast! I usually buy a small jar of the instant yeast because that’s where I get the most bang for my buck. I keep it in the refrigerator and it stays good for months. I’m not really familiar with fresh yeast so I don’t know what to suggest… but if you use dry yeast, make sure to use “instant” or “bread machine” yeast because neither of those need to be dissolved in water before adding to a recipe.
Just wanted to stop by and say that this recipe has motivated me to start making my own bread! Well try to, my first batch of dough didn’t come out brilliantly – didn’t rise very well. I wonder if that is because I used quick-action dried yeast rather than fresh yeast? Is it possible to use dried yeast with this recipe?
ok, mine didn’t rise very much and was super gummy (not that it stopped us from eating it, ha!) The crust was spectacular, tho! Adding fresh yeast to my shopping list, as that’s probably the culprit.
exciting! I have a lot of marble and granite tiles in my garage (unsealed) and I may have to liberate one of them for making this bread! Sorry about your slate cracking…it was beautiful, if inappropriate. ;)
I followed the tips at the end, specifically brushing water over the dough rather than using a water pan. It caused my pizza stone to break. In retrospect, cold water running off the crust onto a hot stone is not a good idea, and I should have thought of that before. But you should put a warning in for others like me who don’t think ahead.
I love this bread. It’s the only one that ever turns out every time for me. Thanks for sharing your updated tips at the end. Off to check out the rest of your site :)
Well, unfortunately that can happen easily with small variations in measurements or even moisture content of your flour. Next time, try adding a smaller amount of water first and then just add a little at a time just until the dough comes together in one piece. It’s okay for the dough to be sticky but if it’s so wet that it won’t shape, that’s no good :) Good luck!
Hey, first I’d like to say that I love your blog! What an amazing resource, thank you so much for taking the time to share this. I have a question about my dough, for anyone. I followed the instructions exactly, but my dough was a bit runny. I added a little more flour, but maybe not enough. I was wondering why my dough may have been like this, as it made it very difficult to shape. Still tasted good though!
Success! I just used this recipe to make my first loaf of homemade bread. Thanks so much for the clear, step-by-step directions!
I made this recipe twice so far, each time used half the dough to make rolls and half to make a loaf. The first time I used Gold Medal AP bleached flour and baked at 400. The crust was tough, and the crumb wasn’t as soft as I would have liked.
But the second time I used King Arthur AP unbleached, baked at 450, and the bread was OUTSTANDING! The crust was firm but thin, and the bread was so moist and amazing. I’ll probably skip the rolls next time and just make loaves since the crumb was so delicious!
Thank you for sharing this recipe!! I made it this week, and it turned out wonderful! I really loved this recipe, and I plan to make it again this week. I think this will become one of my favorite go-to bread recipes!
I posted a picture on my blog (along with a link back to this recipe on your page) at: http://kitchenkatie.com/?p=419
Holly – it’s really hard to say without being there to watch you do it. I would test your yeast by putting a 1/2 tsp in a bowl with some water and a pinch of sugar. If it doesn’t get foamy within 5-10 minutes, it’s dead. Also, how long did you let it rise and what was the ambient temp in the kitchen? I find that when I make the bread from dough that’s been sitting in the refrigerator, I need to double the rise time. If your house is really cold, turn your oven on for just a minute or two then turn it off. Place the dough inside and let the little bit of residual heat help it rise.
Other than that, all I can say is to read other comments to see if there is anything that anyone else has suggested that might help. Good luck!
Your recipe inspired me to make that bread the other day but the dough barely rose at all. It was my first time baking bread. My yeast is a few months old and I used slightly warm water (not hot). Any hints or tips as to what I might have done wrong?
I have been making this bread for some time and I have hybridized it with the 18 hour bread recipe. If you are squeamish you won’t like this. I let it sit out over night, similar to real sour dough, before sticking in the fridge per the recipe.
I use olive oil (any veg oil), rather than additional flour, to keep it from sticking to the bowl and me. Doesn’t get as dry.
For each of the 4 small loaves I choose a different flavor and mix in dried herbs, chunks of parmigiano reggiano cheese, cinnamon sugar, etc., just before baking. The cheese is fantastic! Sugar will burn if you get it on the outside of the loaf.
Actually, I was thinking to myself yesterday that I was going to put my next loaf into a loaf pan! It will probably be next week (because I just made a loaf) but I will definitely let you know how it turns out!
I’ve made this several times now and it is so amazing! I’ve also been experimenting with variations to add some more flavor.
I’m wondering if anyone has tried baking this in a loaf pan or if there would be any need to change how long it bakes if I use one?
I’m terrible at shaping it into a nice shape and pulling it out of the loaf pan onto the baking sheet makes it loose a lot of the shape.
Suggestions?
Just wanted to comment in thanks for the tip on this one. I tried it last night, and it turned out great. I used the tips from the video walk-through, and well, it worked out perfectly.
I was sure to reference the budget bytes site in my own blog post about the experience (http://adventure.codyjbennett.com/2010/10/no-knead-ciabatta/). I hope you get some hits & followers from it!
Best,
-Cody
All we can say is ‘Where have you been all our lives?” Soo amazing, this recipe is a keeper! thank you so much for sucha wonderful recipe! =D
Storing your yeast in the fridge actually extends it’s life so that’s good. My guess is that your oven temperature is not accurate. That happens more often than people think. Try setting to to 450 and see what happens. I’m thinking about trying my next batch at a higher temp too (to get a better browning of the crust and a lighter texture). The rising in the oven happens because of steam that rapidly expands as it heats up quickly. If you don’t have quick steam formation, you won’t get a big rise in the oven. Quick steam happens with high heat :)
I’m going to update when I try baking at a higher temp.
I HAD to make this bread! And it’s delicious!
The only thing is though, it barely rose at all in my oven… ?… I store my yeast in the fridge, so maybe that aged it very quickly? The end result was enough for about 3 servings, ha! 3 delicious servings!
Did you use kosher salt? Kosher salt is “fluffier” than table salt so the measurements are usually a little bit different. If you are using table salt, you will only need to use one teaspoon. I should have explained that a little more thoroughly!
I think there might be a typo on the .75 Tbsp of salt. I used that much and the dough was super salty and nasty. I had to add flour and yogurt and sugar and turn it into pizza dough, which turned out great, but the original product made me hate this recipe.
I’ve noticed that too, Tara. I think it has to do with the fact that this is such a high moisture bread. It probably needs to be stored in an actual bread bag (paper or cloth) to allow excess moisture to escape. I haven’t tried it yet though. I’m going to put the question out there to the facebook fans to see if there are any seasoned no-knead bread makers who have figured out how to keep their crust crusty!
So I made this over the weekend. Right out of the oven it was delicious!!! (After I let it cool for a while.) But by the second day, it didn’t taste so great. Maybe I’m not storing it properly. I had it wrapped in seran wrap. Any suggestions for a better way?
Ditto on the bottom of the cast iron frying pan!! No need to buy anything else.
Anonymous, you can’t go by time on the clock when “proofing” or letting your bread dough “rise”. You have to judge when it is doubled in size.
Many things can affect the proofing time…room temperature, humidity in the air, activity of the yeast used (old yeast gets very sluggish), texture of your dough…types of flours used… and so on.
i so love your blog, i already tried a couple of recipes and they all turned out TERRIFIC!
i am going to try to make this bread later, but im confident it will be very nice :)
i love your site and i love how to keep track of the costs as well, really shows the difference between homemade and store bought. i’m definitely going to try this bread, it looks great!
Yep, “proof” means rise. I’m making more bread today and I’m realizing why my rise time may not have been enough. I made my bread from dough that was in the refrigerator which means it was really cold when it started to rise. The first half hour of the rise time it was probably just coming to room temp rather than actually rising!
Due to this dough’s wet nature, it rises quite a bit more in the oven than regular bread anyway (it’s almost half steam risen, half yeast risen). So, I think no matter how much you let it rise prior to cooking, it will still get quite a bit larger in the oven and need fairly deep slits. We’ll see today!
I have the same question as the anonymous commenter above, when redforever said “proof”, did that mean let it sit to rise longer than 2 hours to prevent the side explosion?
I make this bread really often and have always used my sheet pan! It turns out great every time!
so if I let it sit for like 3 hours, it’s not gonna explode?
(I really wanna make this!) :)
I have stayed away from making bread because I hate having to knead it. Now I do not have to worry! Thanks for sharing this recipe.
I’ve found that the perfect pan for holding water is the roasting pan that came with the oven. It’s a little deeper than a cookie sheet, so I usually pop it in the oven while preheating with extra water so it’s producing it’s own steam by the time the bread goes in. Not as dramatic as throwing water on a hot pan, but it seems to work.
I made this today and I used a baking sheet because that’s what I had. The loaf is cooling on my stove right now. The hubby and I already broke off a couple of pieces. WOW it’s SO yummy. I’m going to save the second loaf to bake off in a few days. I want to try to get a sourdough flavor like you’d said you got..
Beth, this looks awesome & so fun! I have to say, I love seeing how much more adventurous your cooking has become & how many more readers you have as a result since I started reading a year ago! Congrats, and thanks so much for all the love & hard work you put into you blog!
Flip a cast iron fryer pan upside down, add corn meal, heat it up and bake your bread on it. It works. Use a large metal spatula to remove the bread when it is done baking.
It looks like from the picture that you used a ceramic tile, not a quarry tile, which was probably the problem. I think the key for a baking stone is to use real stone, not a clay (ceramic or porcelain) product.
I’ve made this bread several times and love it. I do have a pizza stone. I picked mine up at a yard sale years ago for $2.
I found that I need to add 2 cups of water to the steam pan as 1 cup was always totally absorbed.
I’ve made this kind of bread several times. I like to add cheese to it, gives it tons of flavor. I don’t have a stone, I just spread some cornmeal on a baking sheet and let it cook that way.
Great suggestions everyone! If you’ve made this bread before or have been making it for a while, I’d love to hear from you!
Your loaf exploded on its side, not on its surface, so I don’t think that was caused by not slashing your loaf deep enough.
Try proofing your final loaf a bit longer, until it is fully doubled in size. Underproofing bread is usually the cause of loaves exploding on the side.
I use their gluten-free recipe, found online at their website and in their book Healthy Bread in Five Minutes a Day, and it works great. I don’t bake on a stone, I use the alternate method of baking in a cast iron dutch oven. You can use the fancy enameled ones, or the regular iron-only ones. Saves the whole steaming issue, as the covered, preheated pot steams the bread automagically, and gives a great crust. The instructions are in their book, or in the recipe on their site.
I have the “Healthy Bread in Five Minutes a Day” cookbook and it is full of awesome recipes. I like using the King Arthur White Whole Wheat Flour for many of the recipes. The seed mixture the authors use also makes any loaf an “Everything” type of bread.
I would suggest 1/2 whole wheat and 1/2 white. Using all whole wheat can make bread really heavy and dense. Here is a video with the authors of that book making a whole wheat version. The recipe is in the video. They add vital wheat gluten to help with the density problem.
http://www.youtube.com/watch?v=HSOoH686_b8
Could you use whole wheat flour instead of AP flour?
I have the 5 Minutes a Day Book and LOVE it! I have had great success making bread using their technique.
Here’s a tip: use unbleached all purpose flour. I got much better results when I switched to the unbleached four. Your loaf of bread is beautiful!
I use this recipe and LOVE it! It makes the best bread!